Enhancing WhatsApp Chatbots with Embedded Images: A Step-by-Step Guide
Discover how to create a WhatsApp chatbot that sends images with messages. This step-by-step guide uses Two Chat, N8N, and AI to enhance customer interactions with embedded product images, providing a more engaging experience
Businesses are constantly seeking innovative ways to engage with their customers, and one effective method is through chatbots. In this blog post, we will explore how to create a simple chatbot that can send images along with text messages on WhatsApp. By integrating images into your chatbot responses, you can provide a more engaging and informative experience. Let's dive into how you can achieve this using 2Chat, n8n, and an AI model.
Step 1: Setting Up the Chatbot Flow in 2Chat
Message Received Trigger
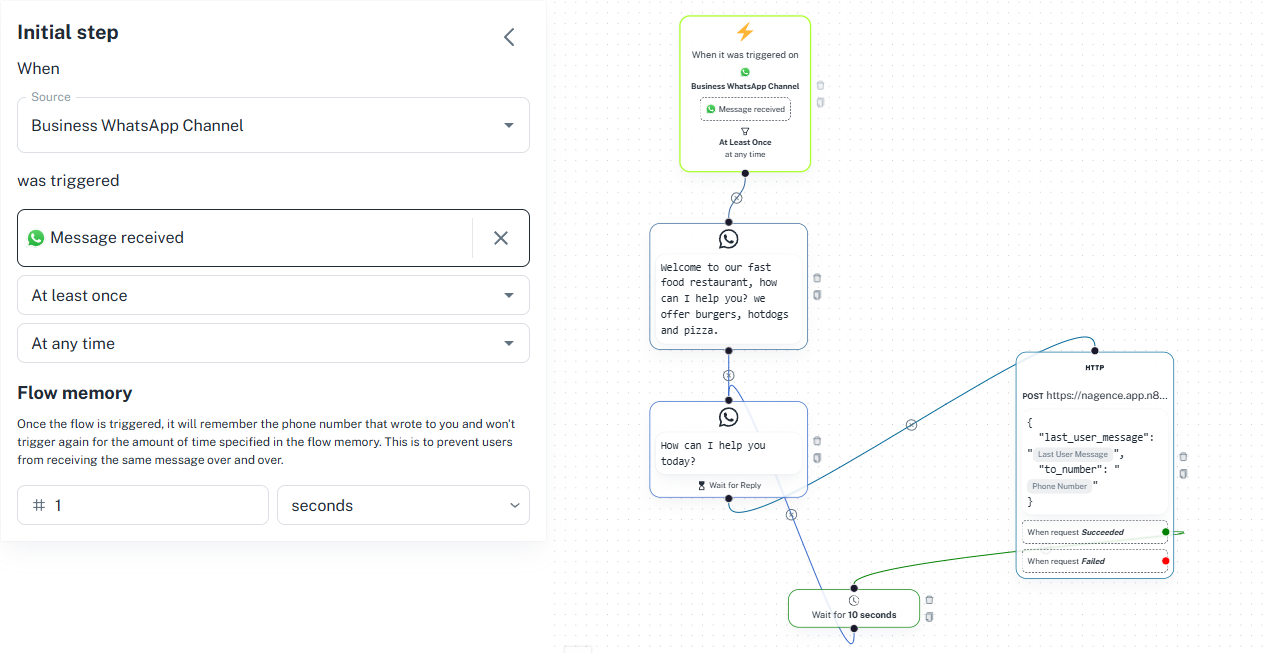
The flow starts with a "Message Received" trigger. This trigger listens for incoming messages from users. Message and Wait for Reply Component
Once a message is received, the "Message and Wait for Reply" component captures the user's question. This component is crucial as it allows the chatbot to interact with the user in real-time.
HTTP Request to AI Endpoint
Next, we use an HTTP request to send the customer's message to an AI endpoint we will create in n8n. The body of the request includes a JSON structure with the last user message and the customer's phone number.
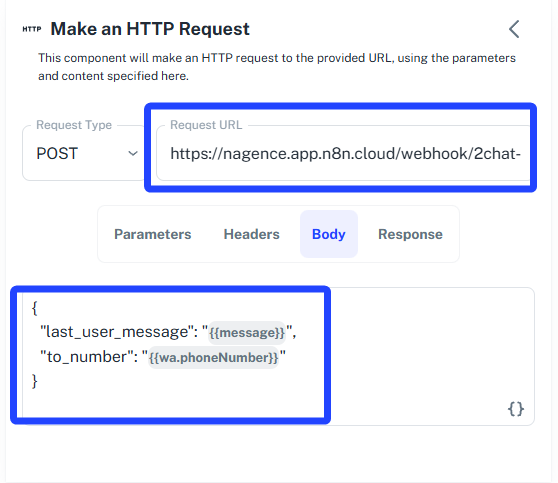
{
    "last_user_message": "{{message}}",
    "customer_phone_number": "wa.phoneNumber"
}
Wait and Return
The web service does not return a direct message. Instead, it sends the WhatsApp message directly to the user. We add a wait of 10 seconds and then return to the "Message and Wait for Reply" component to continue the conversation.
Step 2: Configuring the Web Service in n8n
Download n8n template:
 2ChatCo
Webhook Component
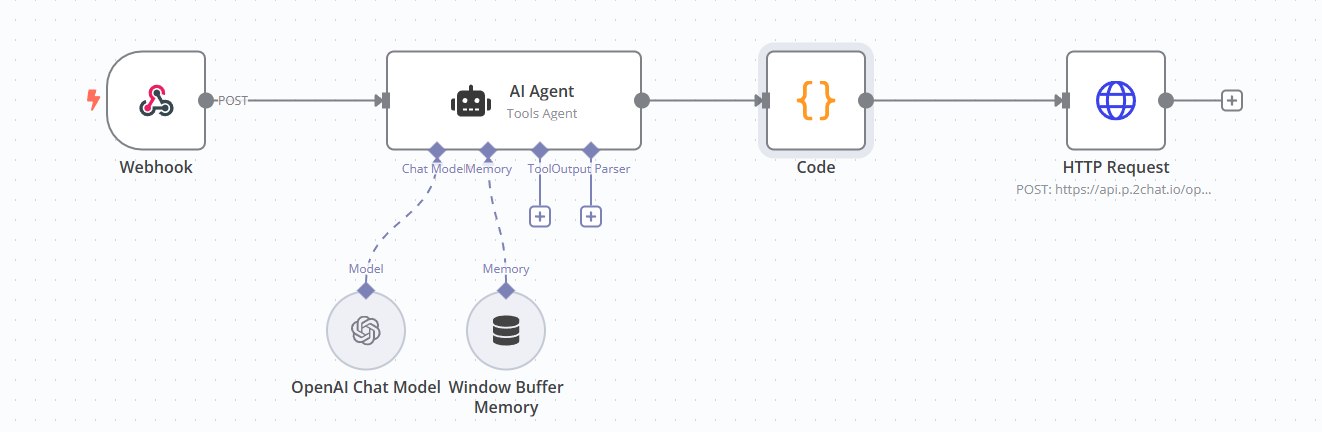
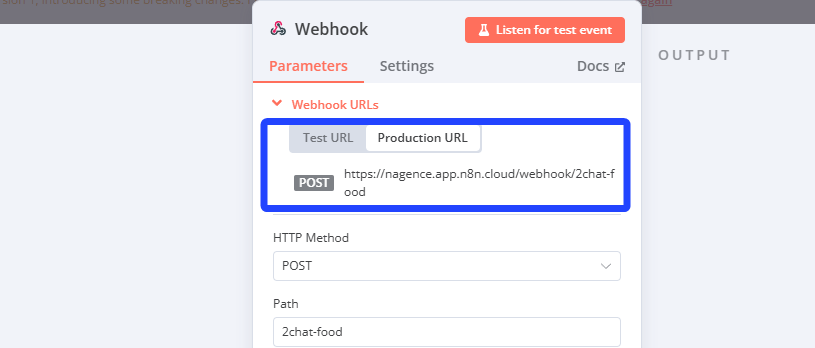
The web service is created using n8n. The flow starts with a Webhook component, which receives the production URL used in the 2Chat HTTP component.
AI Agent Configuration
In the AI agent, we include behavior guidelines and details about the restaurant products in the system prompt. Importantly, we also provide publicly available image URLs for each product. This is essential because 2Chat requires a publicly available image URL to embed it in the WhatsApp conversation.
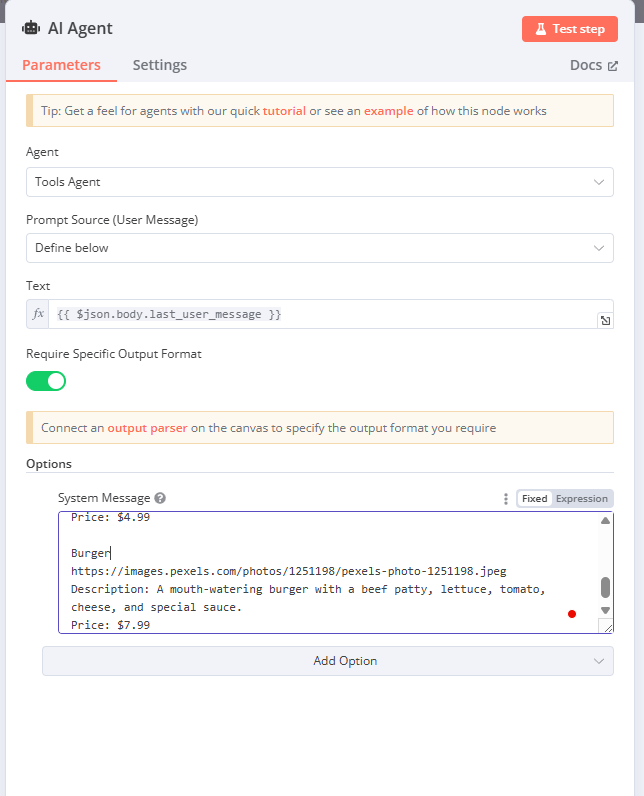
Sample System Prompt:
You are an assistant for a fast food restaurant. Always say hello to the user, inform that he is talking with a Restaurant and offer a simple list for the menu. Provide a brief description and price for each of the following items and add the image link avoid using \n in the text, id the answer doesn't have http add https://2Chat.co

Pizza
https://images.pexels.com/photos/842519/pexels-photo-842519.jpeg
Description: A delicious pizza with a variety of toppings including pepperoni, mushrooms, and extra cheese.
Price: $12.99
Hotdog
https://images.pexels.com/photos/30635915/pexels-photo-30635915.jpeg
Description: A classic hotdog with a juicy sausage, topped with mustard, ketchup, onions, and relish.
Price: $4.99

Burger
https://images.pexels.com/photos/1251198/pexels-photo-1251198.jpeg
Description: A mouth-watering burger with a beef patty, lettuce, tomato, cheese, and special sauce.
Price: $7.99
Connecting the LLM Model
We connect the LLM (Language Model) model, in this case, OpenAI, but you can use your preferred model. A window memory buffer with the customer's phone number as the key is used to maintain the context of the conversation.
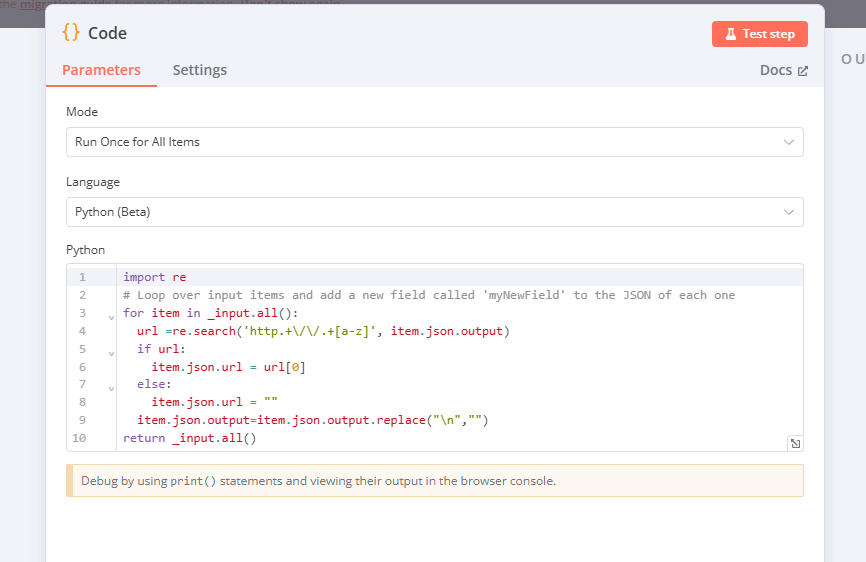
Extracting Image URLs
The AI agent uses the WhatsApp message as the prompt. A code component, written in Python, extracts the image URL from the AI response. This URL is then used to return the message to the customer with the embedded image.
import re
# Loop over input items and add a new field called 'myNewField' to the JSON of each one
for item in _input.all():
  url =re.search('http.+\/\/.+[a-z]', item.json.output)
  if url:
    item.json.url = url[0]
  else:
    item.json.url = ""
  item.json.output=item.json.output.replace("\n","")
return _input.all()
Step 3: Sending the Message with Embedded Image
HTTP Request to 2Chat API
The last component uses an HTTP request to connect n8n with 2Chat. The 2Chat API documentation provides detailed information on how to use the "Send Message" method. You need to provide the image URL as a parameter, along with the text message.
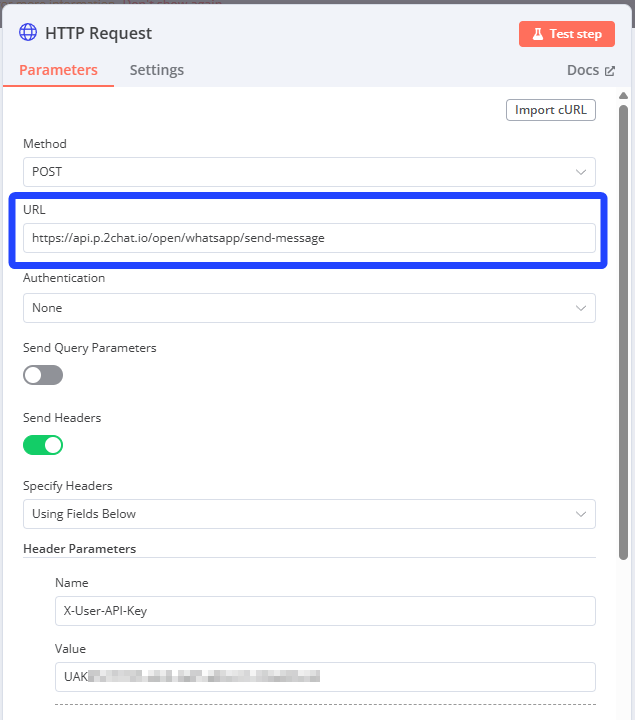
JSON Body for the HTTP Request
The HTTP component in n8n sends requests to the 2Chat API using the "Send Message" method. The API key is included in the header, and a JSON body is dynamically generated. This body contains both the text message and the image URL if an image URL is present in the LLM response.
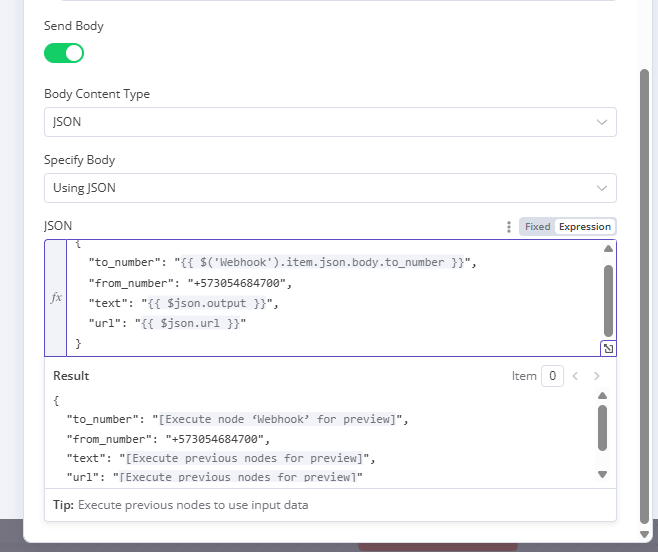
{
 "to_number": "{{ $('Webhook').item.json.body.to_number }}",
 "from_number": "+573054684700",
 "text": "{{ $json.output }}",
 "url": "{{ $json.url }}"
}
Conclusion
By following these steps, you can easily enhance your chatbots with embedded images, providing a richer and more engaging experience for your customers. Utilizing 2Chat, n8n, and an AI model, you can create a seamless and interactive communication channel on WhatsApp.