How to send a WhatsApp message for each Google Form response
Learn how to send a WhatsApp message using your own number after a Google Form is filled
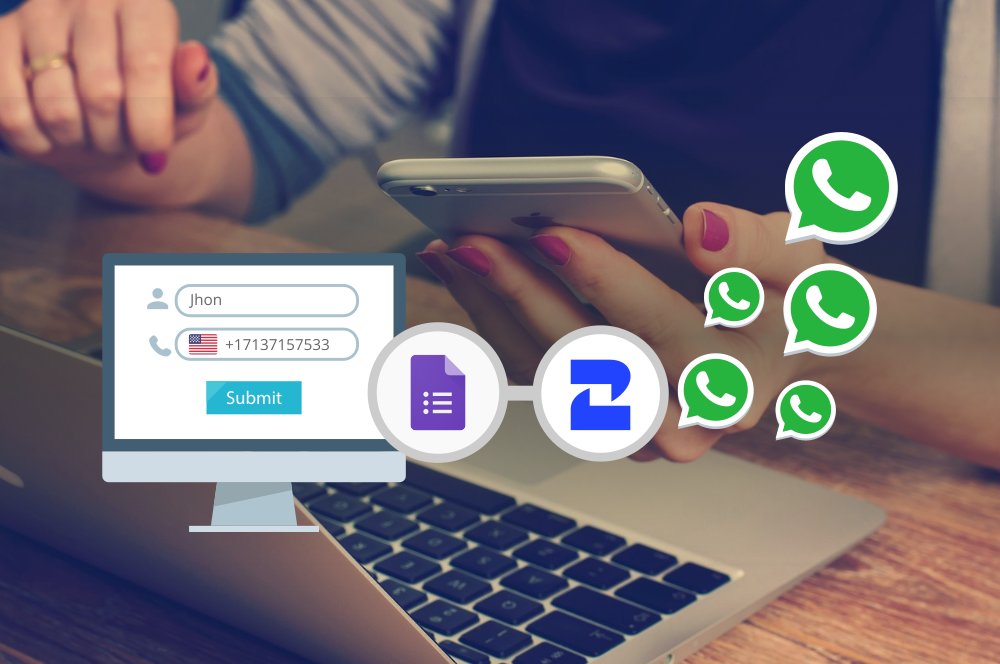
In this tutorial, we are going to show you how you can use 2Chat to send a WhatsApp message every time a person submits a response on your Google Forms.
Requirements
- A Google account to create your form.
- A 2Chat account with a WhatsApp number connected to it.
Our example form
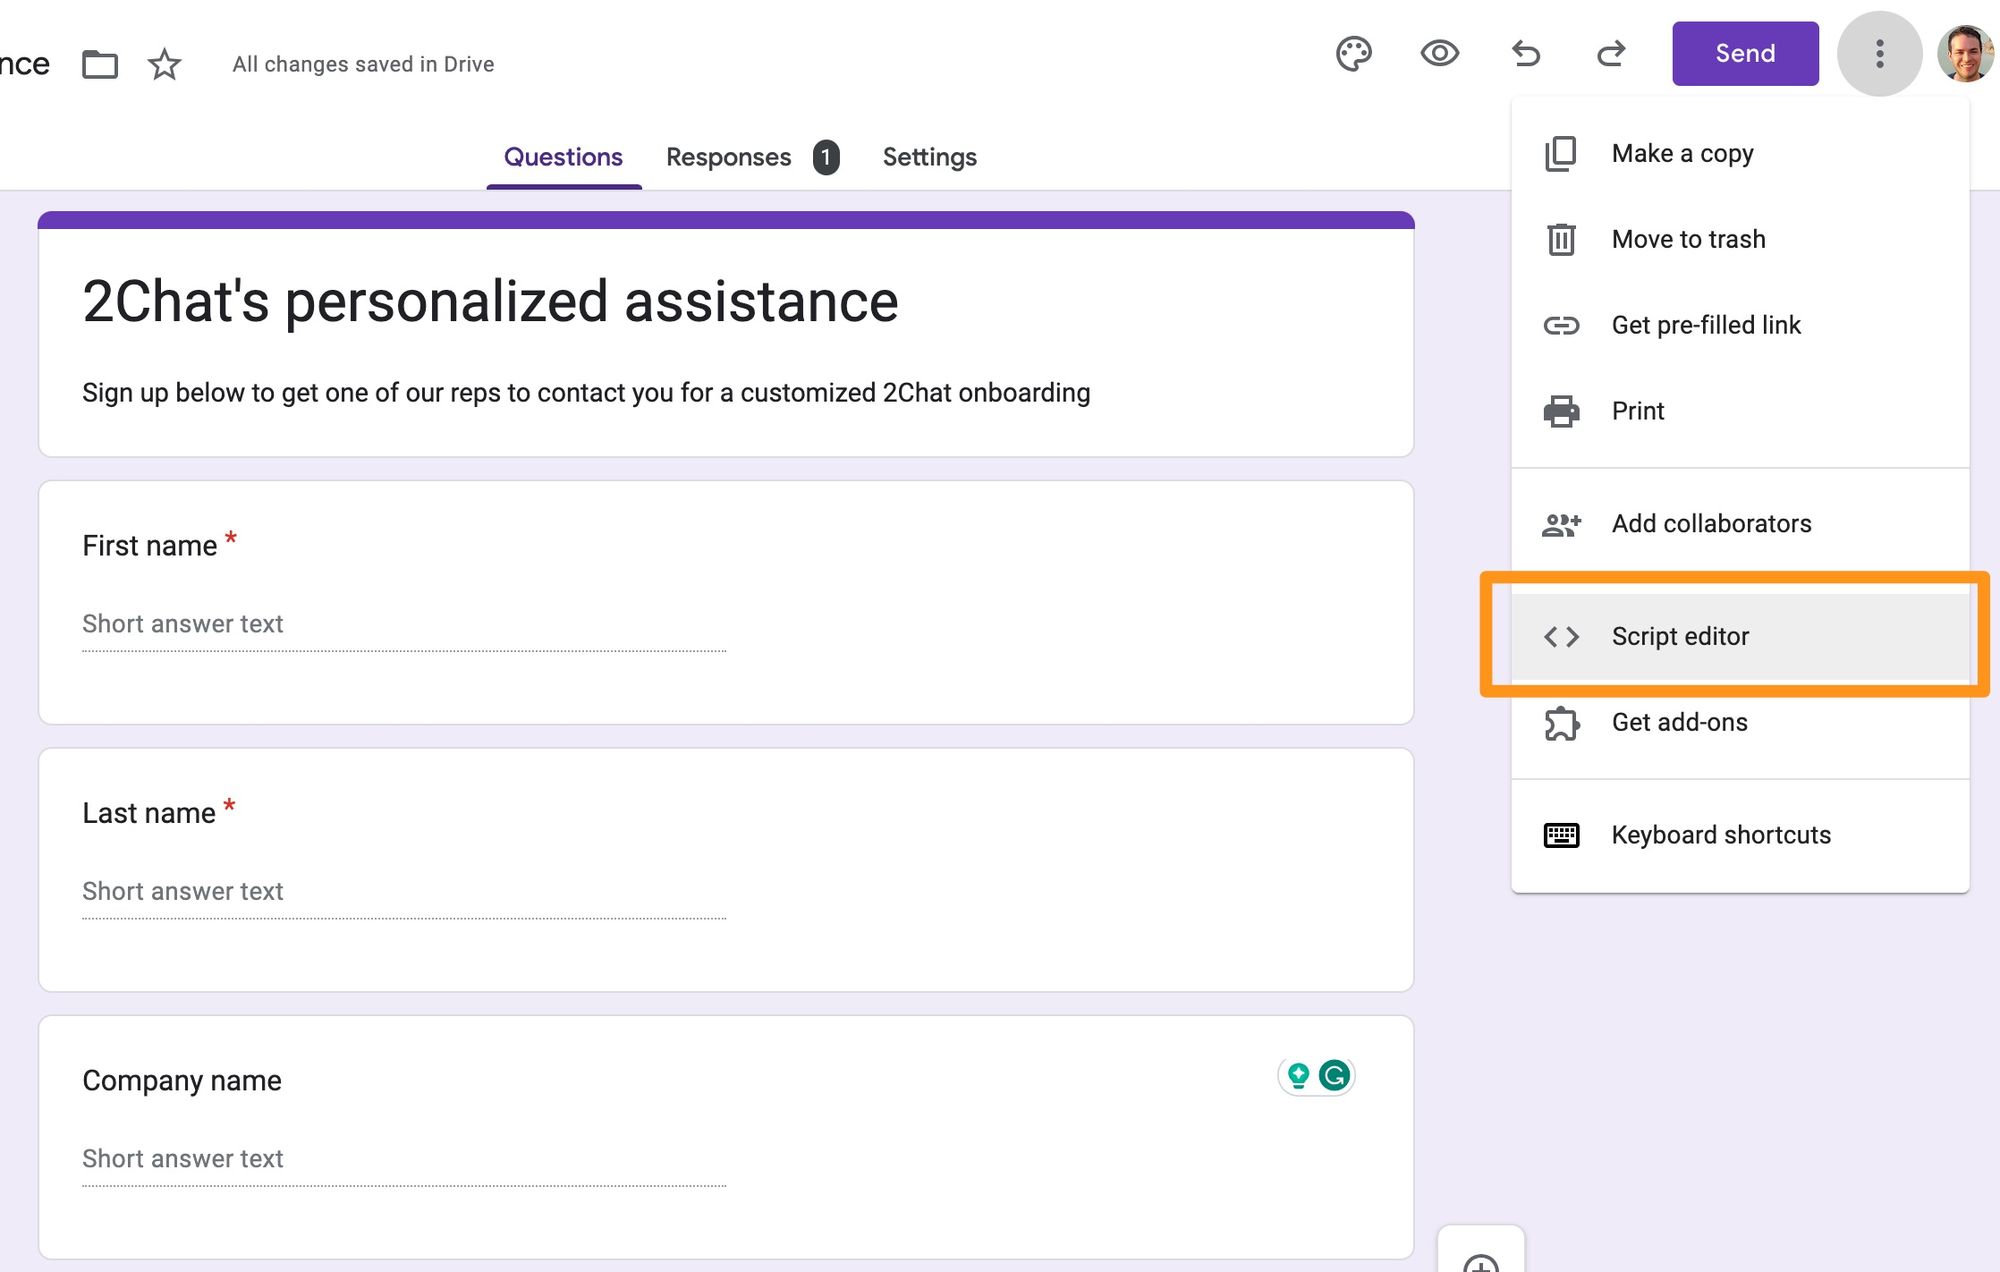
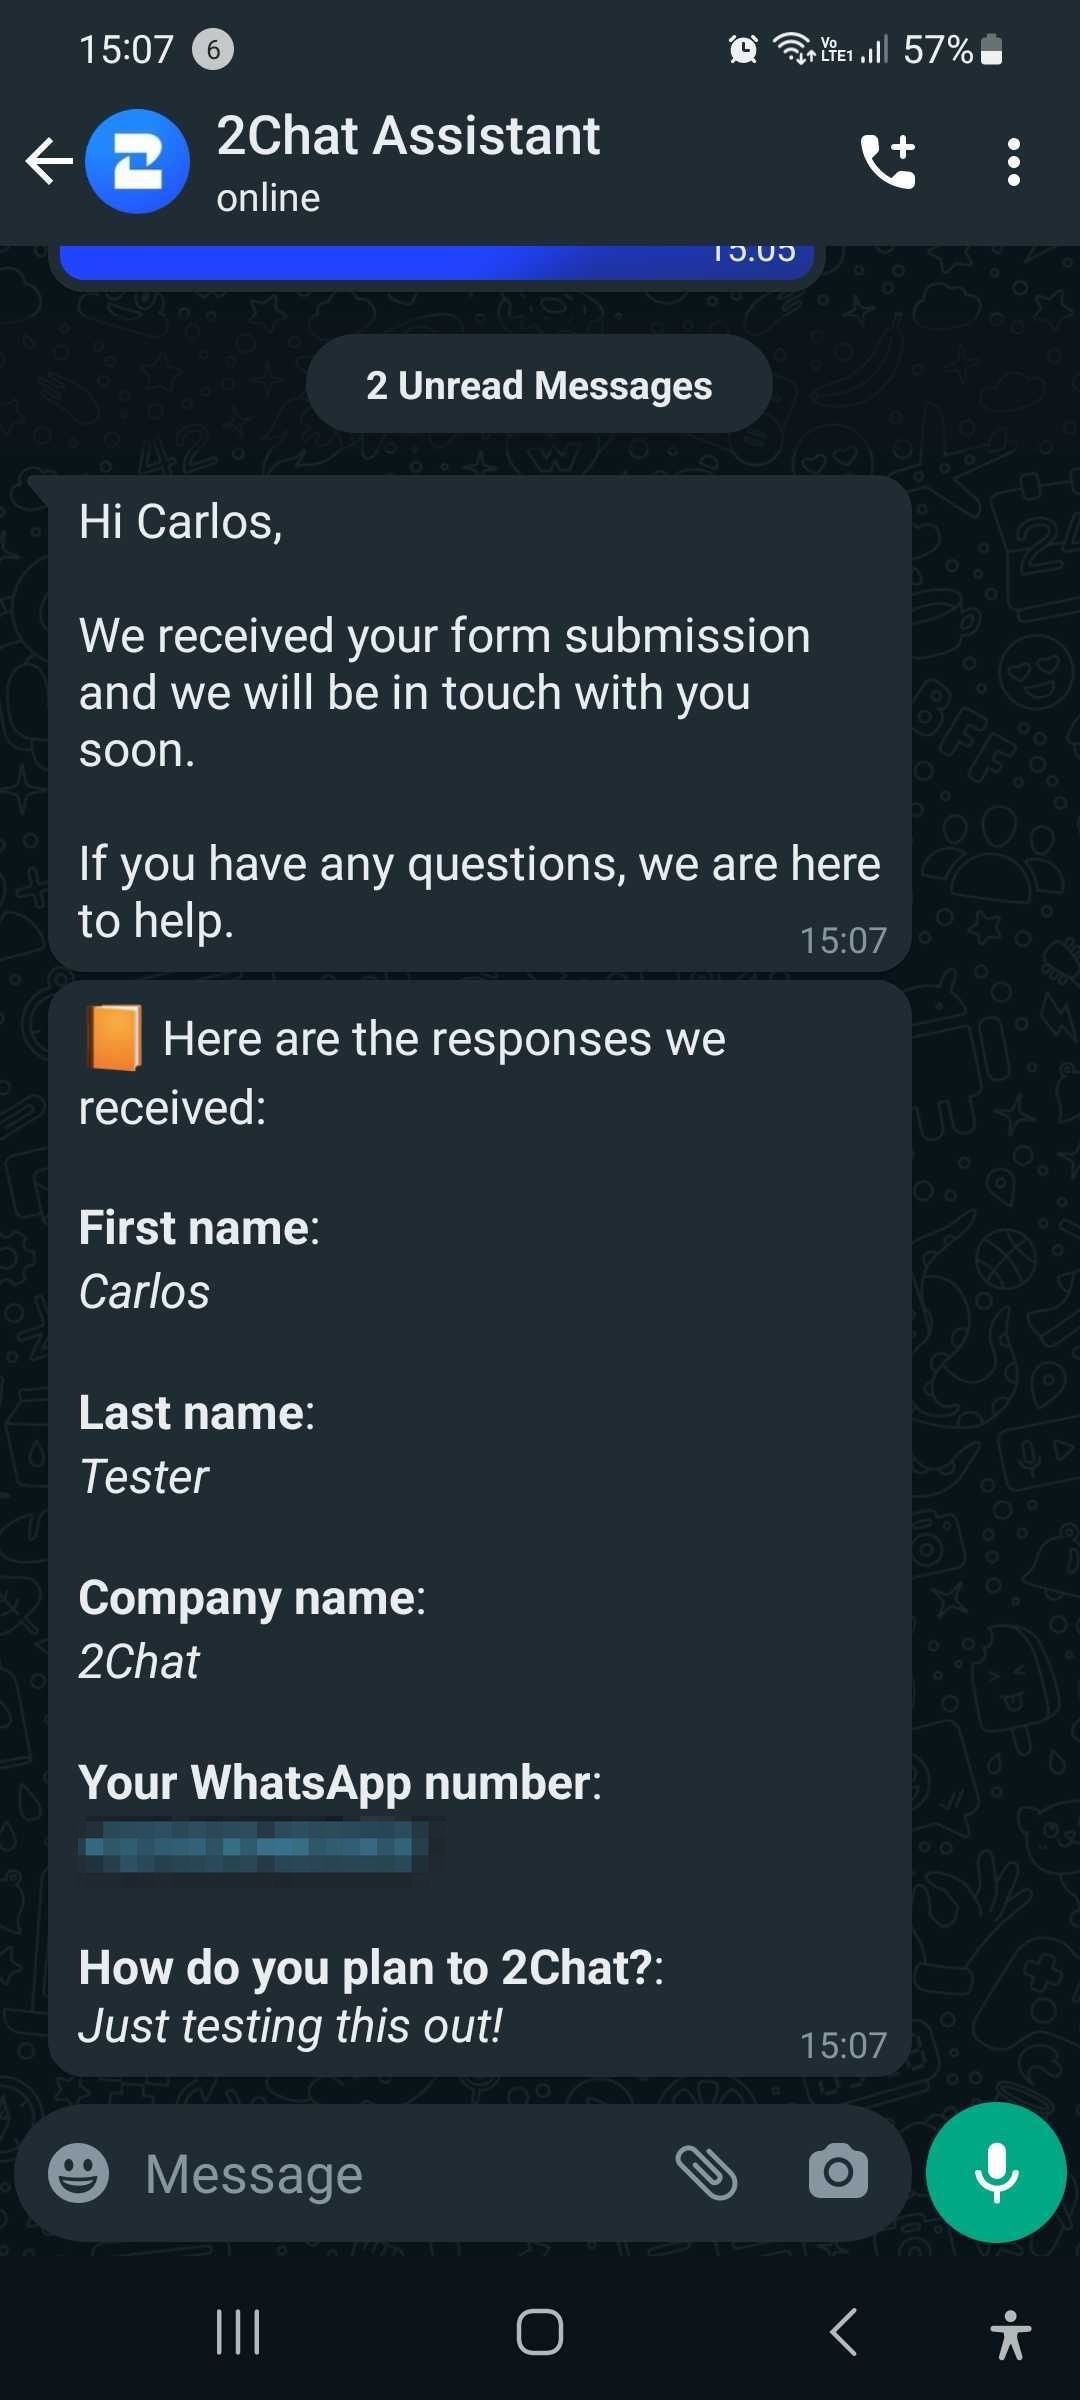
We will use a very simple form for our example that will ask for a name, last name, phone number, company, and the type of use they would like to give to 2Chat.
This is a live form that you can use to try this example yourself. It will send you a WhatsApp message as soon as you submit it.
The phone number field on your Google Form
The most important field we will need for our form is the submitter's phone number, which must be in an international format to work with WhatsApp.
Being in an international format means that it must include the plus sign and the country code which is typically not needed in regular life when giving a phone number. Because of this, you have to ask the submitters to write their numbers in this format or the WhatsApp message won't send.
In our example below, we are asking the submitter for their phone number and validating it with a regular expression to make sure it follows at least the most basic formatting we need: start with a plus sign and have some digits after it.
^\+\d+$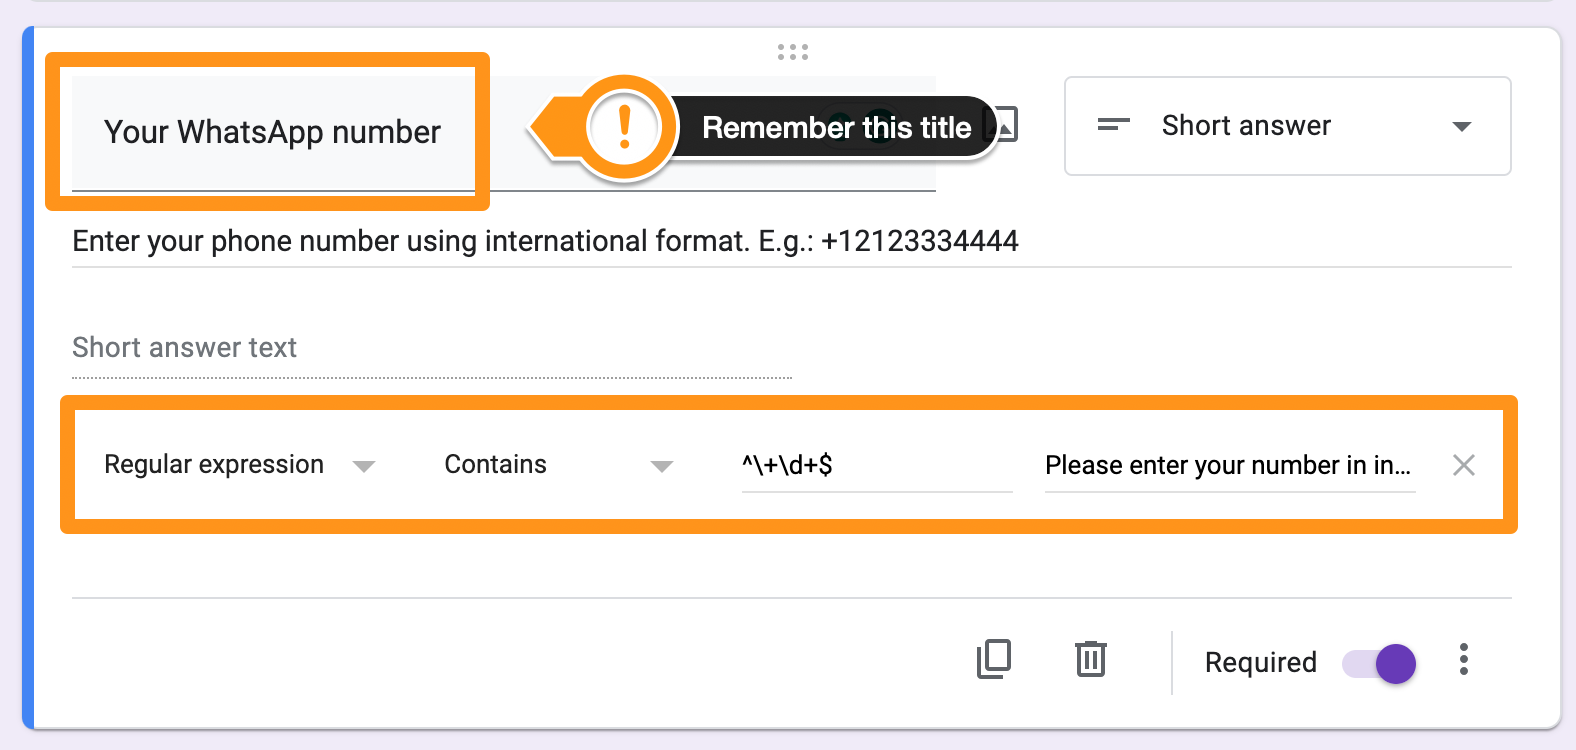
Designing the WhatsApp message you want to send
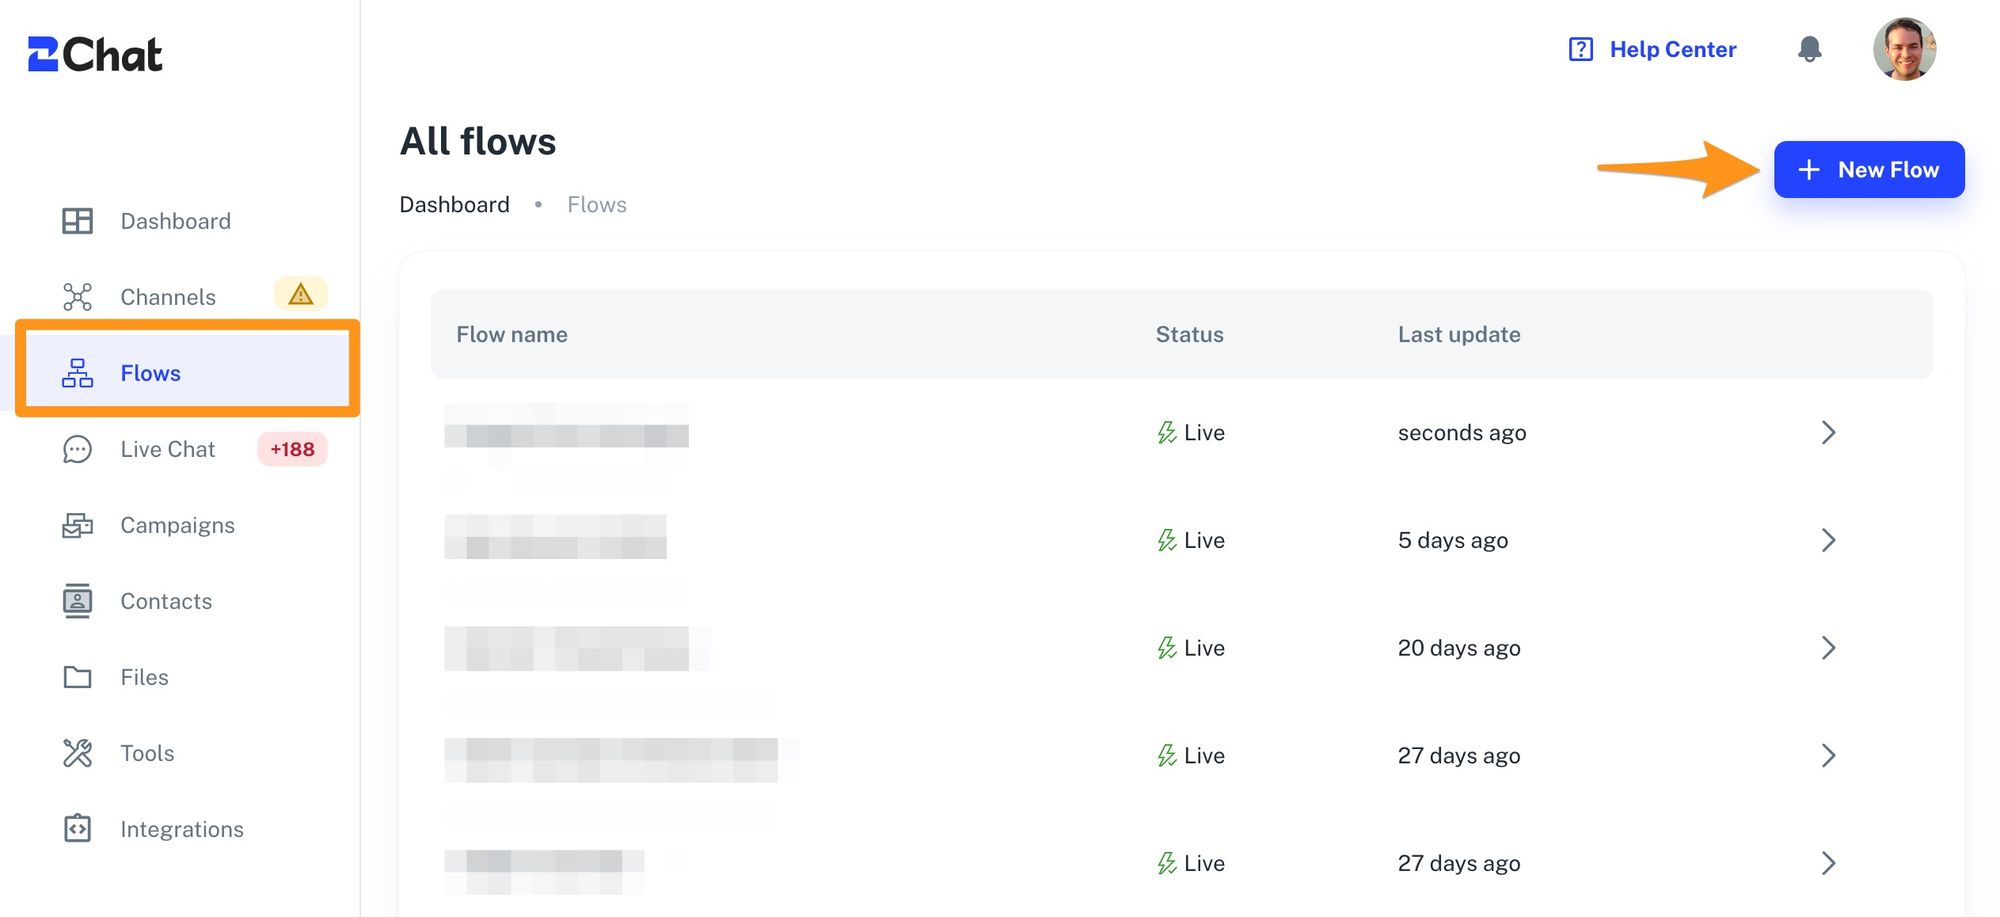
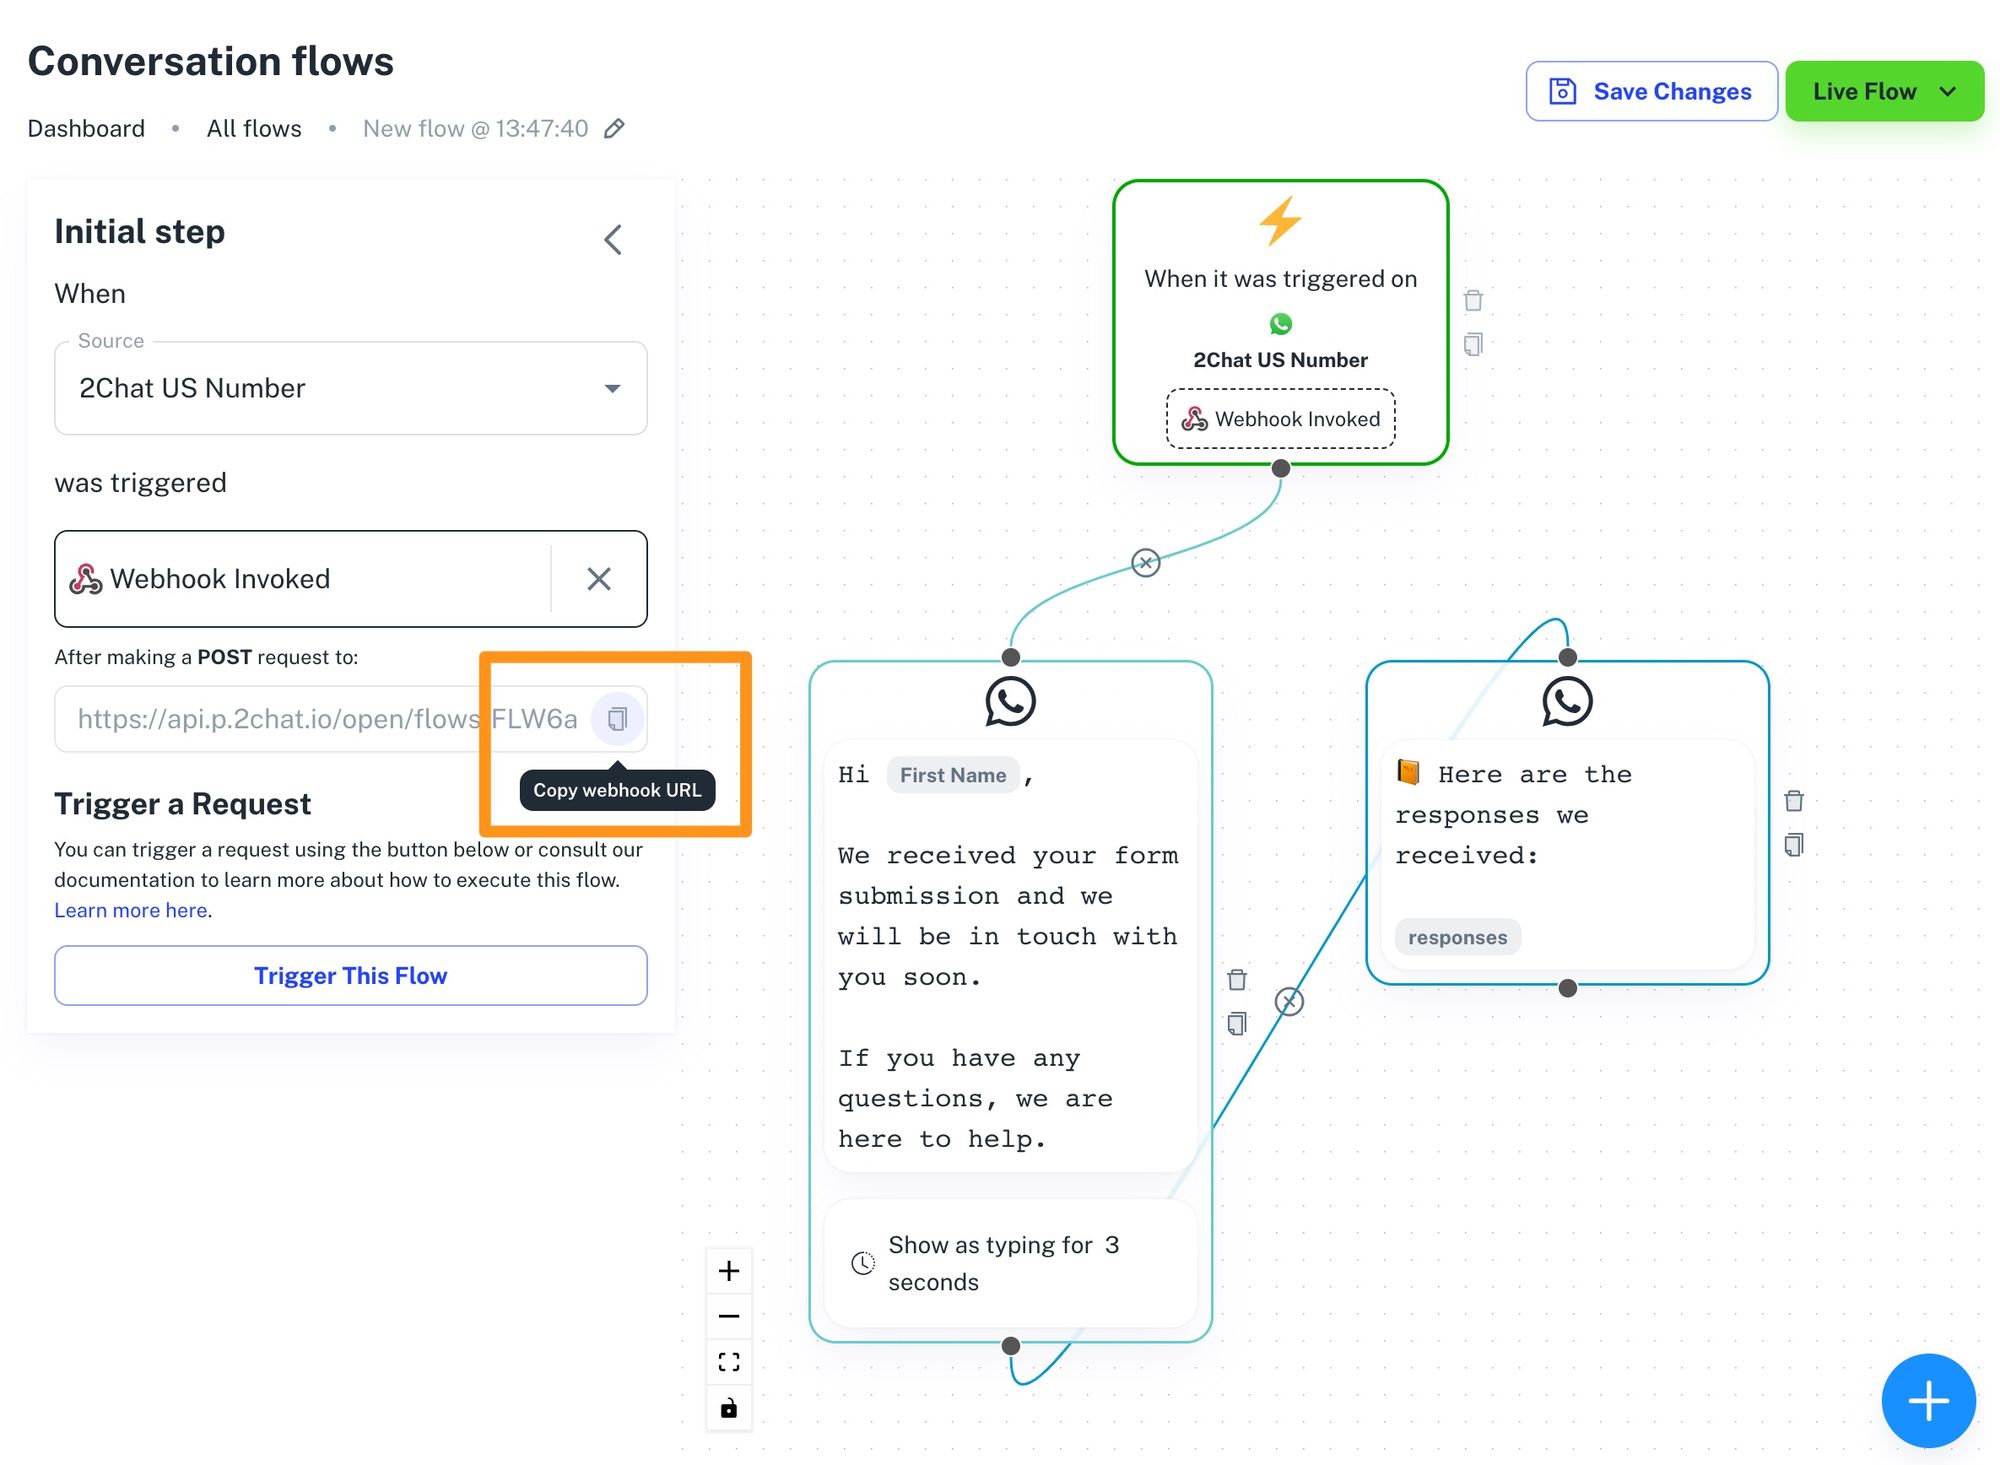
Now on the 2Chat side, we need to create a flow that gets activated every time a webhook is invoked. Later, we will use the URL created by 2Chat in this step to call it from the form in the last step.
- Go to 2Chat and click on Flows > New Flow.
2. Select your connected number and use the Webhook Invoked trigger.
3. Write the content of the message you would like to send for each form submission.
In our example, we are using two custom variables whose values are going to come from Google Forms:
firstName: since we are asking for this, we are using it to make the message feel more personal.responses: we combine all questions and answers and we send them to the user over WhatsApp.
4. Save the flow, and then publish it.

5. Now that we have the saved flow, we will need to get the public webhook URL that we will use on our Google Form.
Configuring the Google Form
This is the final step we need to have everything working.
- Open the script editor on your form.
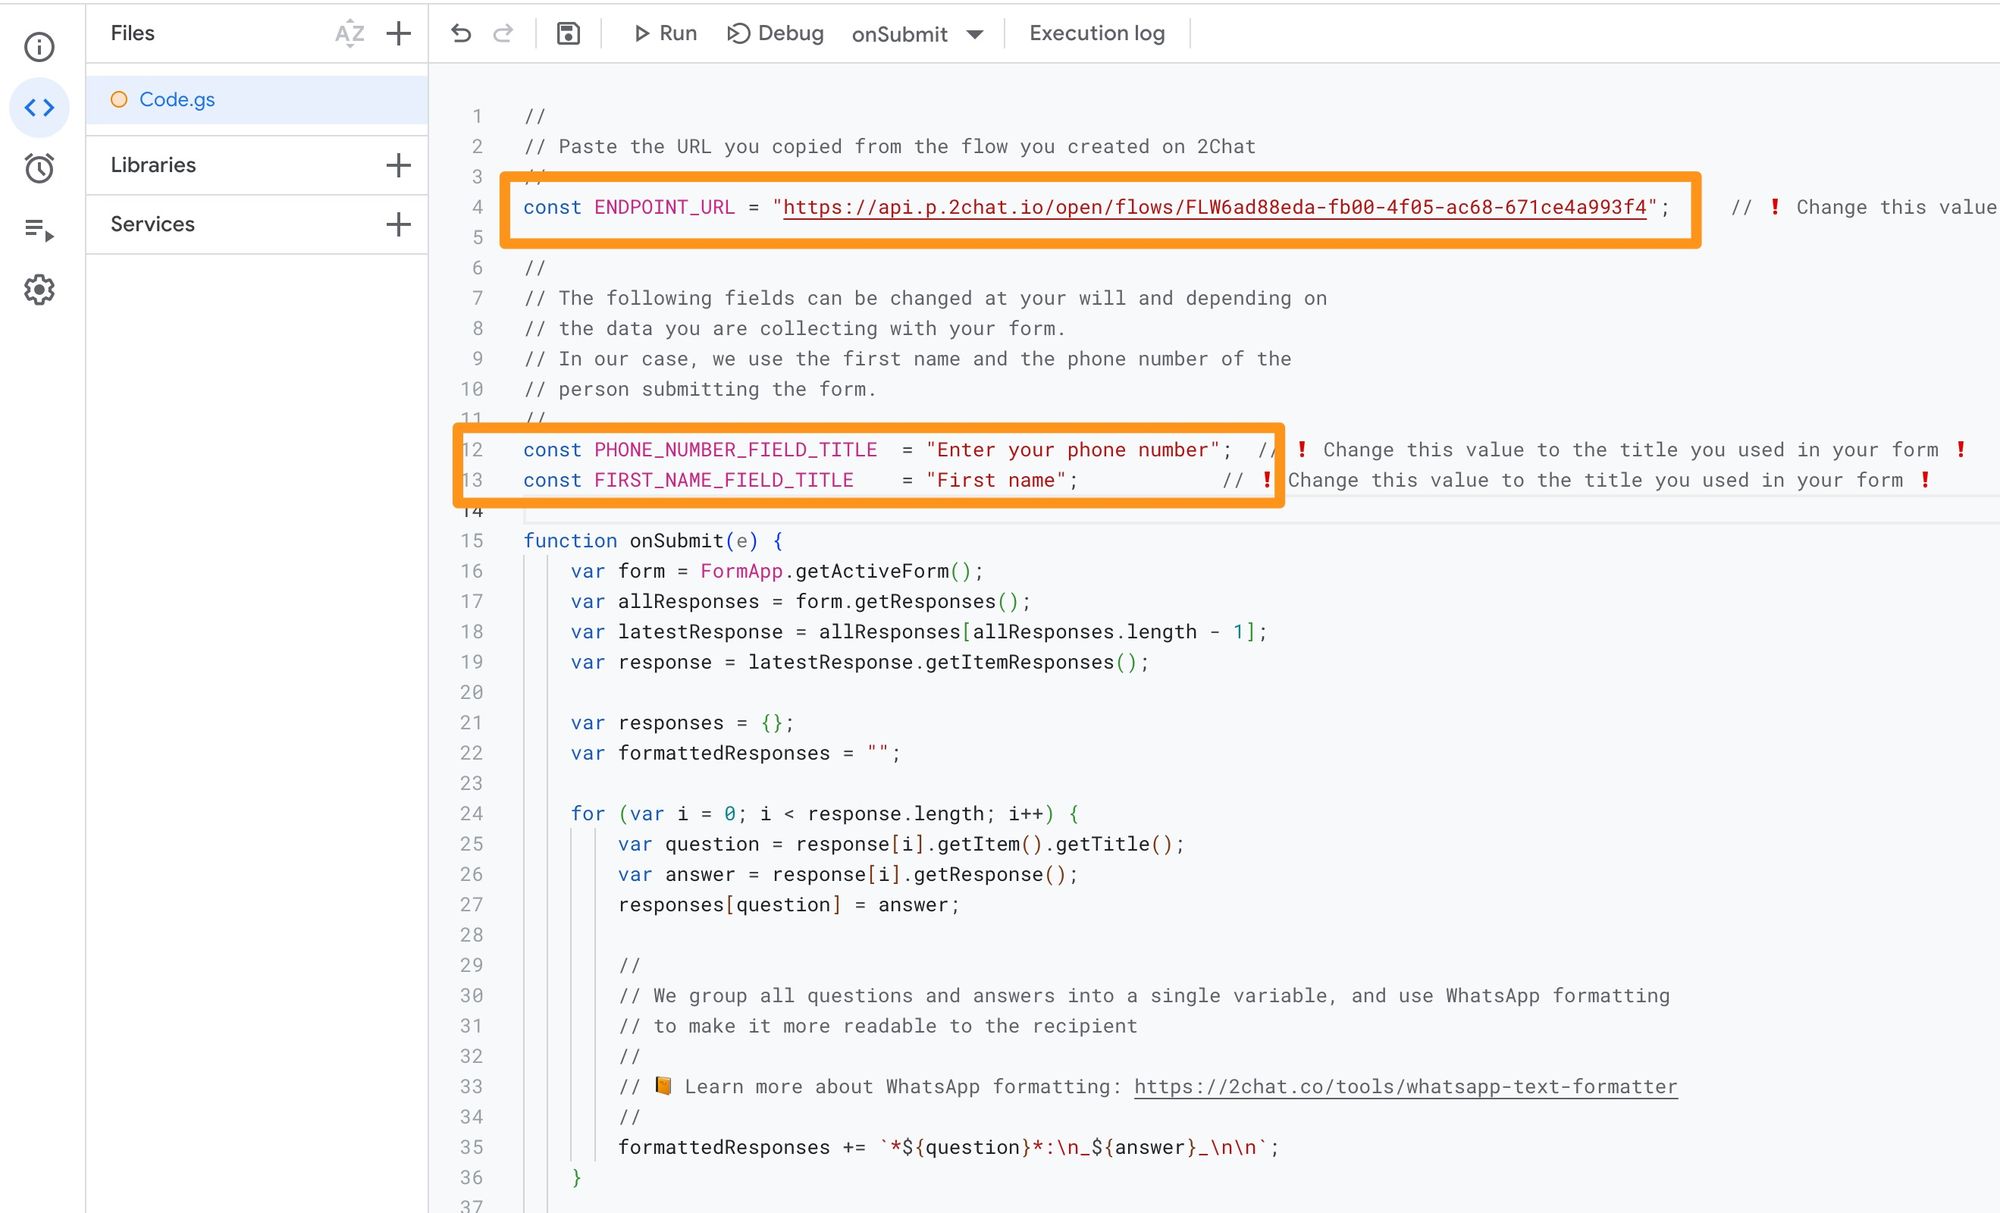
2. Paste the following code inside the editor.
ENDPOINT_URL with the URL you copied in the previous step.Also, use the title you used to ask for the phone number and paste it inside the quotation marks of the variable
PHONE_NUMBER_FIELD_TITLE.3. The final result should look something like this, but with your own values.
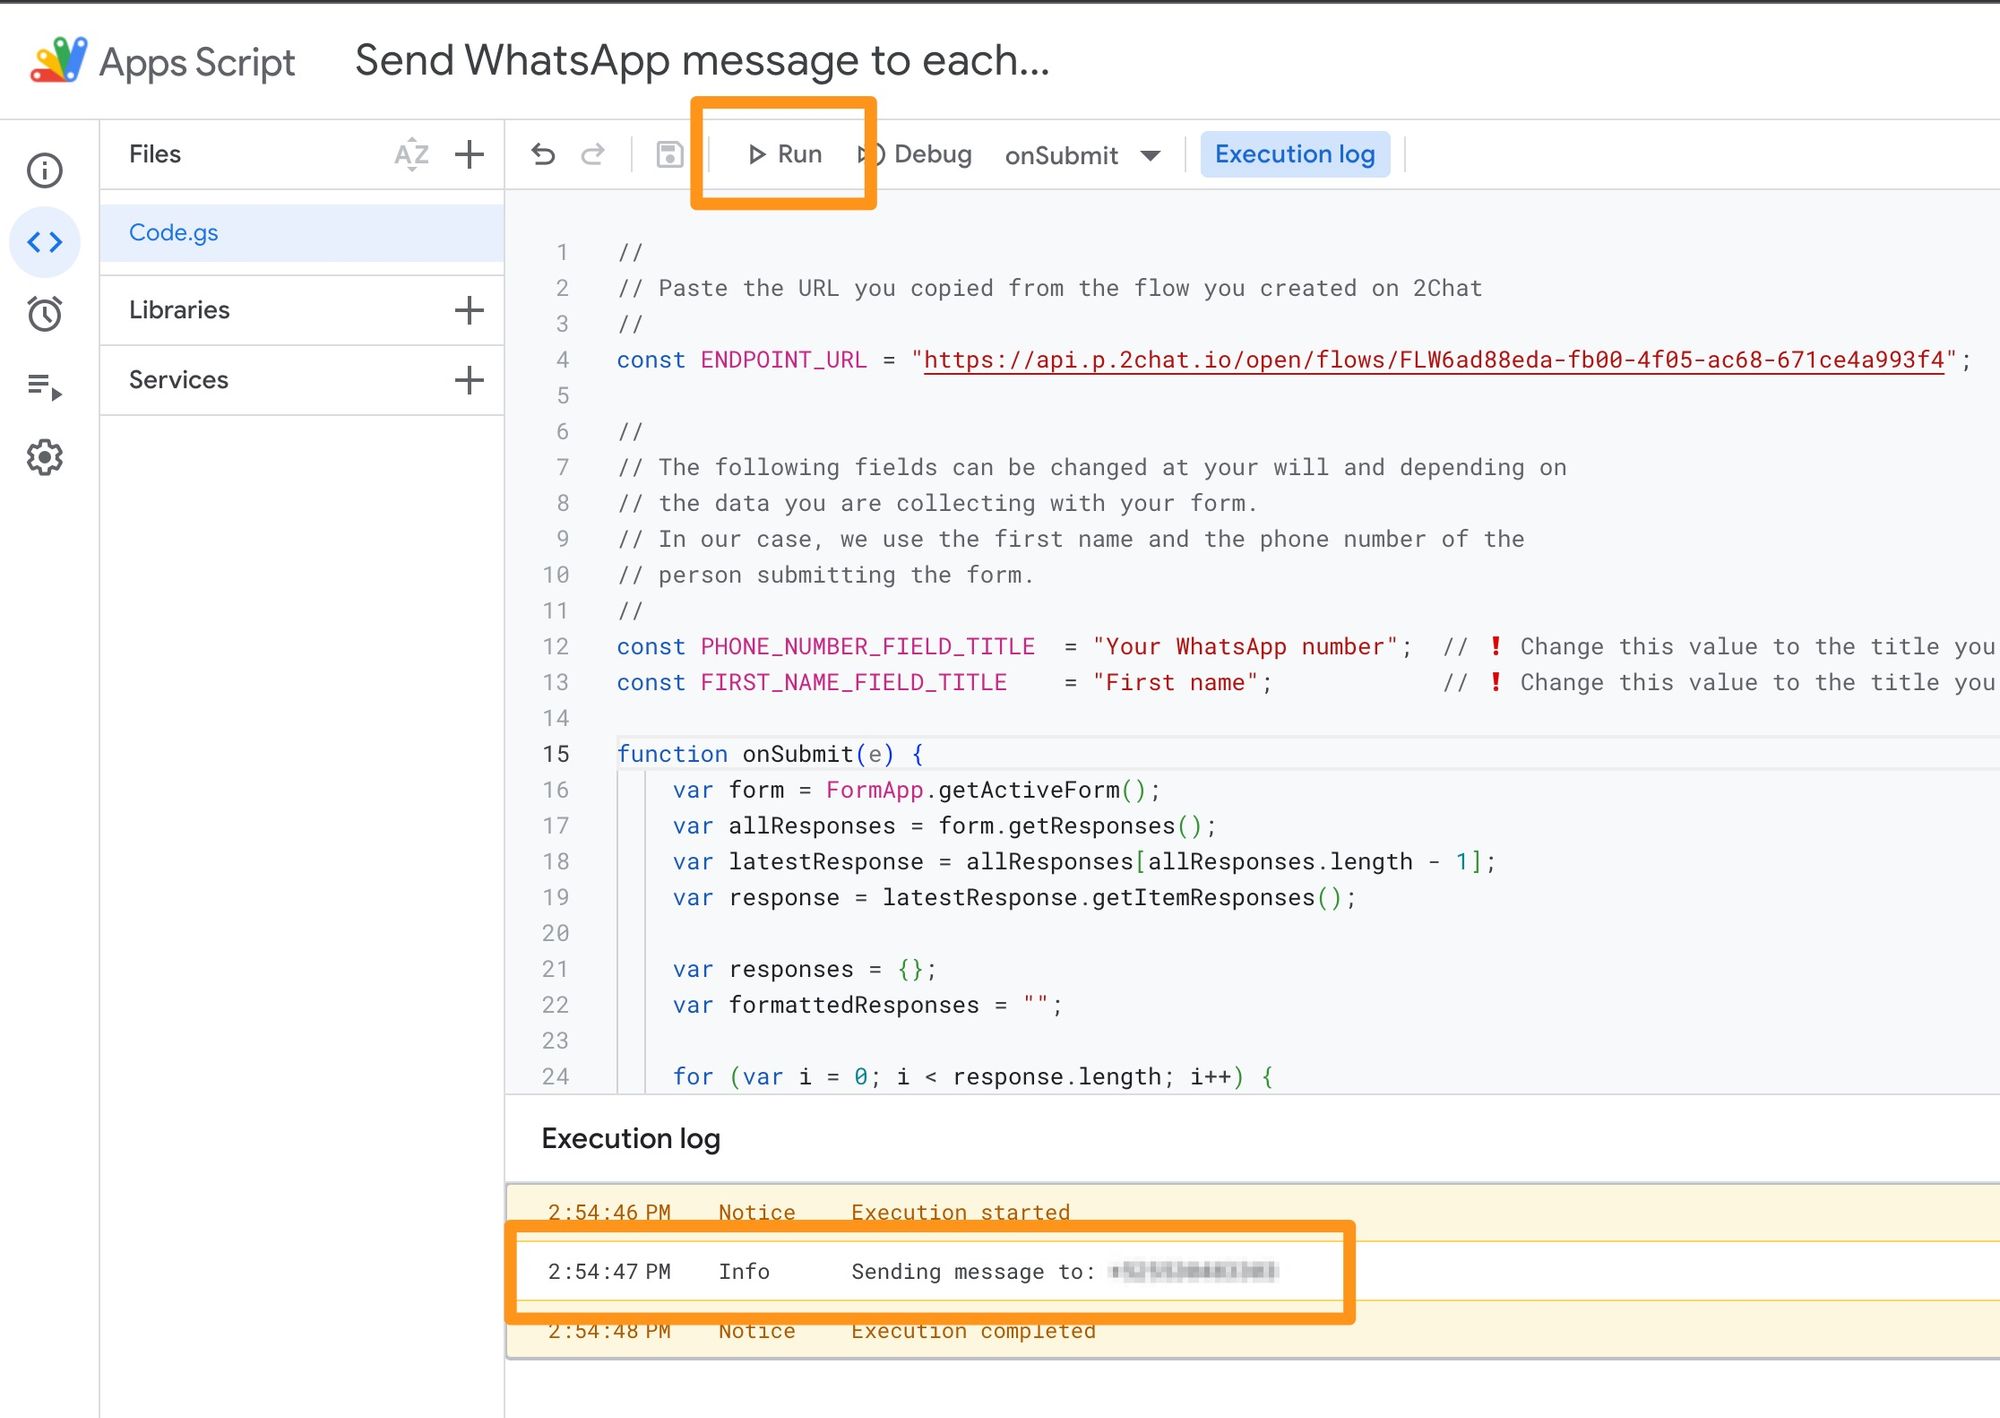
4. Test the script.
- Click on Run and wait for the message to arrive. Google Forms will use the last form submission to test it.
- If you don't see any errors, you are all set and your form is ready to send WhatsApp messages! 🎉.
The script is hosted in your account and no one except for yourself can access your data as this is not an external application.
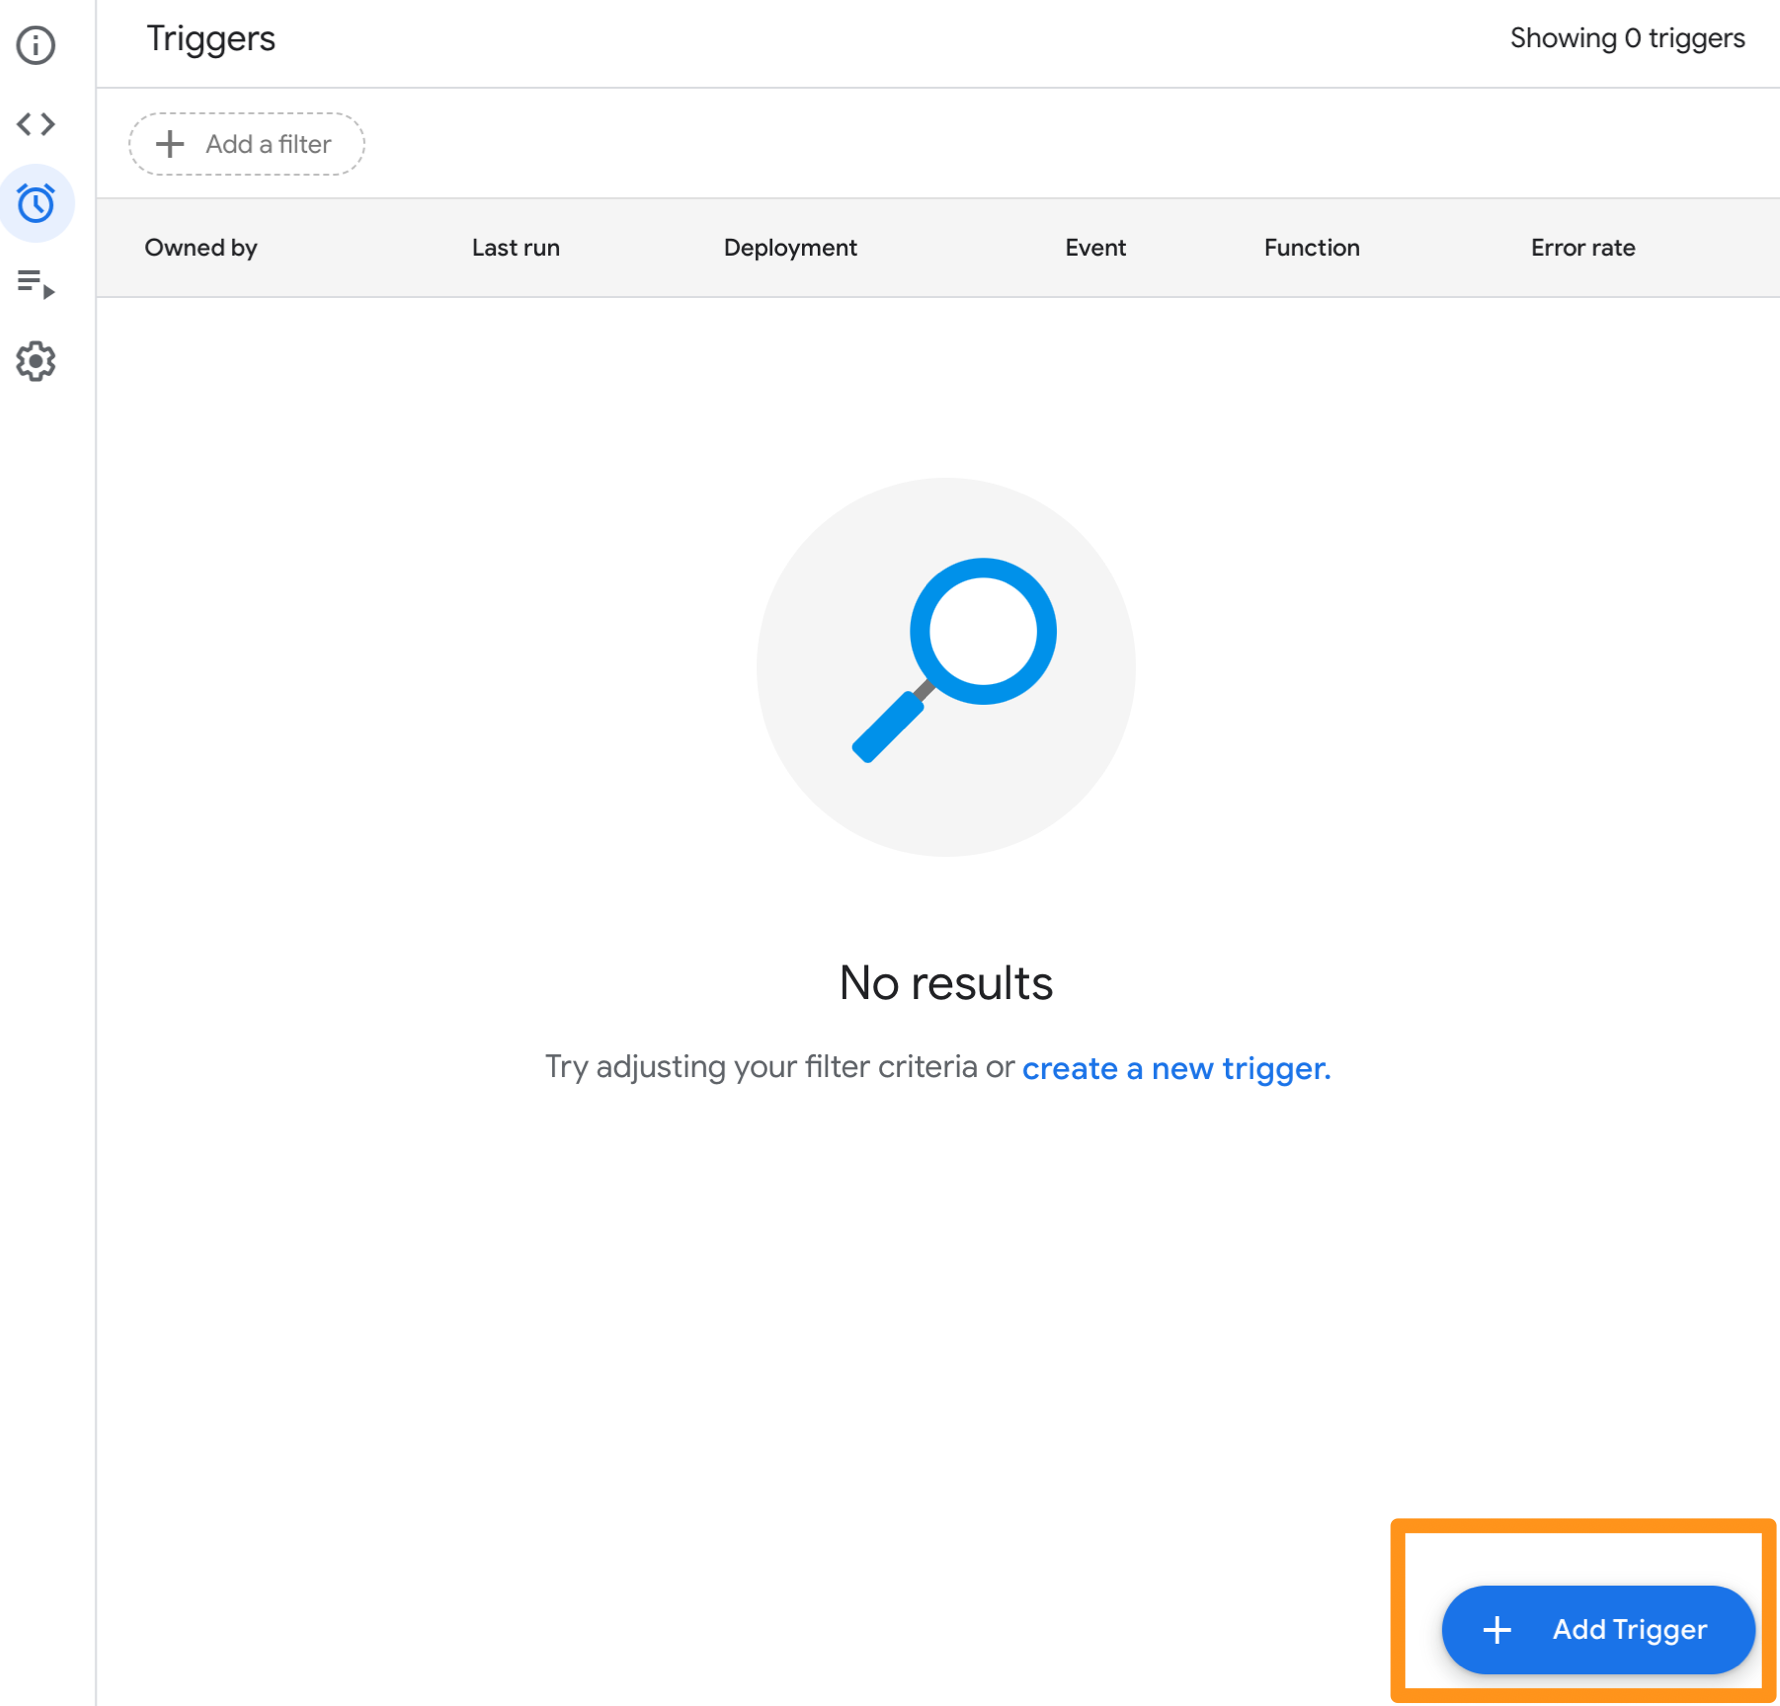
5. Add the trigger to call this script for each form submission.
- Go to Triggers, and click on Add Trigger.
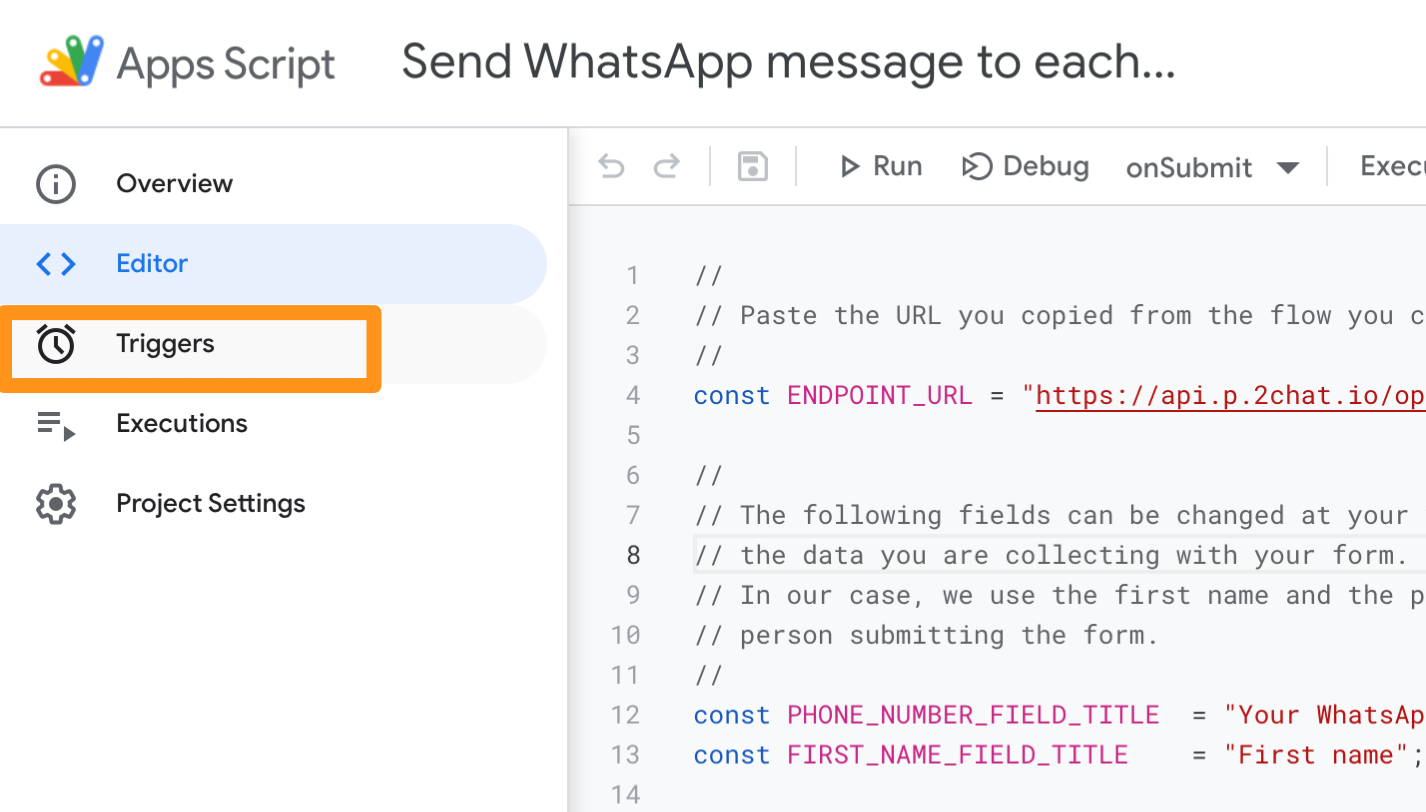
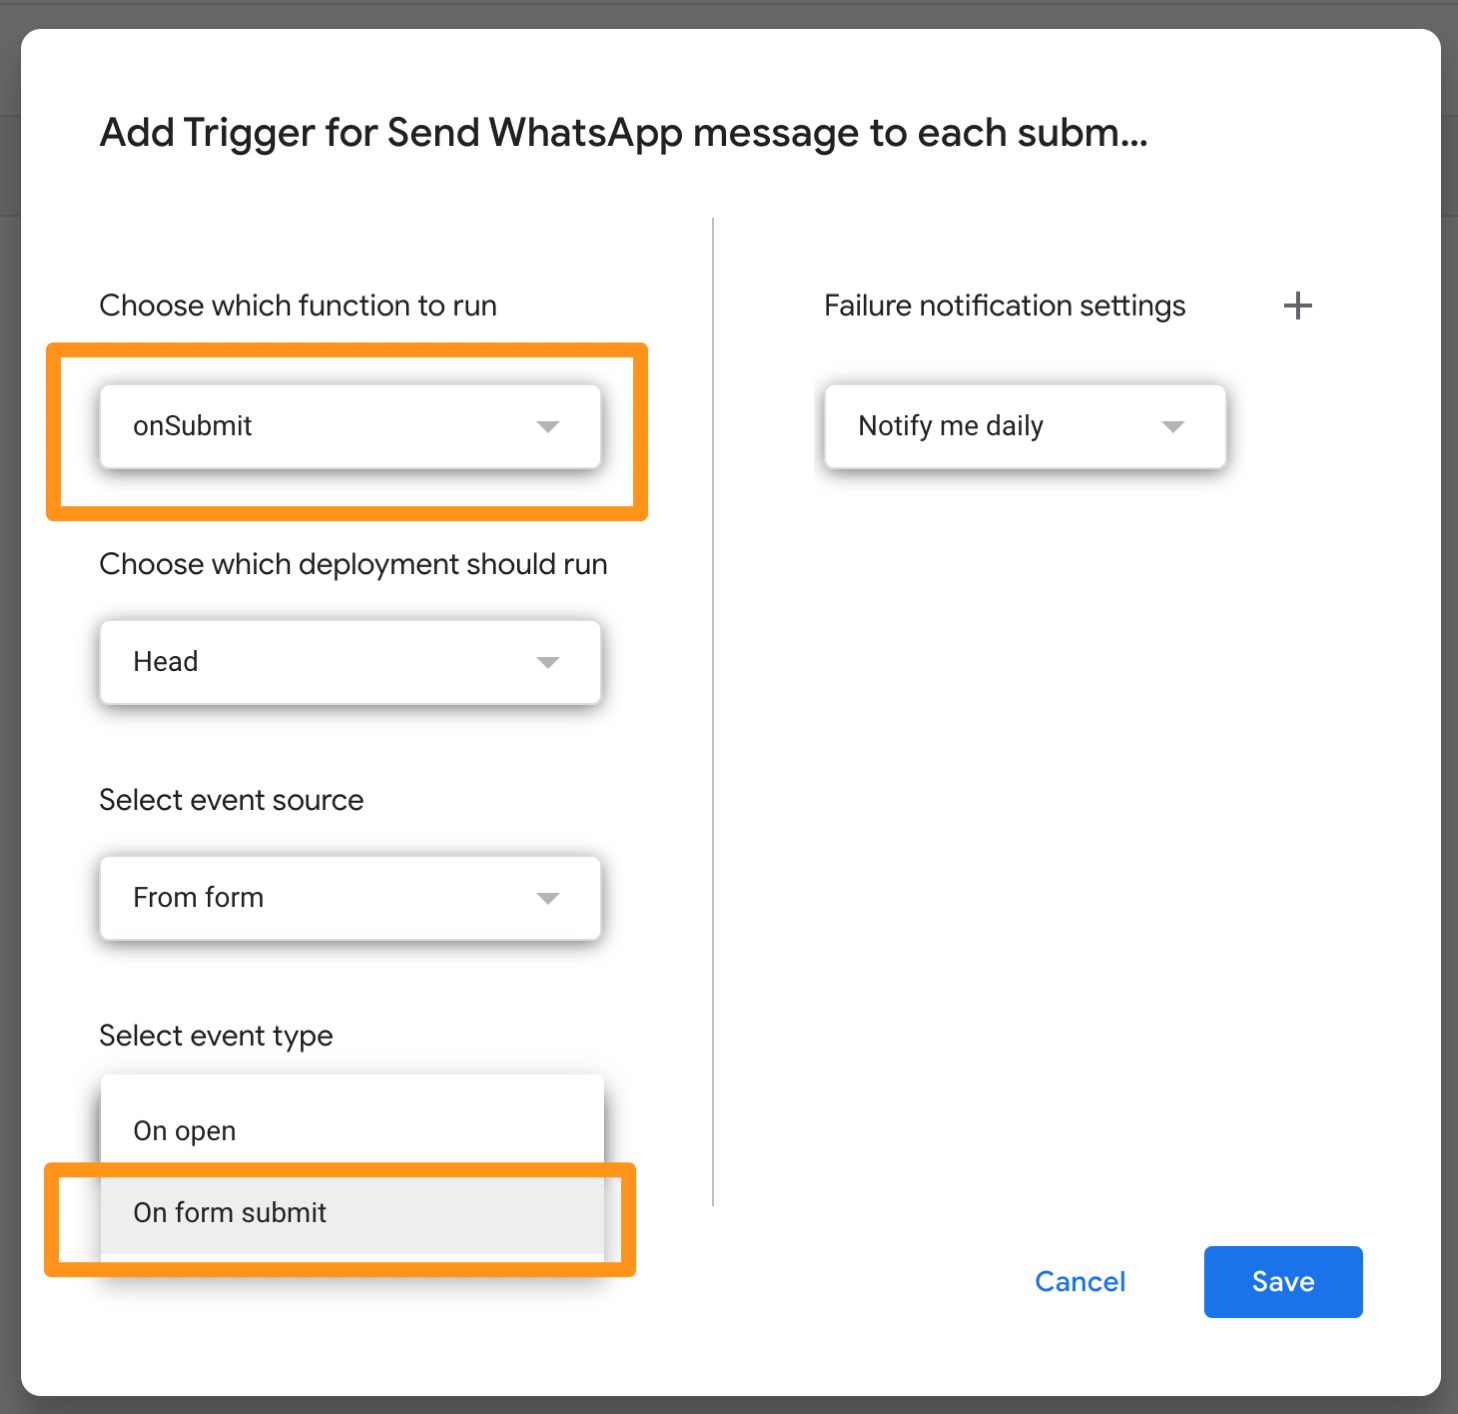
- Select the function we created called
onSubmit, and the event type toOn form submit. Then, click on Save.
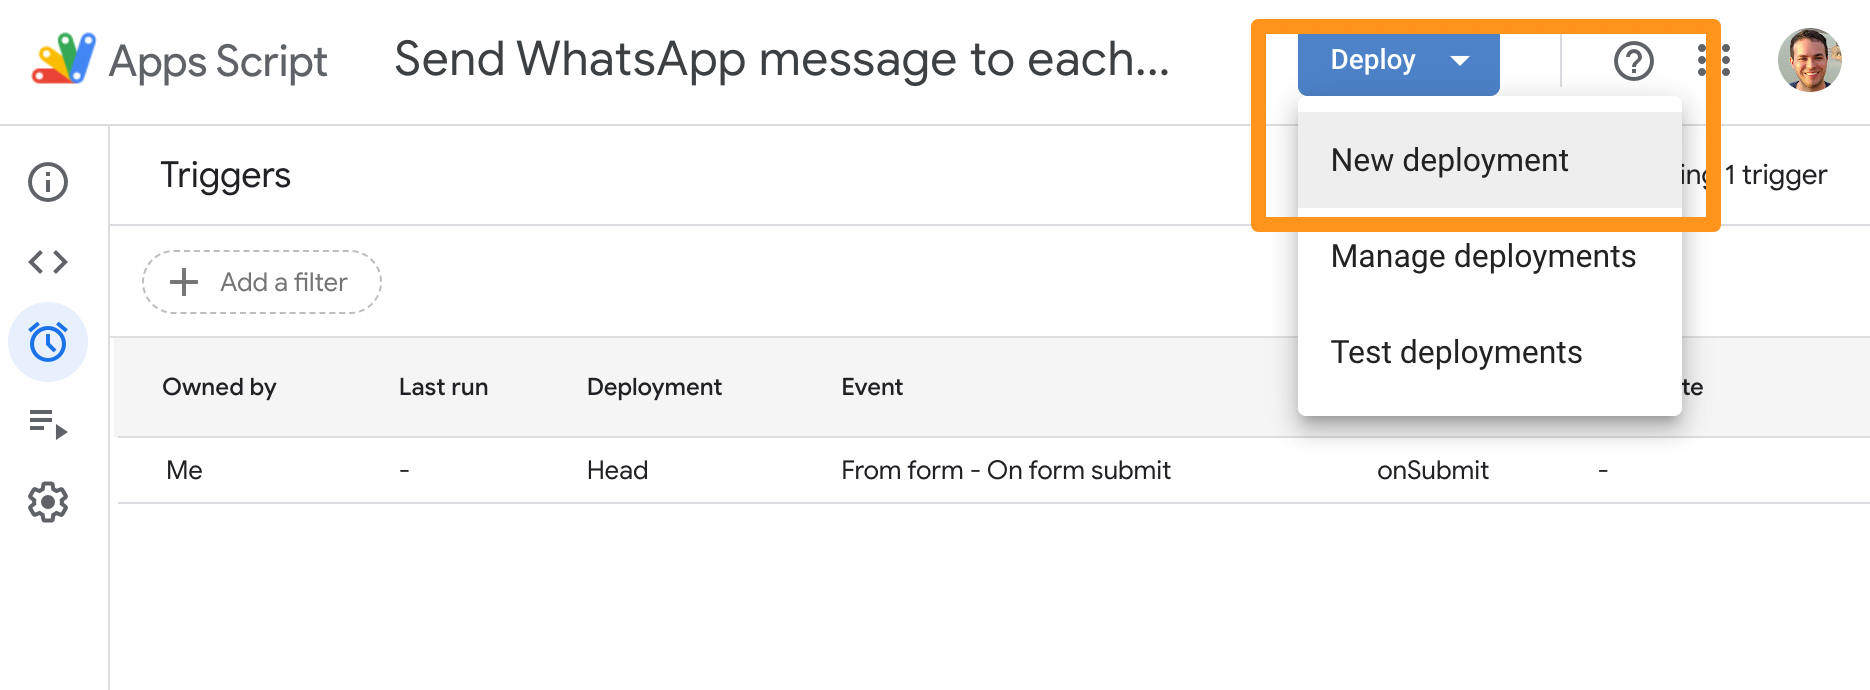
- Go to Deploy > New Deployment.
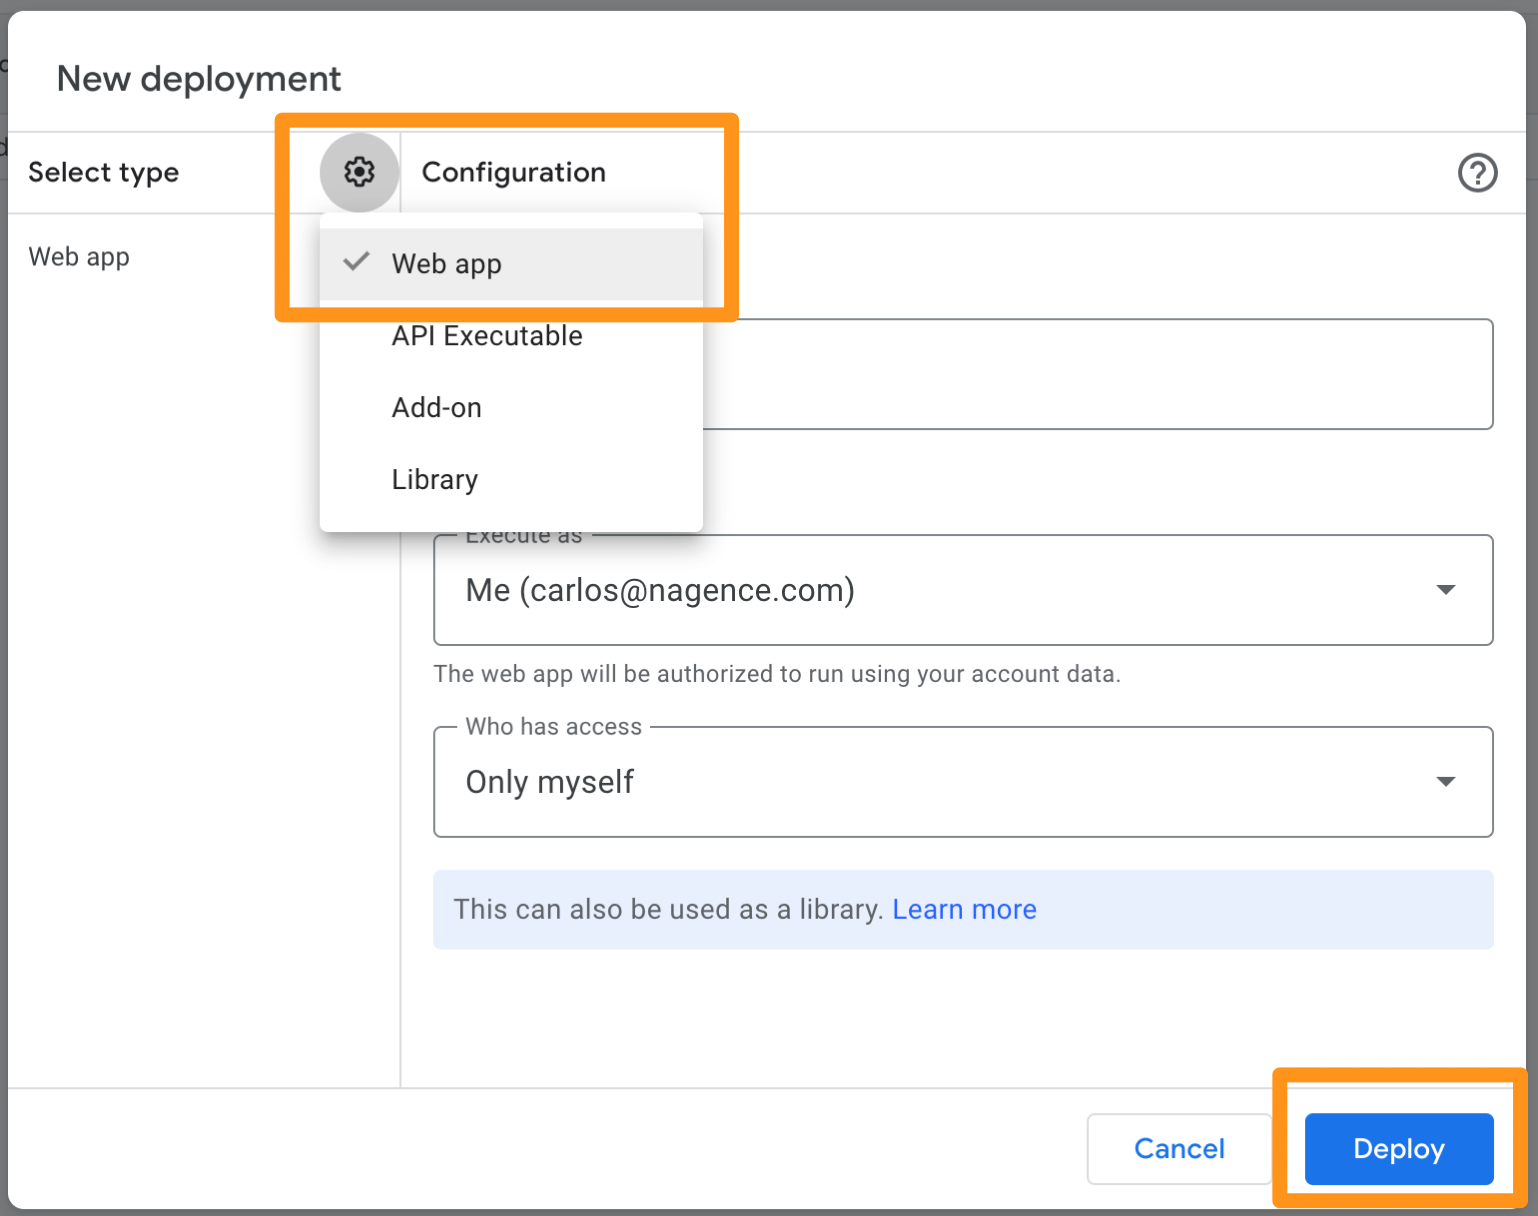
- Deploy your script as a web app, and click on Deploy. This will make your script go live.
See your WhatsApp message in action
Test it yourself now with your actual form:

2Chat has many other features that may be very useful to you and your business. Don't miss out on the opportunity to try them, we have a 7-day free trial!