Never Miss a Client: Create an AI Voice Agent for Your Business with 2Chat and ElevenLabs
Learn how to build an AI voice agent to schedule appointments 24/7. Automate your bookings and never miss a client using 2Chat, ElevenLabs, and Cal.com.
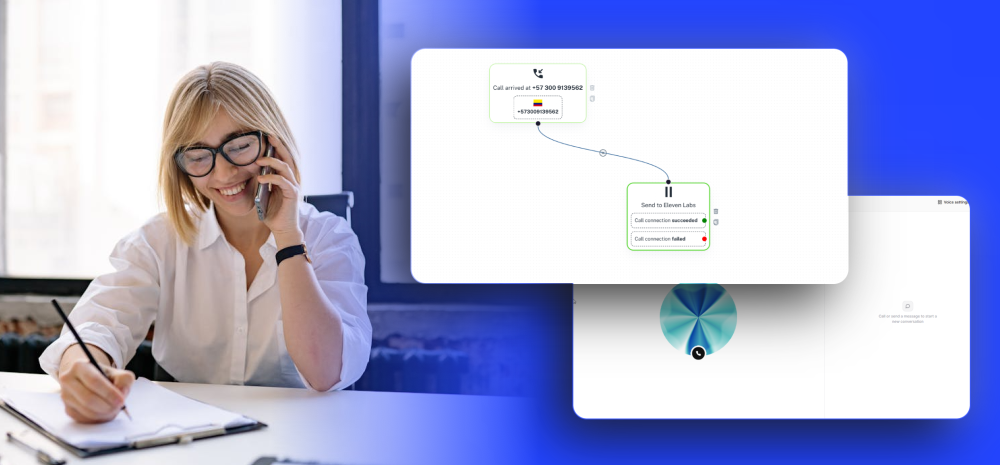
Let’s be real for a second: as a business owner or entrepreneur, your time is your most valuable asset. But every time your phone rings and goes to voicemail because you or your team are too busy, you’re potentially losing a client.
Whether you run a dental clinic, a spa, an auto repair shop, or a consulting agency, managing appointments can become a massive bottleneck. What if you could have a friendly, human-sounding receptionist answering calls, answering FAQs, and booking appointments directly into your calendar—24/7, without taking a single coffee break?
We are going to show you exactly how to build an AI voice agent to do just that. We’ll be using three powerful tools:
- 2Chat (for our virtual phone number)
- ElevenLabs (for the AI voice)
- Cal.com (for the booking calendar).
Step 1: Set Up Your Call Routing in 2Chat
First, we need to tell your 2Chat virtual number to send incoming calls to our AI brain.
- Log into your 2Chat Dashboard.
- Navigate to Channels and select Virtual Number. Click on your active number.
- Go to Inbound Call Handling. Here, we are going to configure the flow.
- Add a trigger for an incoming call, and then add an Integration component: select Send to ElevenLabs.
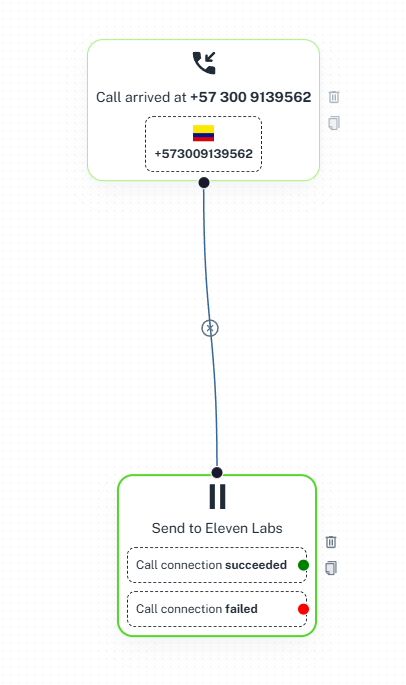
- Input your 2Chat phone number (in international format, e.g., +1...) and select the SIP TCP option.
(Entrepreneur Note: "SIP" is just a fancy telecom term for routing voice calls over the internet. You don't need to be a tech wizard to use it—just click save!)
Step 2: Connect Your Number to ElevenLabs
Now, let’s hop over to ElevenLabs to catch that call.
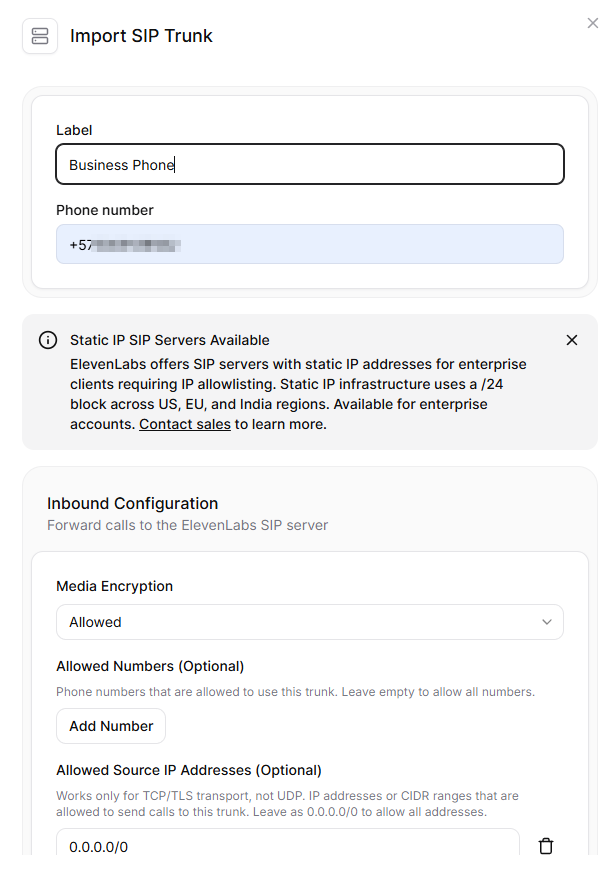
- In ElevenLabs, go to Phone Numbers and click Import Number.
- Choose From SIP Trunk.
- Name your number, enter the exact phone number you used in 2Chat, and hit Import.
(Leave the advanced settings alone unless you want to restrict which phone numbers can call your AI).
Step 3: Create Your AI Agent (The Fun Part!)
It’s time to give your receptionist a brain and a voice.
- Go to the Agents tab in ElevenLabs and click New Agent.
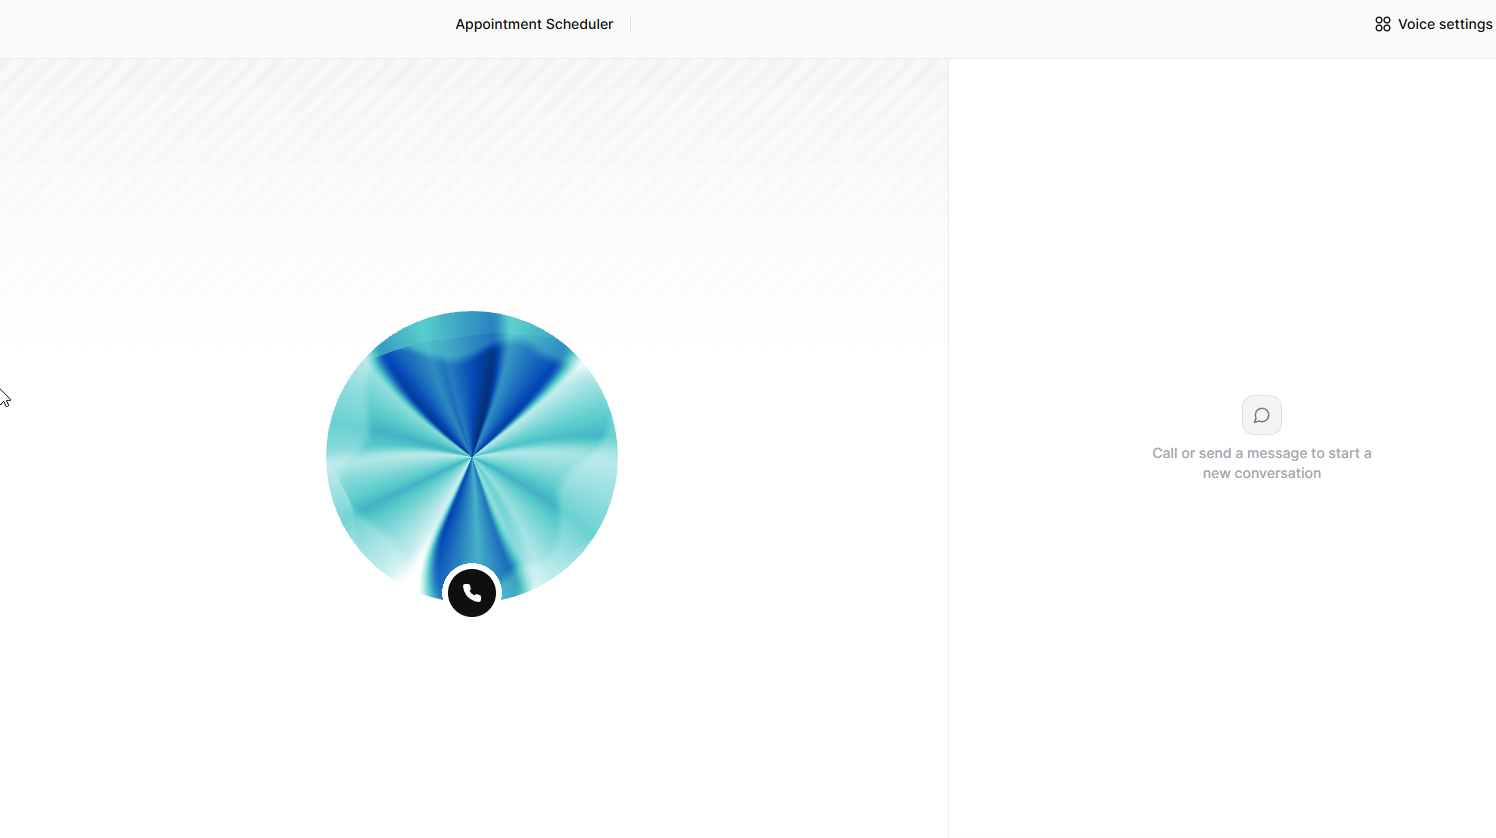
- To save time, let’s use a template. Browse the templates and select Appointment Scheduler.
- Click Use Template and name your agent (e.g., "Dental Clinic Appointment Scheduler").
- The system will ask you to connect your tools. Select Cal.com.
Step 4: Integrate Cal.com (The Booking Engine)
To let your AI actually book appointments, it needs permission to talk to your calendar. We do this using an API Key.
(Think of an API Key as a VIP backstage pass that lets two software programs talk to each other securely).
- Open your Cal.com account, go to Settings, and find API Keys.
- Create a new key, name it (e.g., "ElevenLabs AI"), and set it to "Never Expires."
- Copy the key, paste it back into your ElevenLabs setup screen, and click Create Agent.
- Pro-Tip for Services: In Cal.com, every service you offer (like a teeth cleaning vs. a root canal) has a specific Event Type ID (a short string of numbers in the URL). You can add these IDs into your ElevenLabs setup so the AI knows exactly which calendar event to book!

Step 5: Customize Your AI’s Personality and Voice
Now you’re in the Agent Dashboard. Let’s dress it up.
- System Prompt: This is your AI's personality. Tell it how to act: "You are a friendly receptionist at Good Smile Dental. You handle scheduling effortlessly."
- Voice: Choose a voice that fits your brand. You can select the language (e.g., English, Spanish) and pick a voice model.
- LLM (Large Language Model): This is the engine processing the conversation. A model like Gemini 2.5 Flash is highly recommended because it’s incredibly fast and very cost-effective for simple scheduling tasks.
Step 6: Train Your AI with a Knowledge Base
You want your AI to answer questions like, "Do you offer teeth whitening?"
- Go to the Knowledge Base tab in ElevenLabs.
- Click Add Document and create a simple text file listing your services, prices, or FAQs.
- Make sure to Enable RAG (Retrieval-Augmented Generation). This simply means your AI will "read" this document before answering a customer's question, ensuring it gives accurate, business-specific answers.
Step 7: Tweak the Conversation Flow
Go to the Workflow tab. This is a visual map of how the conversation goes. You can edit the initial greeting, decide what information the AI collects, and customize the sign-off message so it politely ends the call (e.g., "Thanks for calling, have a great day!").
Step 8: Test and Launch!
Before going live, click Preview in ElevenLabs. You can literally call or chat with your AI to see how it sounds. Once you're happy, assign your created agent to your imported phone number.
You can also visit the Analysis tab to review past calls, read transcripts, and see exactly how much each call costs you.
Key Takeaways for Business Owners
- 24/7 Availability: You never miss a lead, even if they call at 2 AM.
- Cost Efficiency: Running an AI voice agent is a fraction of the cost of hiring a full-time, round-the-clock receptionist.
- Better Customer Experience: Your clients don't have to wait on hold; they get immediate, accurate answers and instant bookings.
Ready to level up your customer service and put your bookings on autopilot? Sign up for a 2Chat account today and start building your intelligent WhatsApp and voice agents!