How to send WhatsApp notifications and reminders using Cal.com
Learn how to integrate Cal.com and WhatsApp using 2Chat and start sending notification messages for every new event
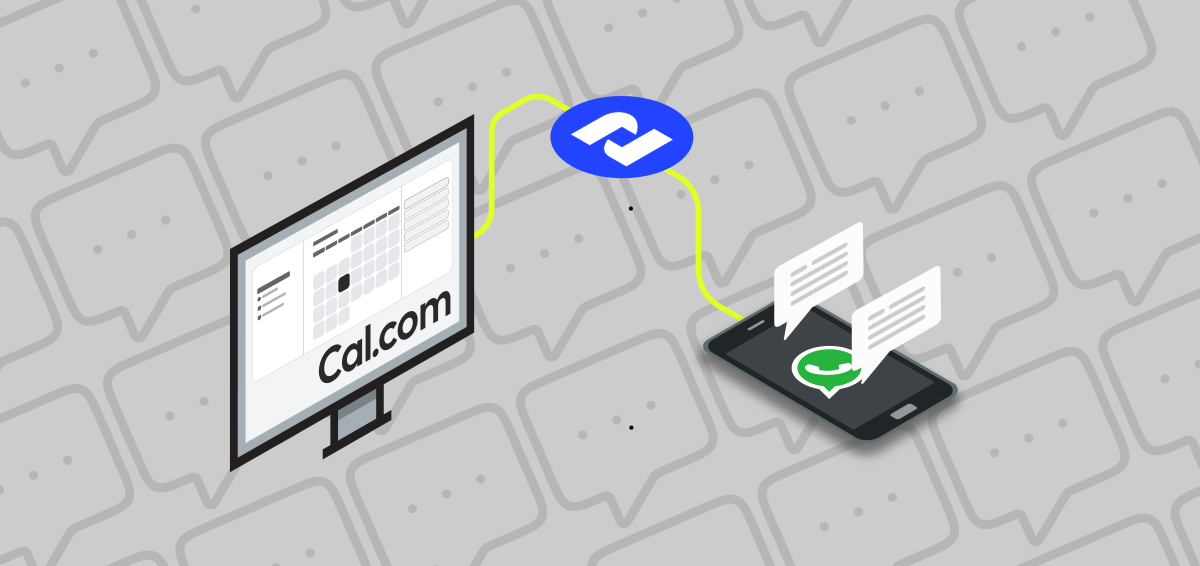
Cal.com is a powerful workflow automation platform designed to streamline and simplify event management and scheduling tasks. With Cal.com, you can automate various aspects of your workflow, enhancing efficiency and ensuring that everything runs smoothly.
You can use 2Chat for integrating Cal.com with WhatsApp through Webhooks flow triggers. A webhook trigger in 2Chat allows you to send POST request and send customized WhasApp messages.
What you will need is the following:
- A Cal.com account.
- A personal WhatsApp or WhatsApp Business enabled phone number.
- a 2Chat account with your WhatsApp number connected to it.
To achieve this you must follow this steps:
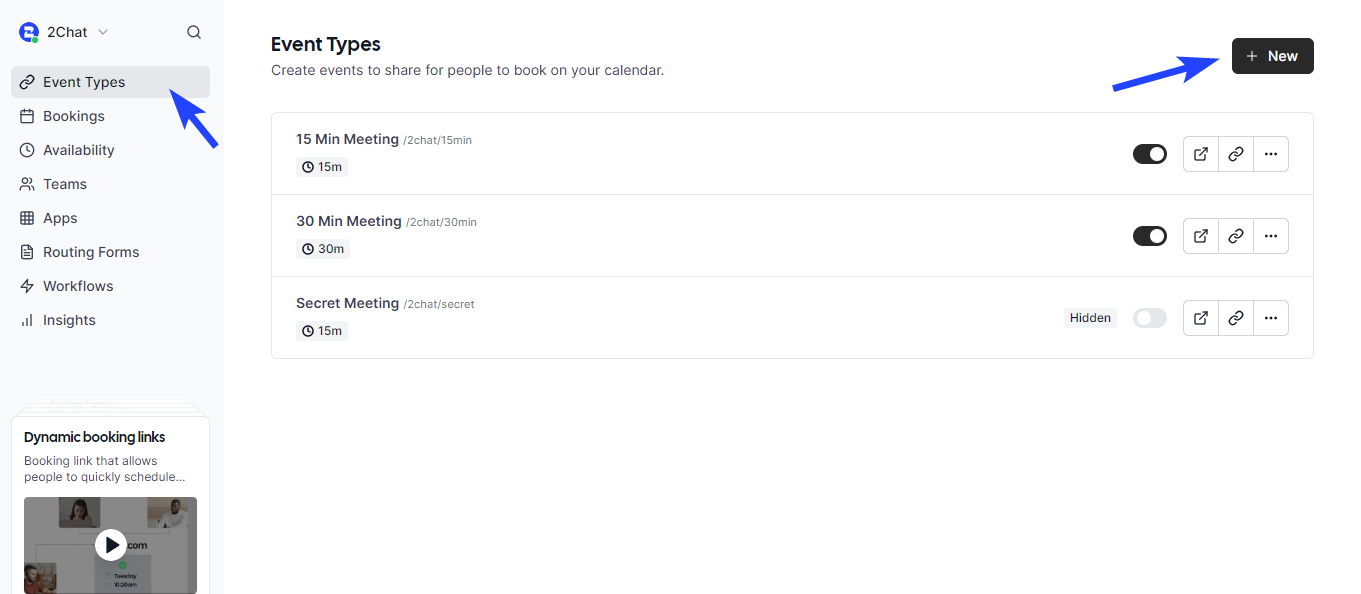
Create a Event Type
Click on Event Types and then New
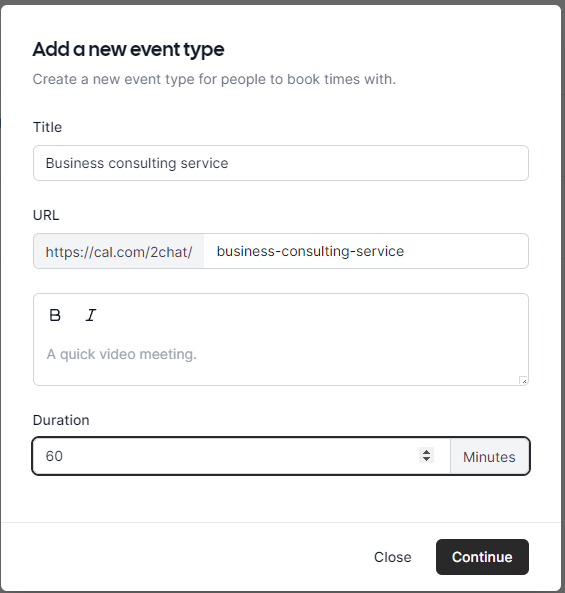
Enter the event information and click on Continue
Add the phone number field
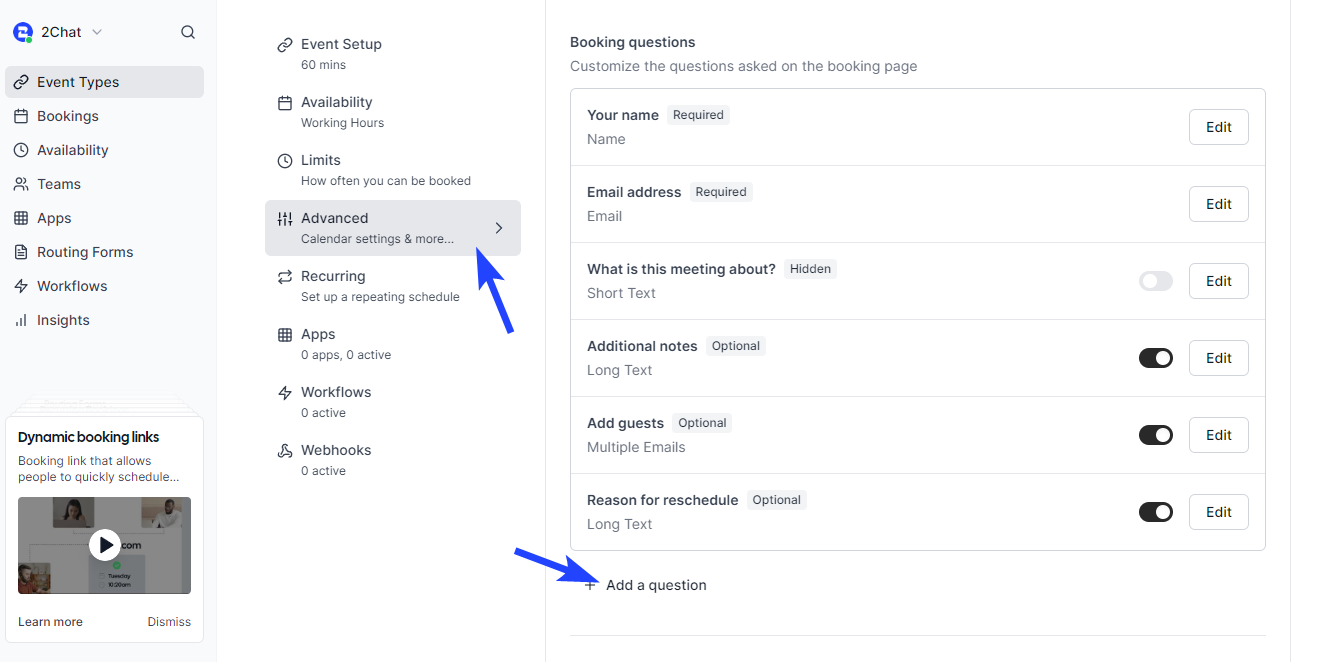
If you want to send a custom WhatsApp message you will need the customer's phone number, so we will add this field as a new question. For this you must click on Advanced and scroll down the window to the bottom where you can add custom questions you require from your customer. Click on Add a question
You must configure the parameters for the new question
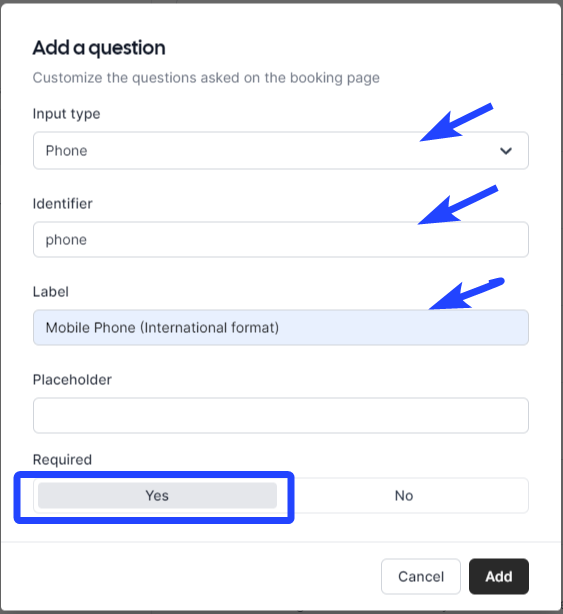
- Input Type: Select Phone
- Identifier: This is the internal name for this fiel and it will be required later when we need to send the custom variables to 2Chat.
- Label: This is the text the user will see
- Required: You want to send a WhatsApp message to the customer so you need to selecto Yes
Click on Add.
Configure the webhook
Now you must connect Cal.com with 2Chat and for this purpose we'll use a flow previously created.
You can see a step by step tutorial on how to create a 2Chat flow triggered by a webhook in this link
For configuring in Cal.com click on Webhooks and next click on New webhook
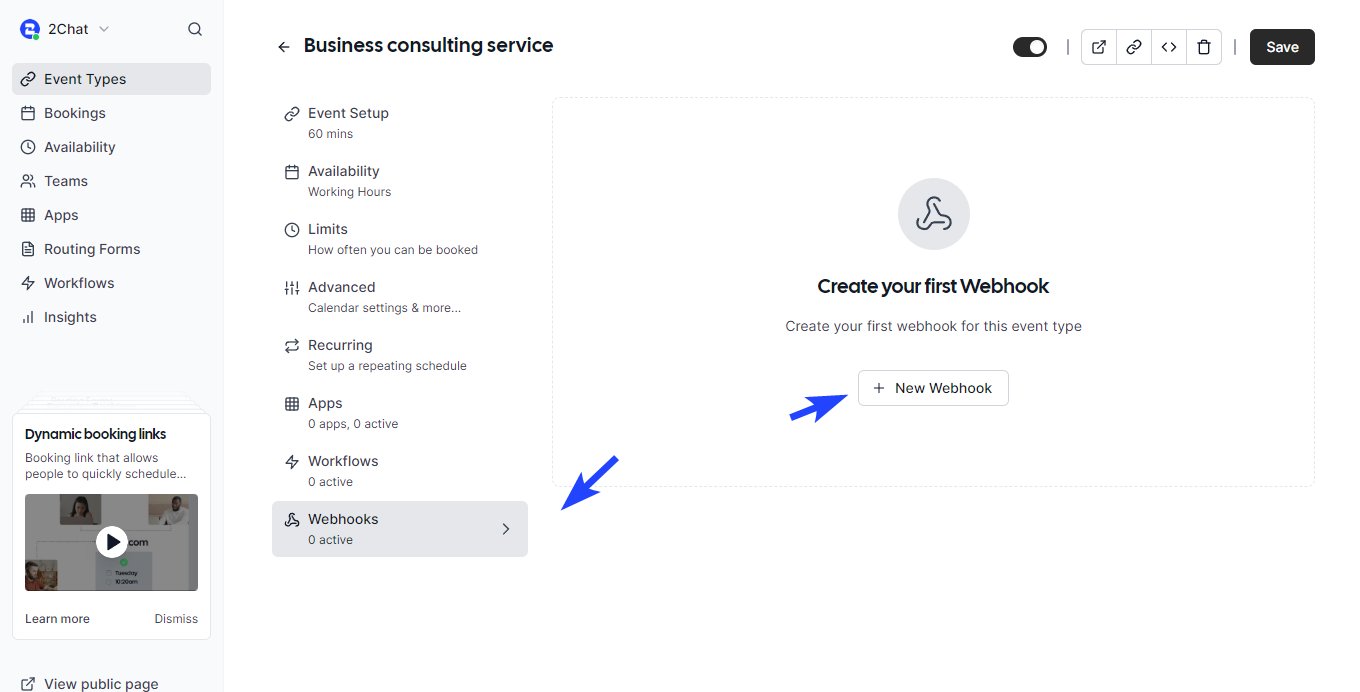
Go to 2chat and open the flow you created for receiving the webhook, copy the URL and paste it in the Subscriber URL field
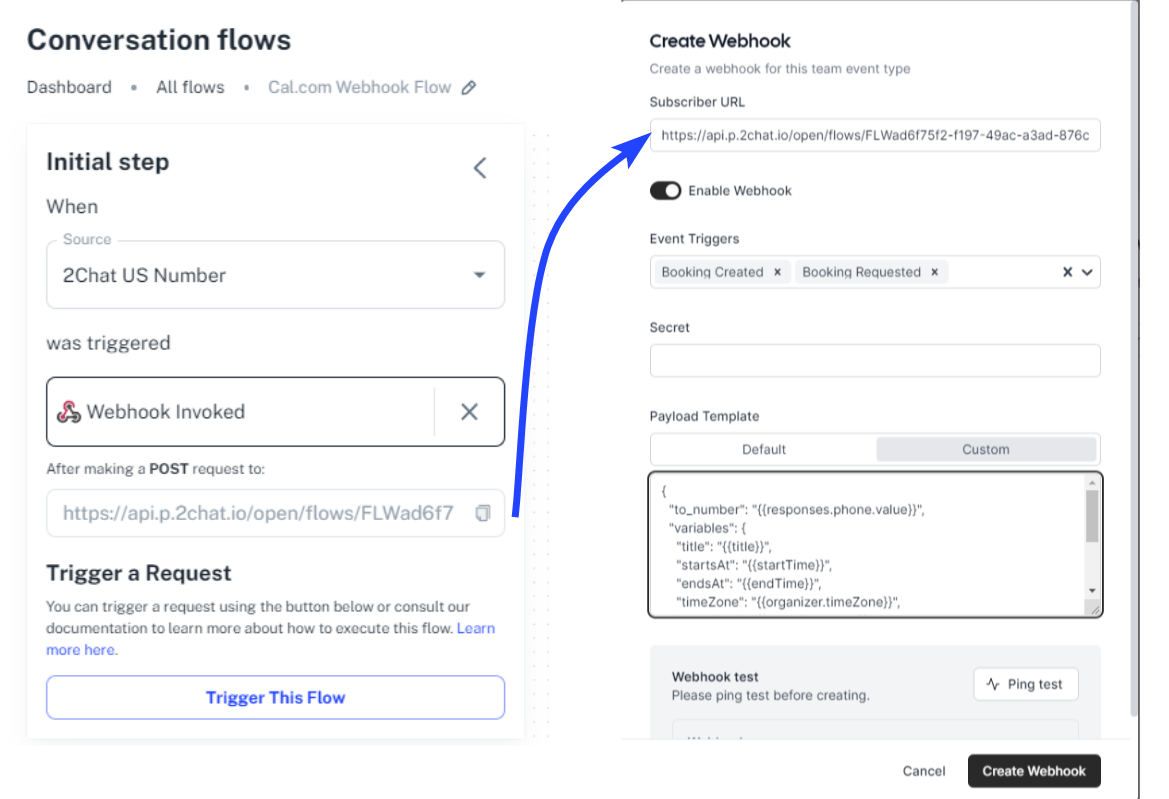
After inserting the URL, configure the other fields:
- Enable webhook: It must be enabled
- Event triggers: You must select the events when the webhook will be called. For this example we selected Booking Created and Booking Requested because we want to send a confirmation message to the customers WhatsAapp, but you could use the same process for other event triggers.
- Payload Template: This is the JSON request that will be sent from Cal.com to your flow in 2Chat. We will use this template, the values with double brackets {{value}} are fields provided by Cal.com when invoking the webhook:
{
  "to_number": "{{responses.phone.value}}",
  "variables": {
    "title": "{{title}}",
    "startsAt": "{{startTime}}",
    "endsAt": "{{endTime}}",
    "timeZone": "{{organizer.timeZone}}",
    "organizer": "{{organizer.name}}",
    "booker": "{{attendees.0.name}}",
    "description": "{{description}}",
    "email": "{{responses.email.value}}"
  }
}
The value {{responses.phone.value}} will return the phone number from the question we added previously. If you want to add other variables here you have other fields:
* description
* type
* title
* eventTitle
* startTime
* attendees[0].firstName
* attendees[0].lastName
* attendees[0].name
* attendees[0].timeZone
* attendees[0].language
* attendees[0].language.locale
* attendees[0].email
* organizer.timeFormat
* organizer.name
* organizer.timeZone
* organizer.language
* organizer.language.locale
* organizer.id
* organizer.email
* organizer.username
* responses.rescheduleReason
* responses.notes
* responses.notes.value
* responses.phone
* responses.phone.value
* responses.name.value
* responses.guests.value
* responses.location.value
* responses.location.value.optionValue
* responses.location.value.value
* responses.title
* responses.email.value
* endTime
When you have all set click on Create Webhook and next click on Save to create the Event Type.
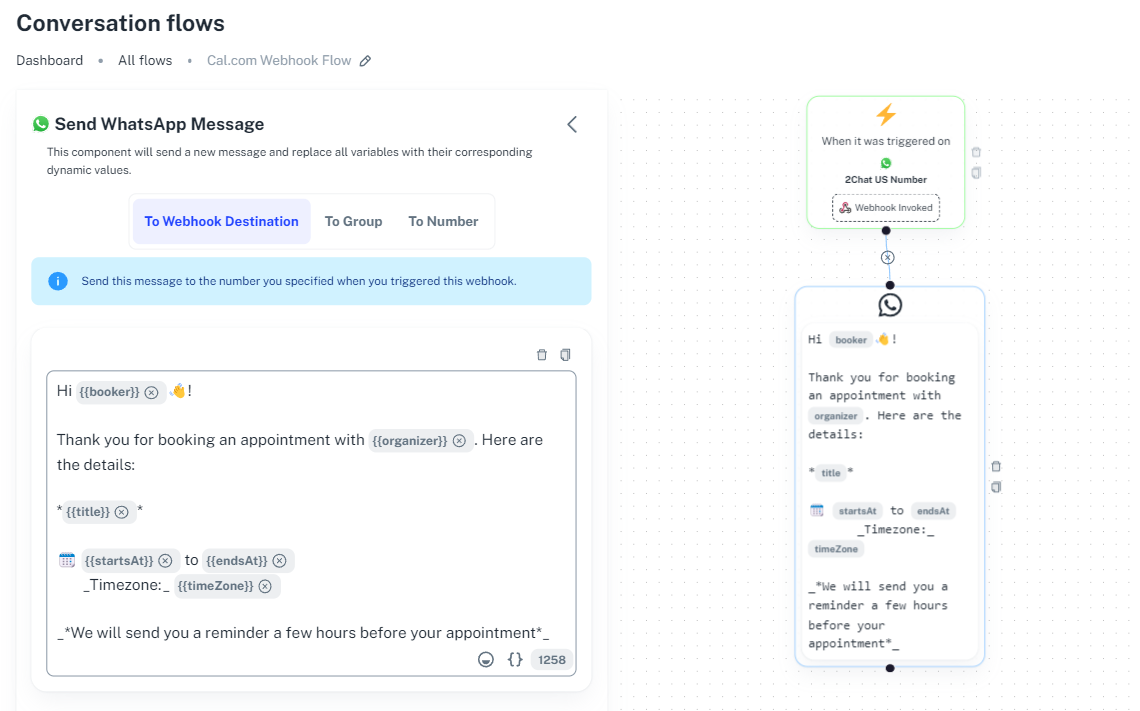
Create custom WhatsApp message
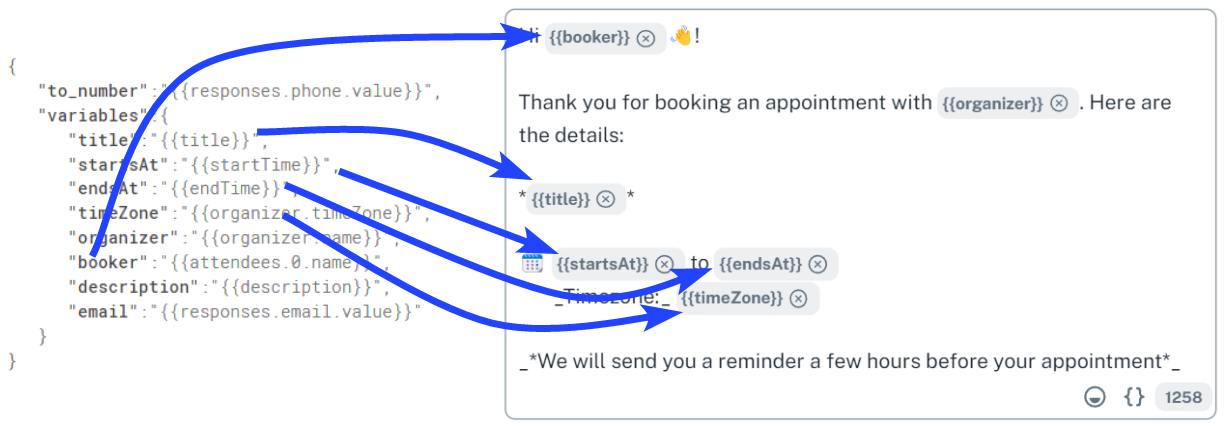
Now you go to 2Chat to configure the message the customer will receive after creating a new appointment. You can use this template and customize it:
Hi {{booker}} 👋!

Thank you for booking an appointment with {{organizer}} . Here are the details:

*{{title}}*

🗓️ {{startsAt}} to {{endsAt}}
       _Timezone:_ {{timeZone}}

_*We will send you a reminder a few hours before your appointment*_
Here you can see the mapping between the JSON sent from Cal.com and the WhatsApp Message
You can add the template in a Message component in the 2Chat flow
Now every new appointment created in Cal.com will send a message to the customer.