How to schedule WhatsApp messages
How to loop through a Google Sheet to find birthdays today, and send a custom WhatsApp message to each one we find.
In this tutorial, we will learn how to send WhatsApp messages automatically based on a date as the trigger.
For this example, we will be using Google Sheets and Zapier to trigger the automatic sending of happy birthday messages. Our integration will look every day at 9 am for birthdays, and depending on the current day and month combination will send a custom message we defined.
Requisites
- A 2Chat account. You can create one here.
- A Google Sheet with the data and dates.
- A Zapier account.
Our database: list of birthdays
We defined a simple spreadsheet on Google Sheets that contains the basic information we need. Among the most important fields are:
- First name: we will use this field to create our dynamic message.
- Phone number: we must store it using the international format.
- Birthday: a date field with the exact birth date.
- Month-Day: it's a calculated field we use to combine the month and day of the birthday. We will later use this value to determine if today matches the month and day stored in that field to retrieve the list of birthdays.
=CONCAT(CONCAT(Month(E2),"-"), Day(E2))- Custom message: another calculated field where we use the first name to create a more personalized message.
=CONCAT(CONCAT("Happy birthday, ", B2), ". I hope you enjoy your day!")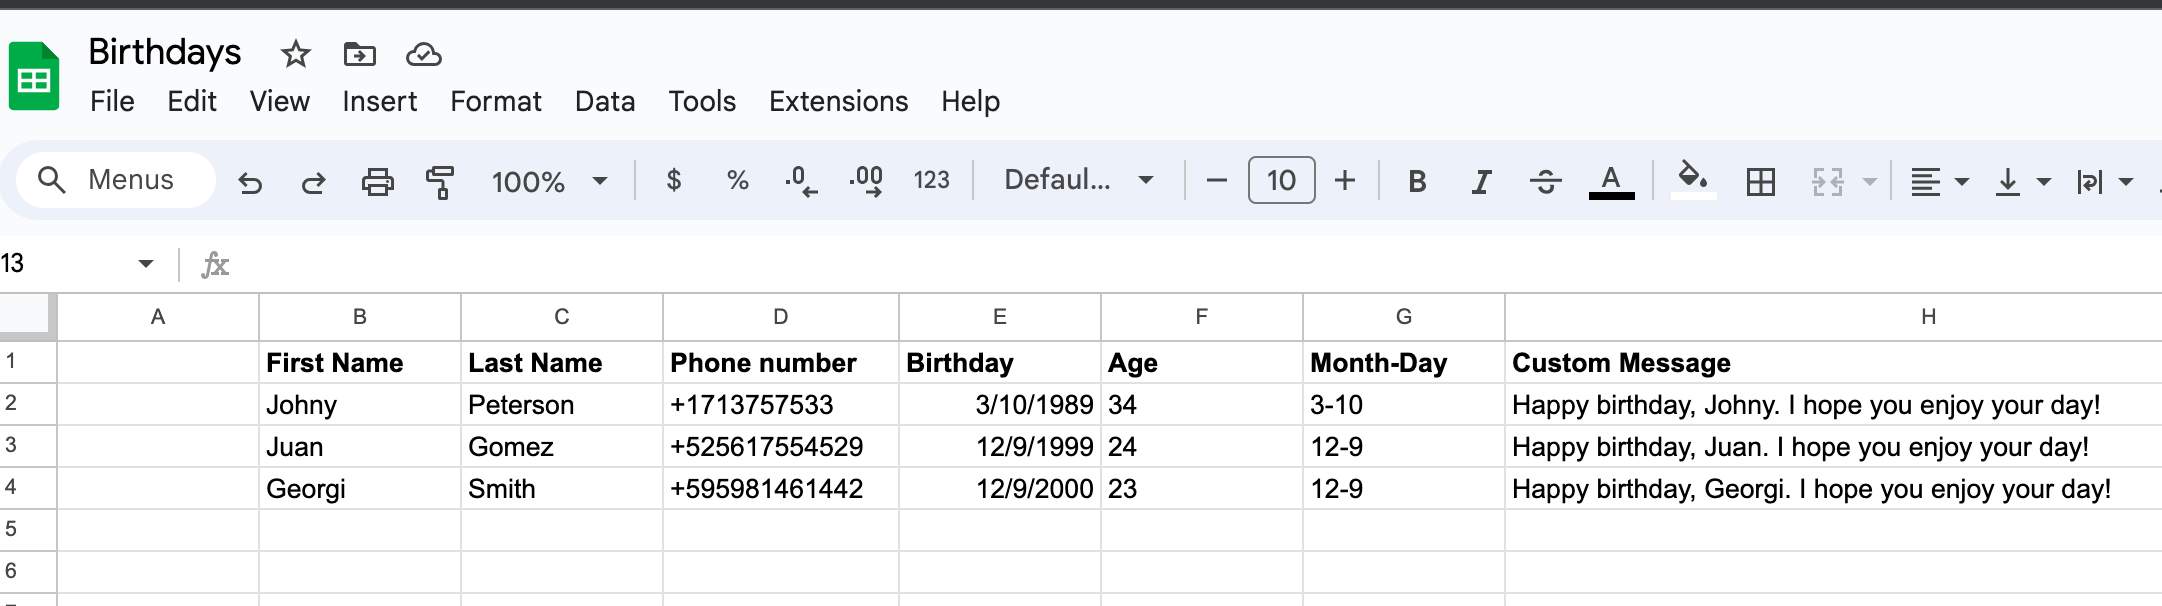
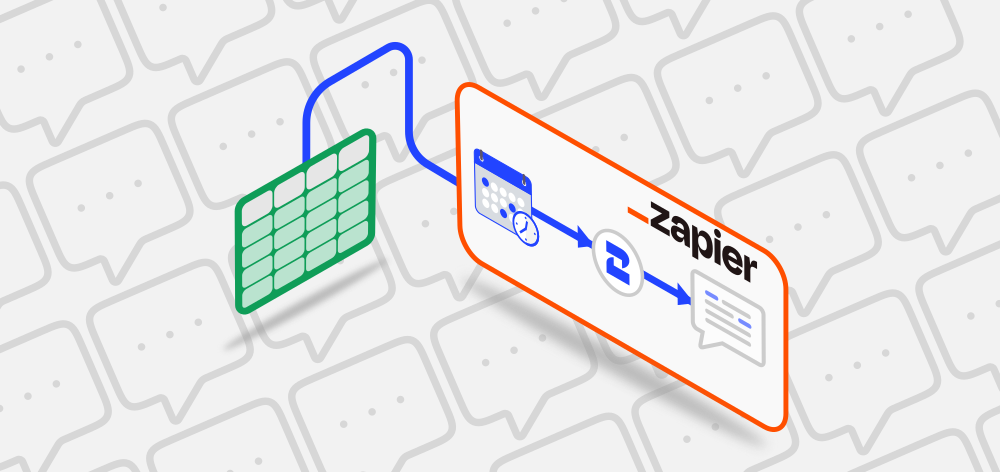
Sending a birthday message automatically
For this last part, we will use Zapier to check every day if there is a birthday, and if so, send our custom message for each one we find.
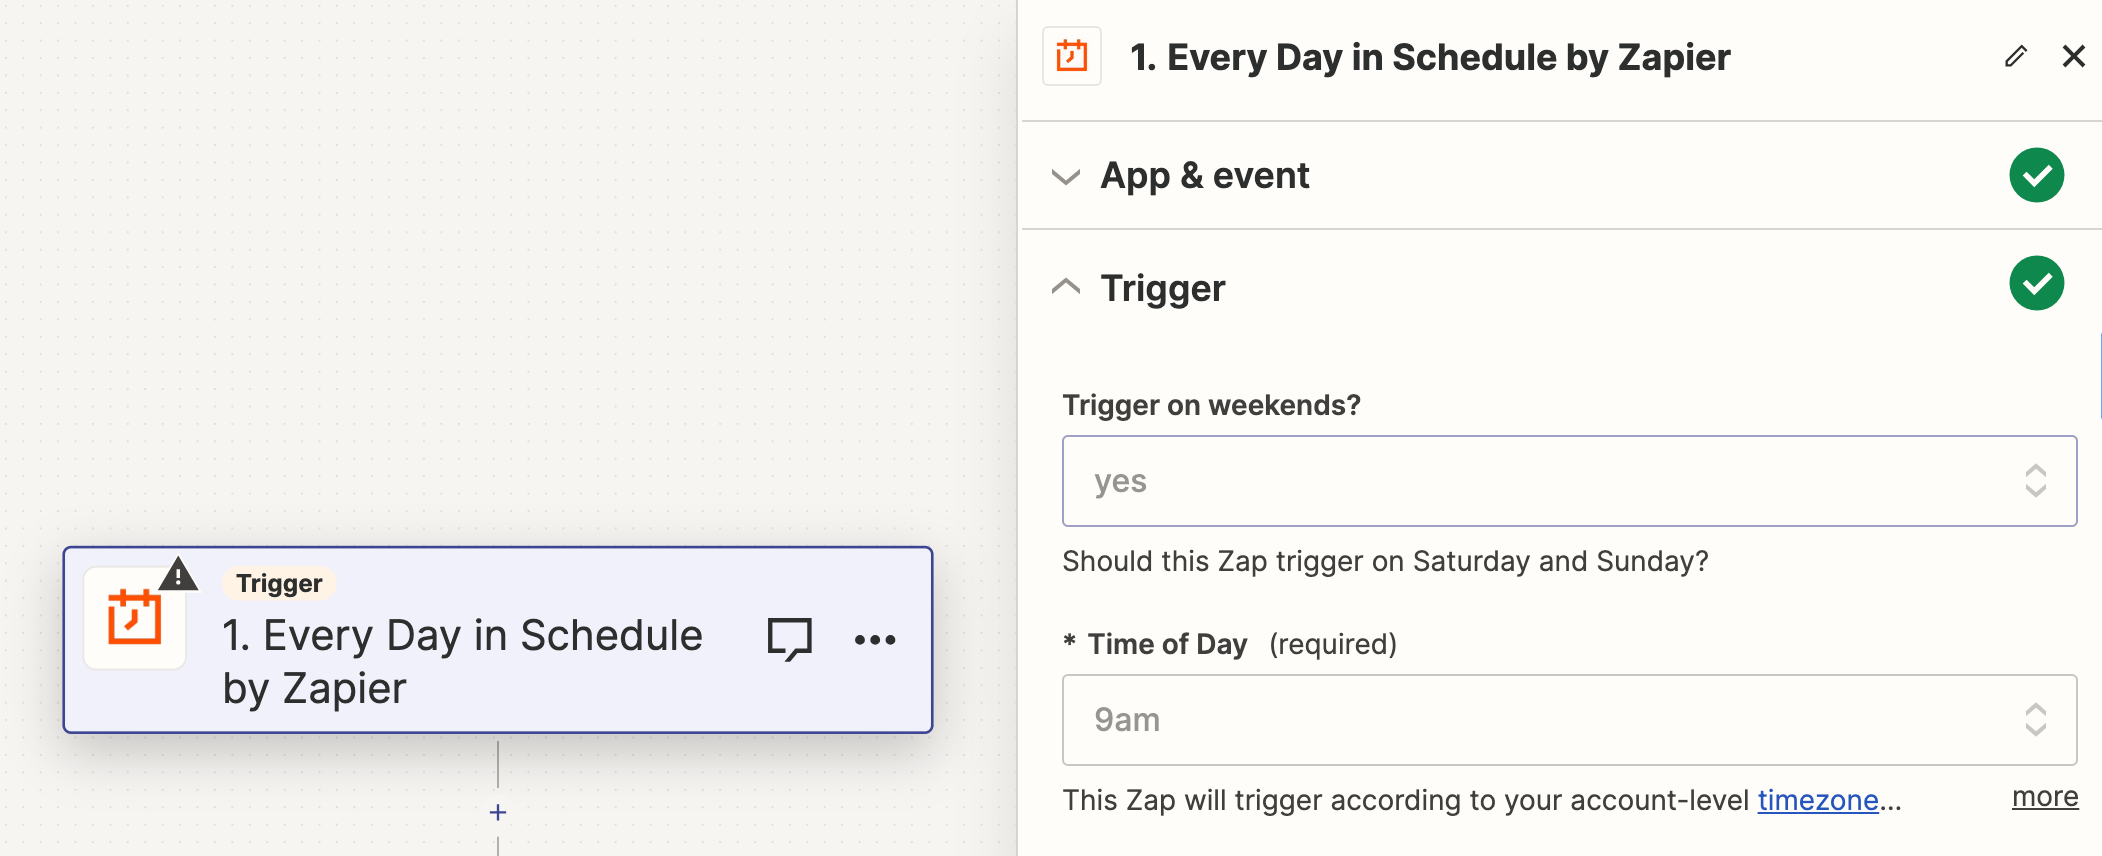
- Let's use the
Schedule by Zapiertrigger to run every day at 9 am.
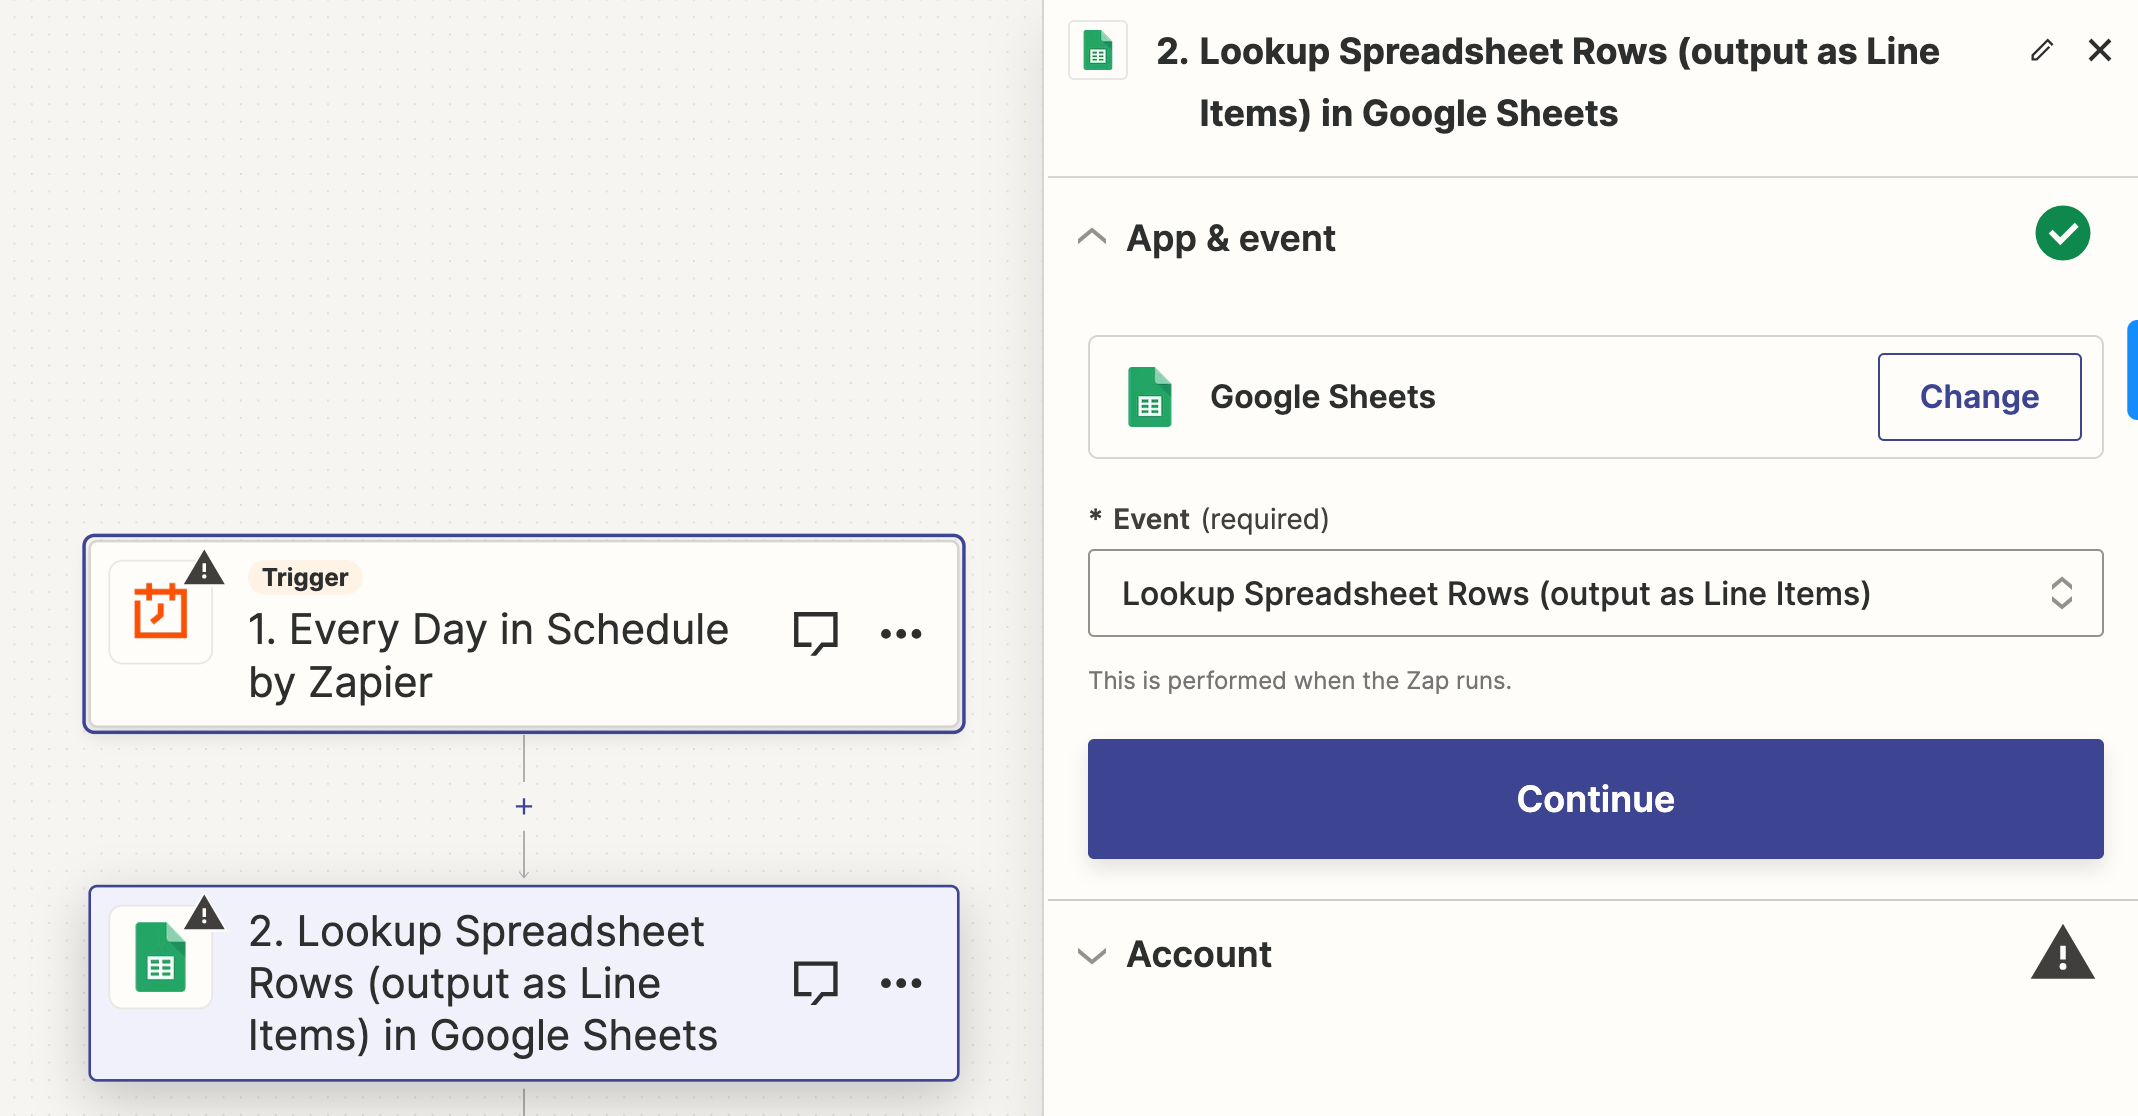
- We then choose Google Sheet's
Lookup Spreadsheet Rows, and select the birthday sheet we created before.
- We now need to configure the
Lookupaction by telling Zapier which field contains the value we are looking for. This is where our calculated Month-Day field comes into action.
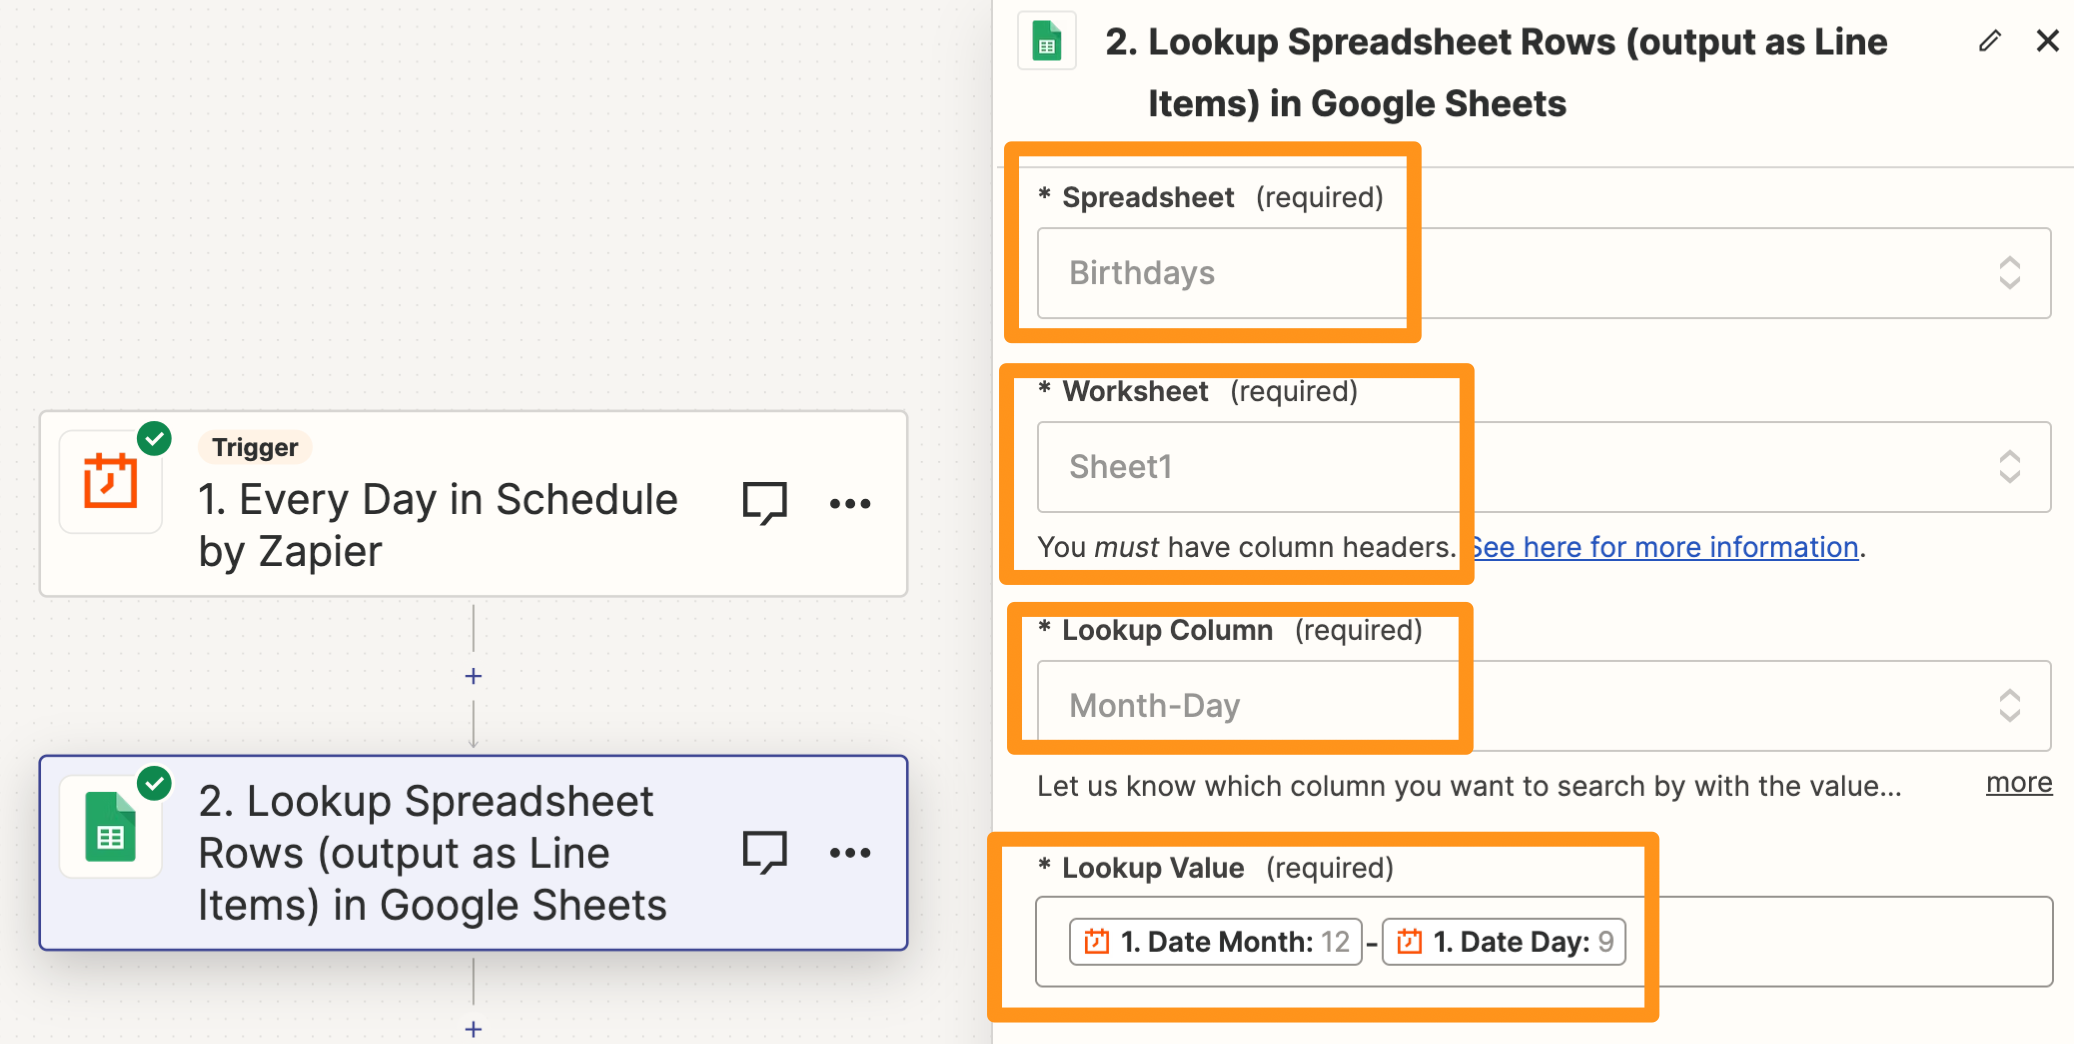
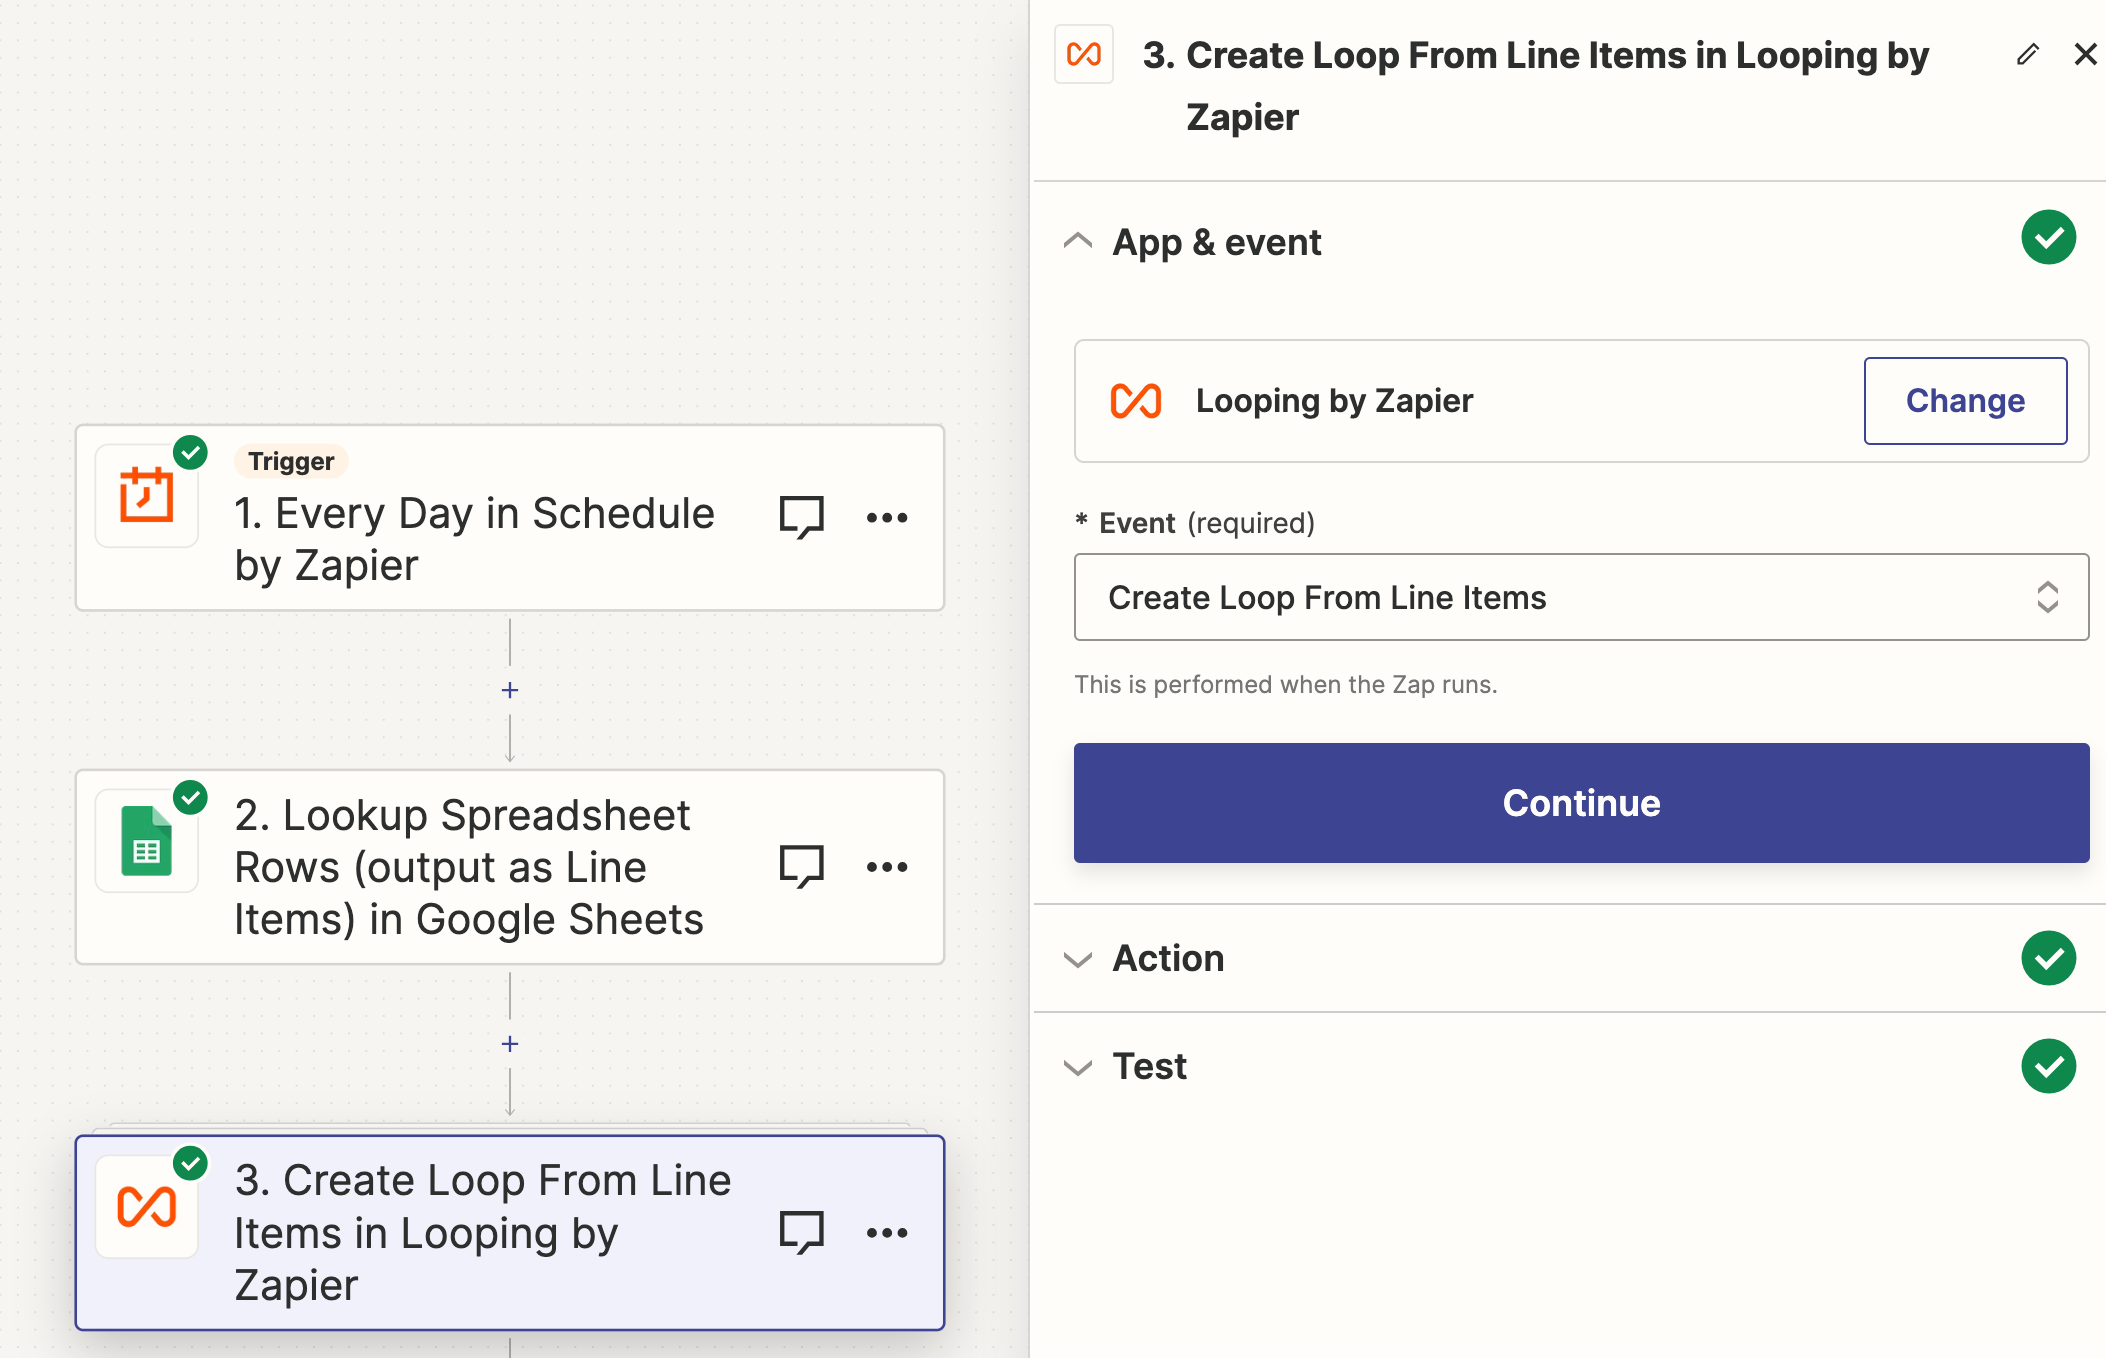
12-9 inside each row of the Month-Day column- Now we need to loop through each of the birthdays we found, and we will use
Looping by Zapierfor that.
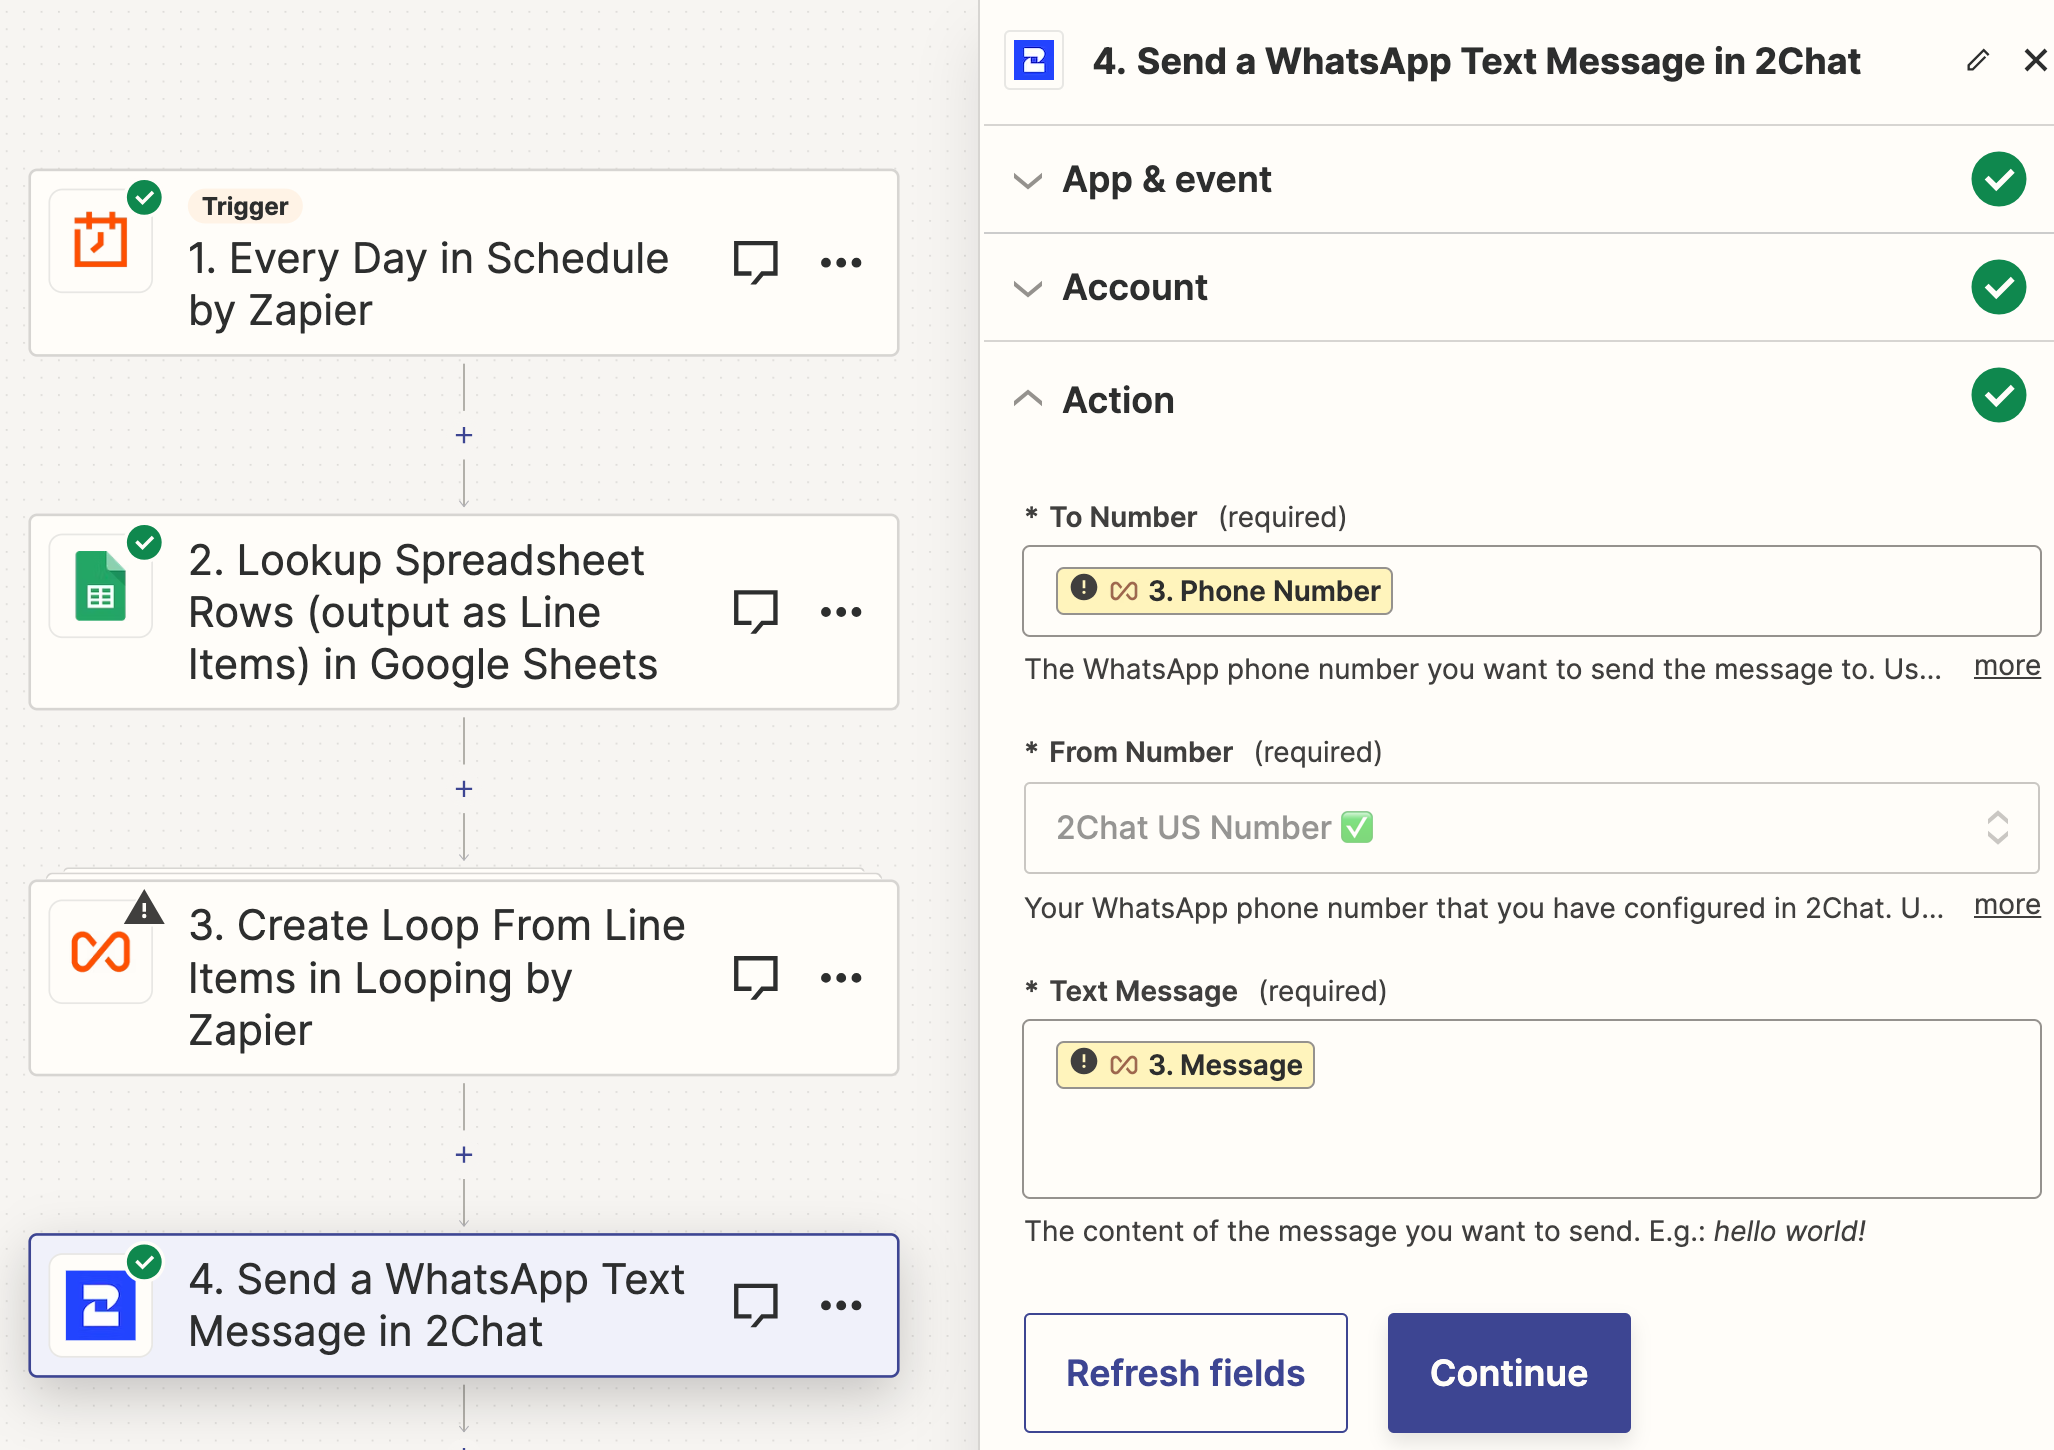
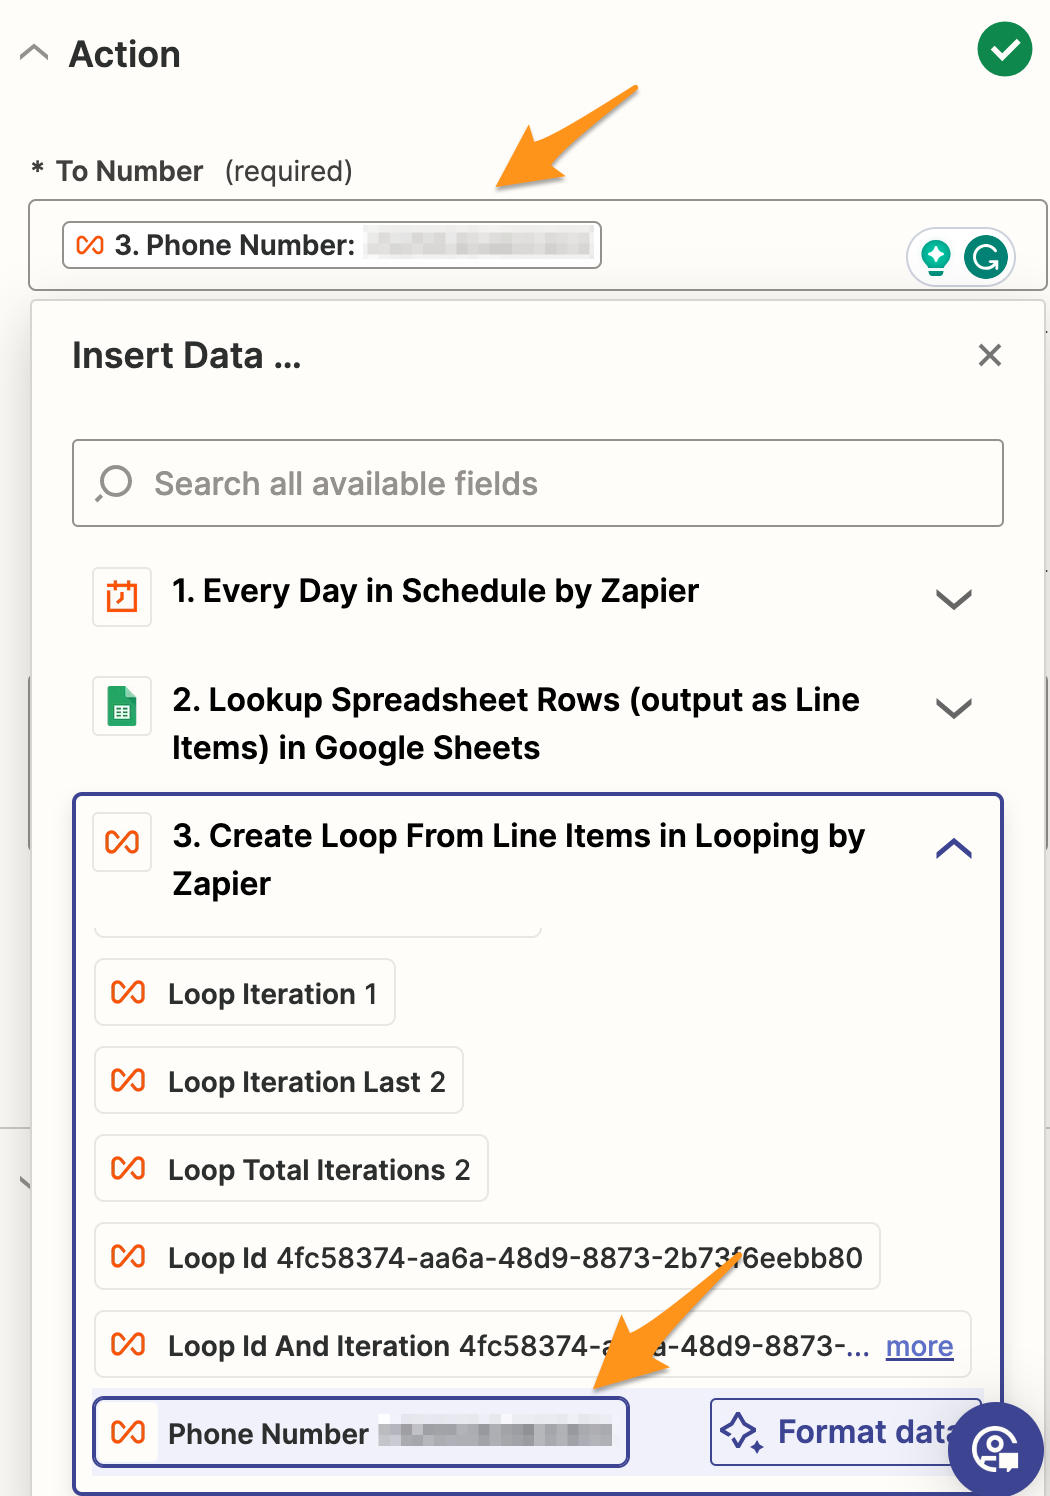
- Next, create an action inside
Looping by Zapierso that we can store the phone number and message fields into custom variables. We will need them to send the WhatsApp messages.
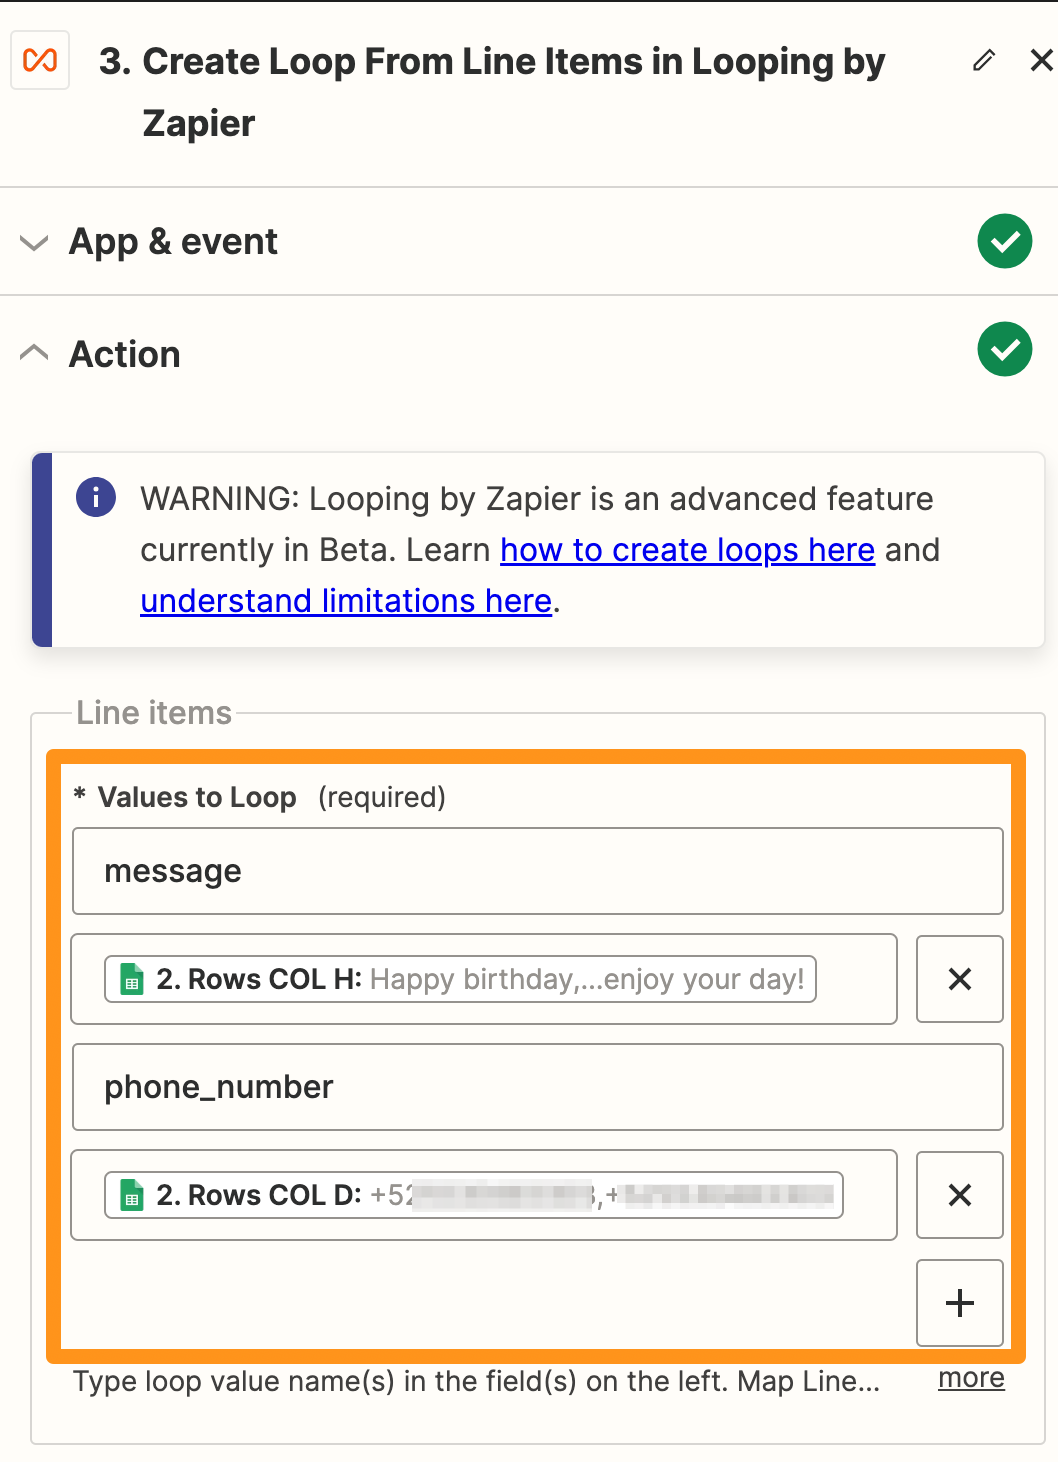
message and phone_number are our custom variables- The next step is to connect to 2Chat with
Send a WhatsApp Messageas action, and to use the variables we configured in the previous step for the To Number and Text Message parameters.
- Finally, click on continue, test the Zap, and set it live to start scheduling WhatsApp messages automatically.