How to add a floating WhatsApp button to your Webflow page
Learn how to install a floating WhatsApp widget in your site without having to code any HTML

You will first need to generate the HTML code that allows your site to display this button. To do this, we have created a free tool that lets you configure the button using a visual editor which is much easier than having to manipulate markup code when you are not a developer.
Getting the HTML code
- Go to our free WhatsApp Widget Generator page.
- Personalize the button to reflect your brand, adding a custom status and greeting message to the button.
- Copy the generated code to the clipboard. You will need it for the next step.
0:00
/
Install the button on your Webflow site
- Log in to your Webflow account and go to the dashboard.
- Find the site to which you want to add the WhatsApp contact button, then click on settings.

- Navigate to the Custom Code tab.
- Then paste the code into the editor and click on Save Changes.
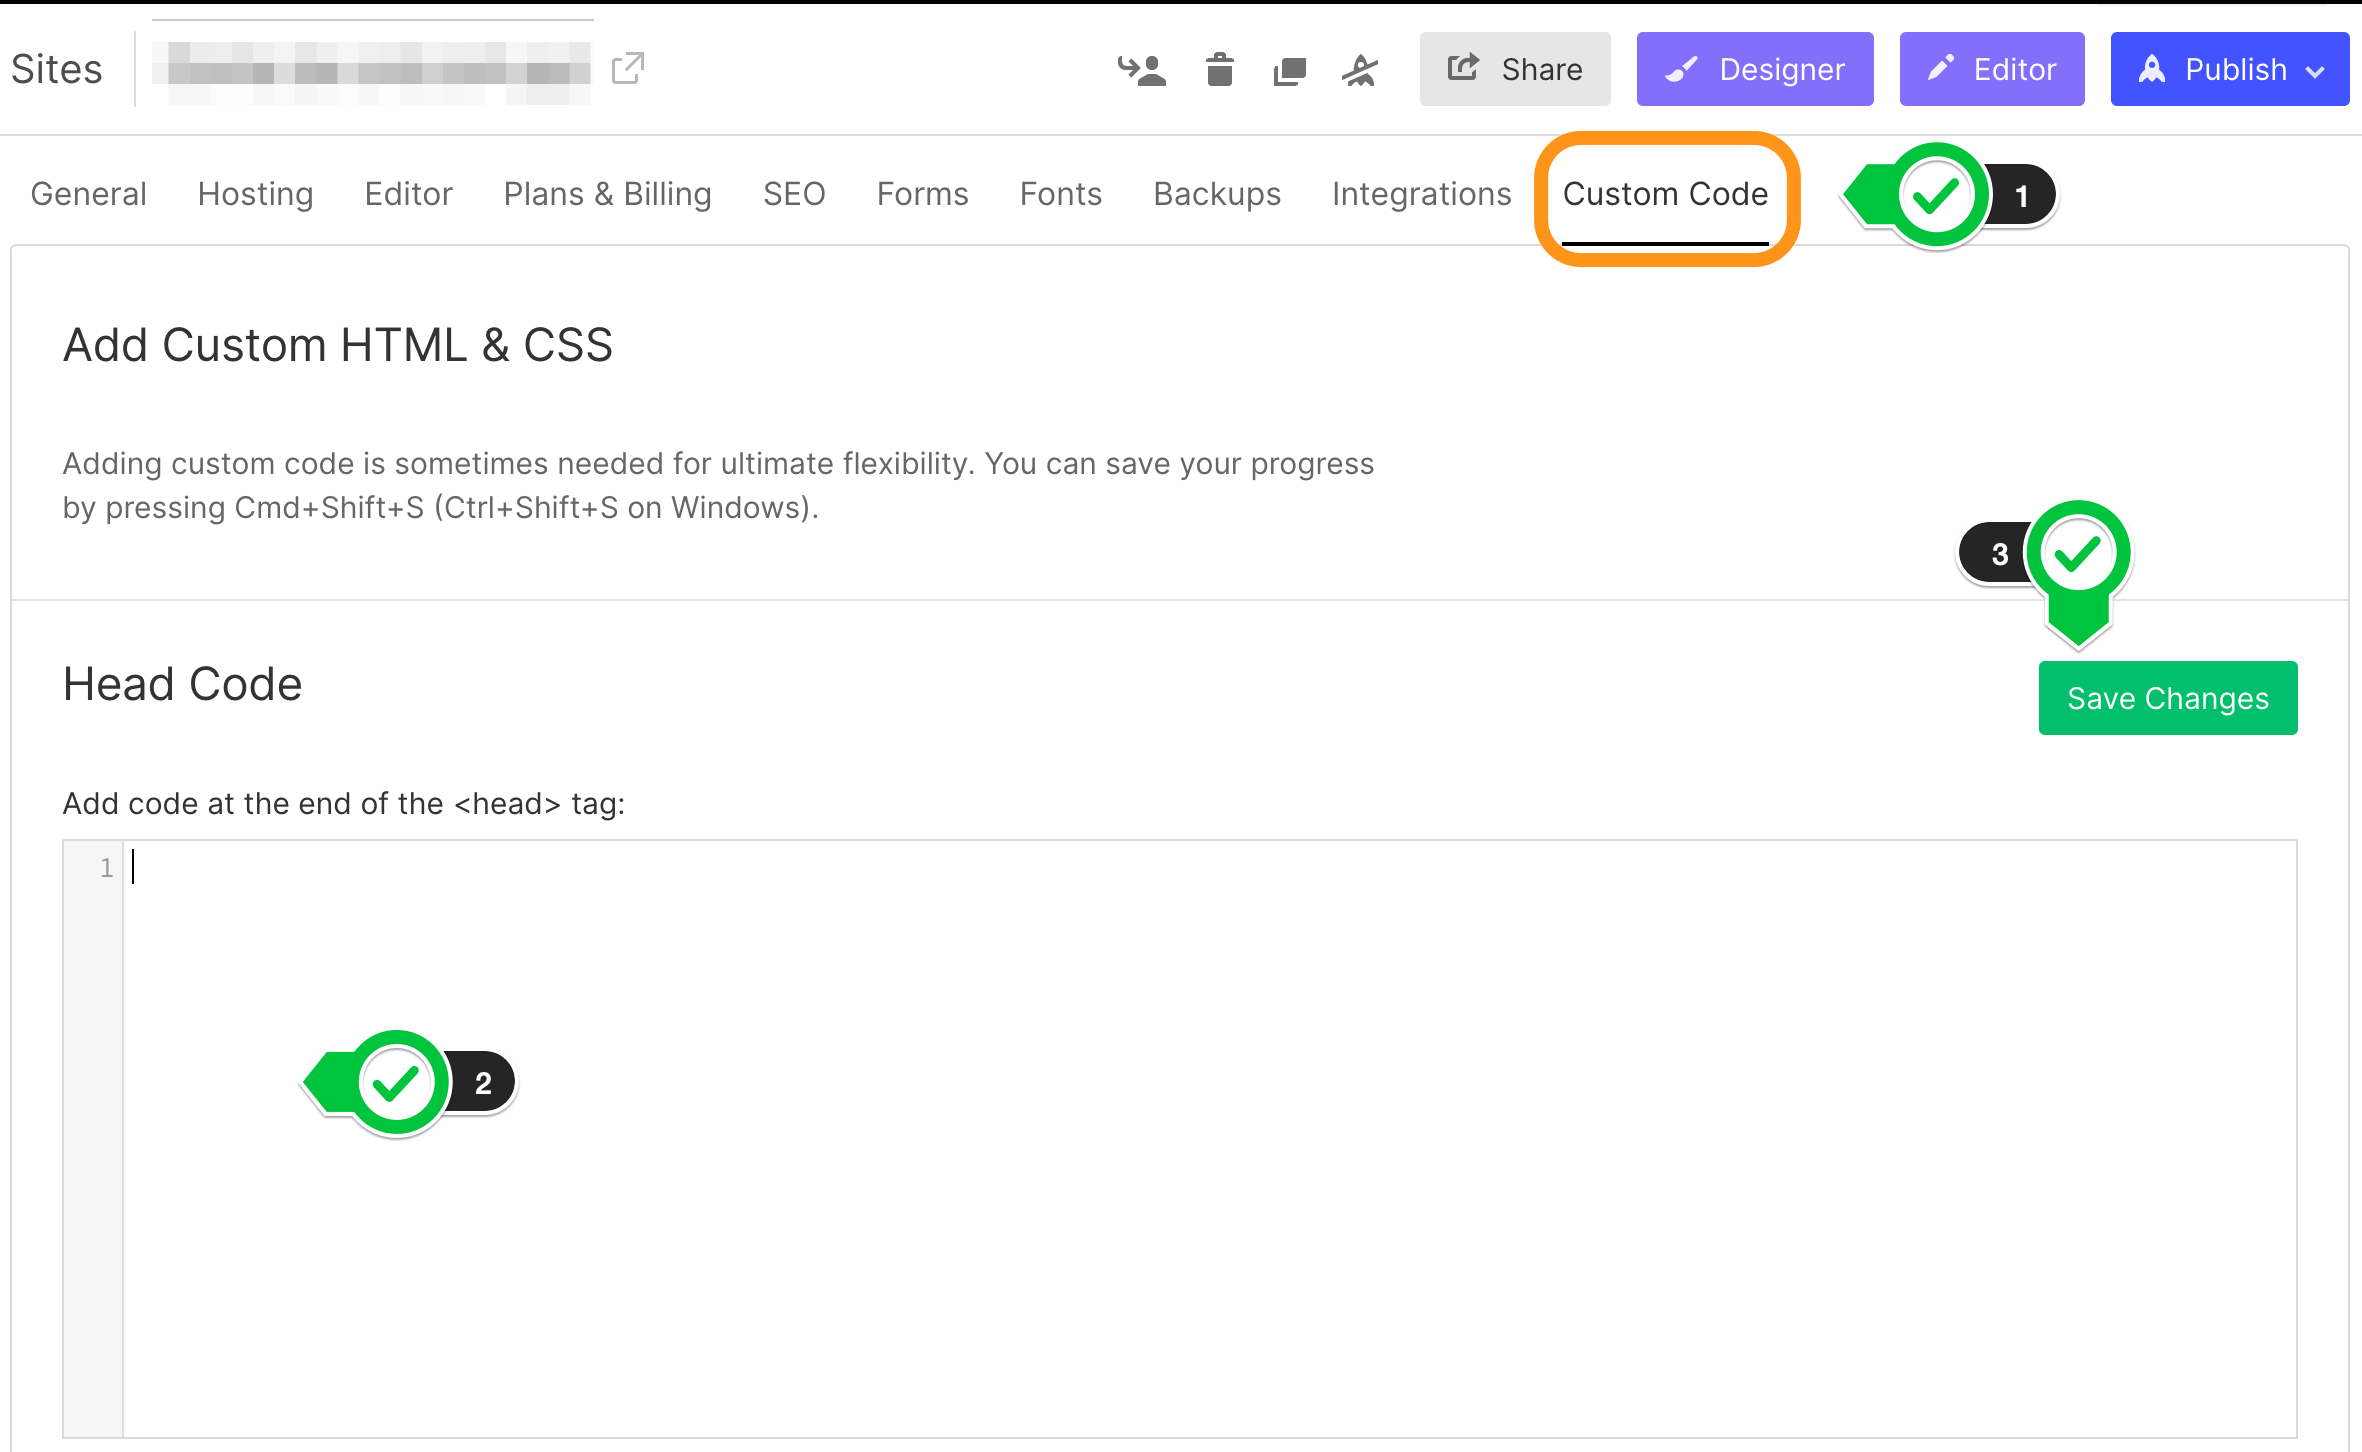
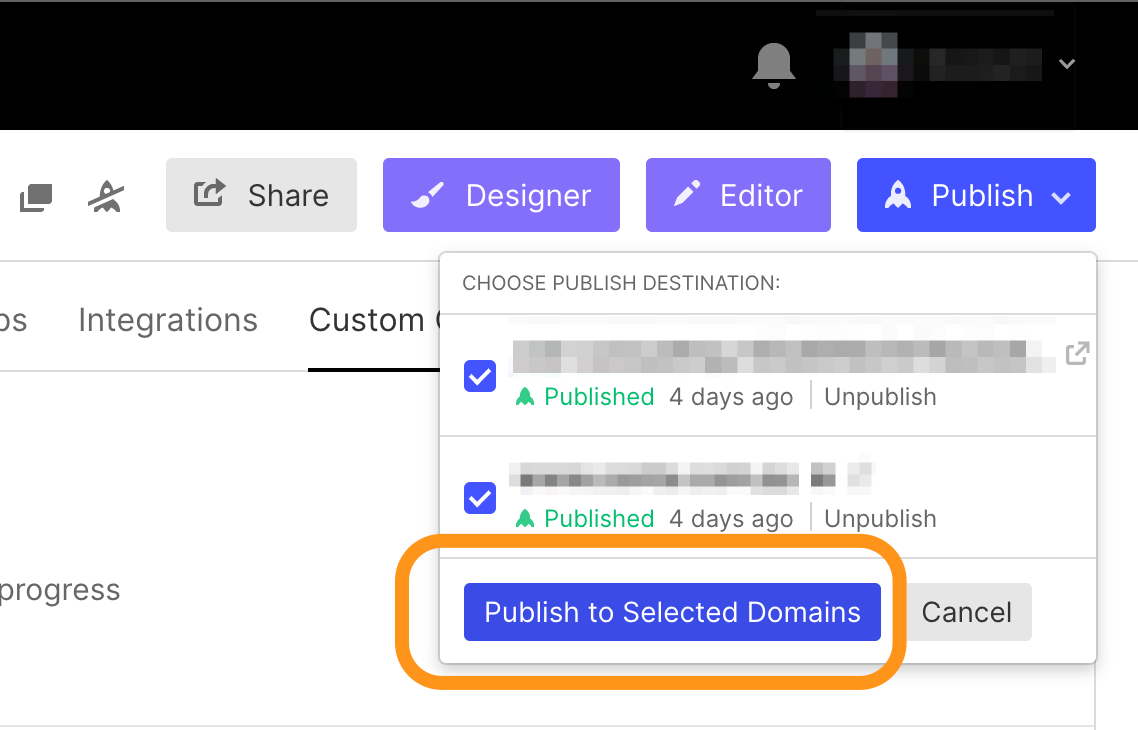
- Finally, publish the page with the latest changes you made and you should be able to see your new button appearing on the site to all your visitors.
This tutorial is not only valid for Webflow. You can install the same HTML code in your site powered by Wix, Shopify, WooCommerce, WordPress, and essentially, any type of site.
Now that you have a WhatsApp button on your site, you may also need a way of automating that channel. You can do exactly that with 2Chat!