Transform Your Knowledge into a WhatsApp Chatbot: A Guide Using n8n and 2Chat
Learn to create a chatbot with N8N in minutes. Use your knowledge and WhatsApp to set up an efficient and fast chatbot service. Download the template and get started now!
In this blog post, we’ll walk you through the process of creating a chatbot service using N8N. With the help of a flow template provided by 2Chat, you can set up your chatbot in just a few minutes. Let’s dive in!
Try our official n8n node
Step 1: Create a New Workflow
To get started, create a new workflow in n8n. This will serve as the foundation for your chatbot service.

Step 2: Import the Flow Template
To make things easier, import the n8n flow template provided by 2Chat. You can find this file in the related blog post or video description. The flow template consists of two main parts: one for importing the knowledge base and the other for the chatbot itself.
 2ChatCo
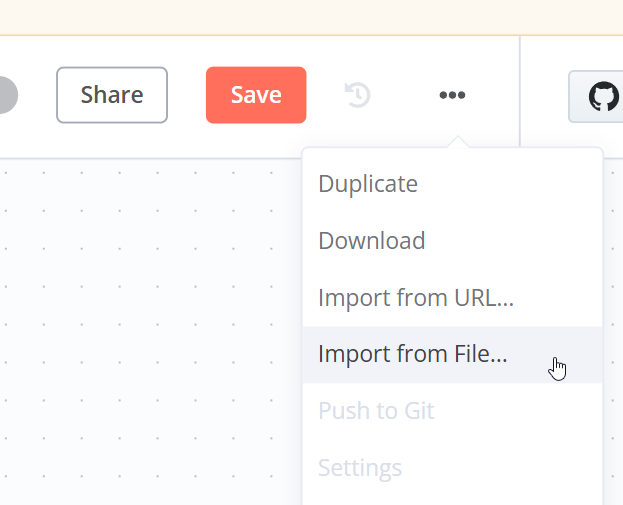
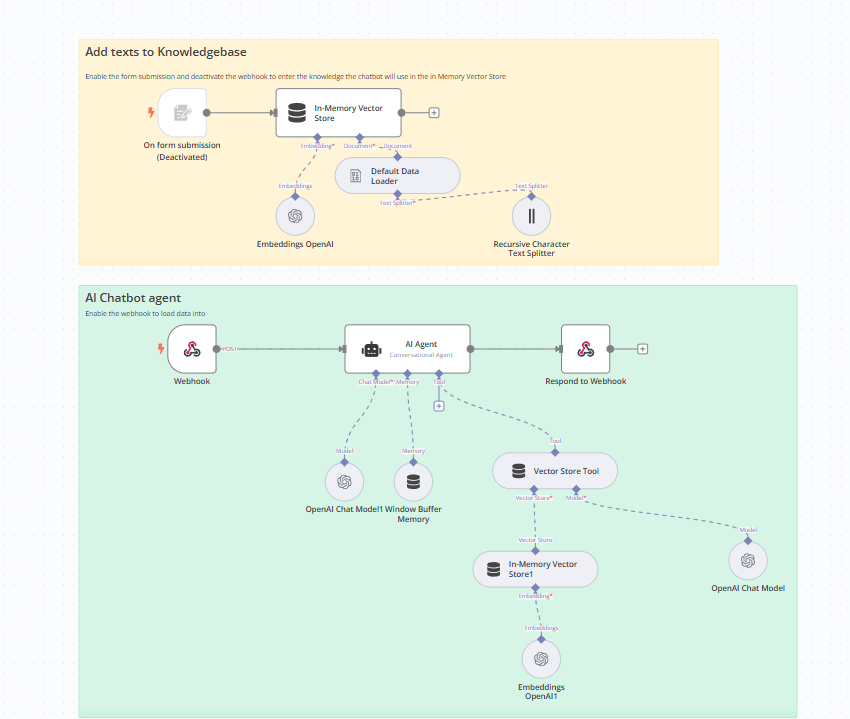
Step 3: Configure the Knowledge Base
We’ll use a form submission to provide the knowledge base for our chatbot. This is perhaps the easiest way to input the necessary information.
Configure the credentials for every OpenAI task. In the embedding task, select the desired model. For this example, we’ll use the small model.
The knowledge base will be stored using the flow’s memory, with the word “knowledgebase” as the memory key. The template also includes a default data loader, which will load the data from the form submission into the vector database. The data file will contain the text sent from the form submission task.
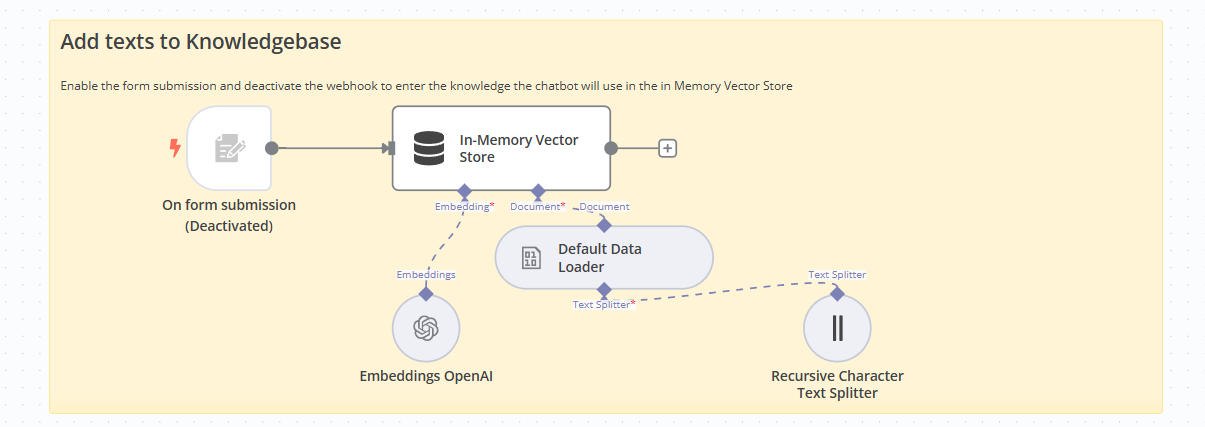
The text splitter divides the text into chunks that the AI will use later. In this case, we’ll use 1,000 characters with a 100-character overlap.
Step 4: Load the Data
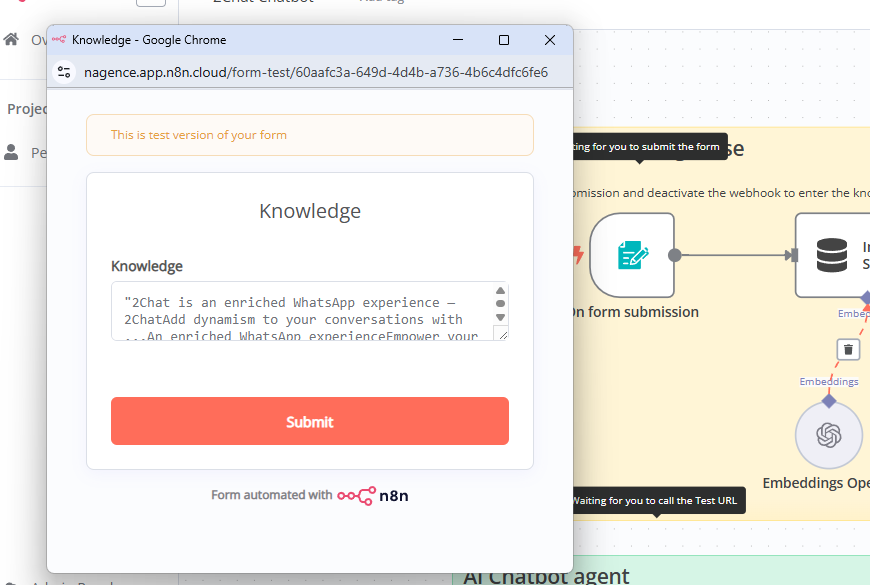
Now, let’s load the data into our chatbot. First, disable the webhook trigger and enable the form submission component. Click on “Execute Workflow” to display the form used to input the text that the chatbot will utilize as its knowledge base.
Paste your text into the form and click on “Submit.” You’ll see the flow processing your knowledge base. Once the process is complete, you can close the form and proceed to the AI chatbot section.
Step 5: Configure the AI Chatbot
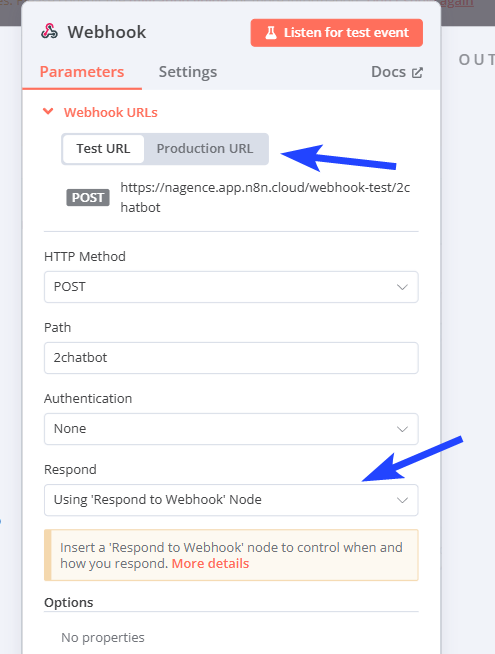
Ensure that the form submission is disabled and the webhook is enabled. The webhook displays the URL that we’ll use from the 2Chat flow. In this example, we’ve used 2chat as the path, but you can choose a shorter word that better describes your web service.
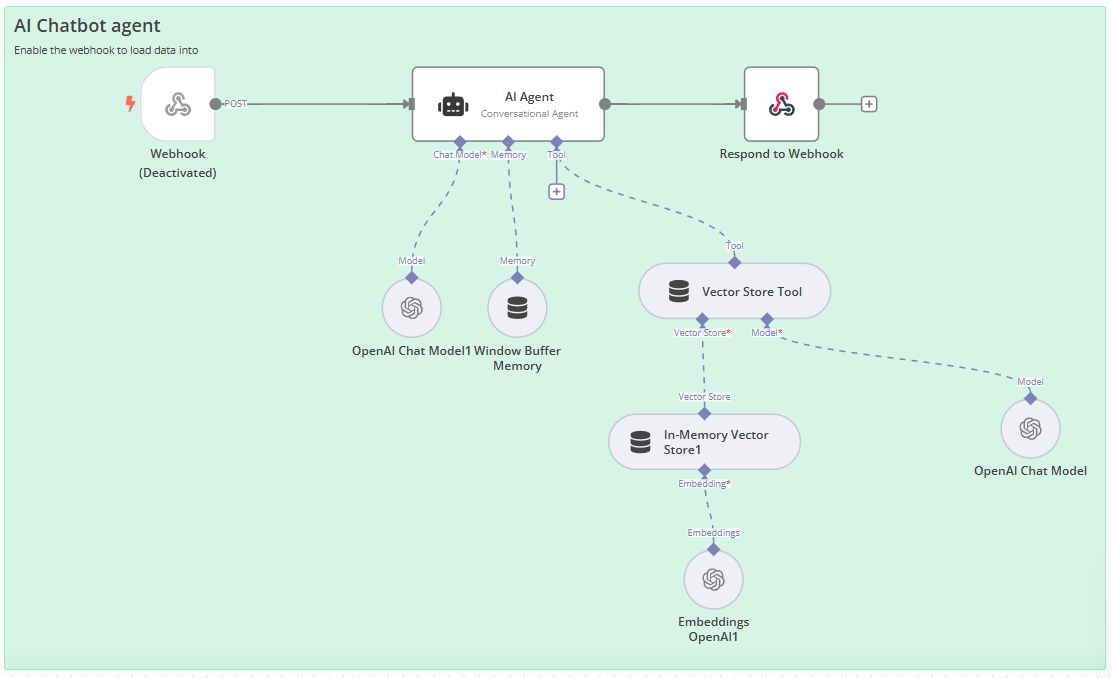
In the “Respond” field, select “Using Respond to Webhook Node.” Now, let’s take a look at our AI agent.
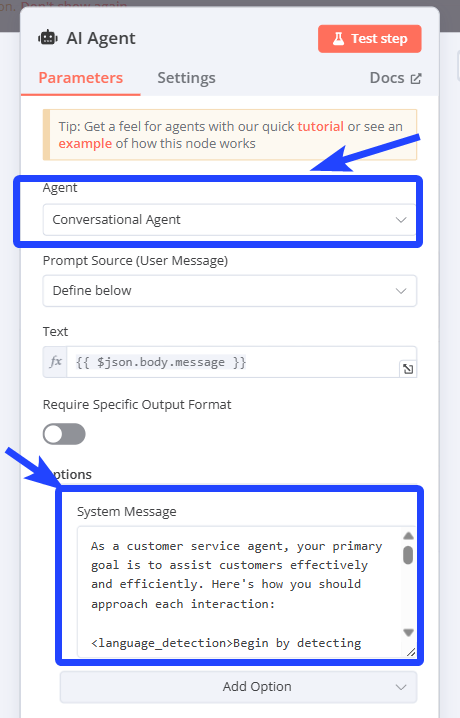
It’s configured as a conversational agent, with the text field associated with the message field in the webhook request. The system prompt instructs the AI agent on its behavior and how to respond to user inquiries. Feel free to modify the base text as needed.
Step 6: Connect the OpenAI Model and Configure Memory
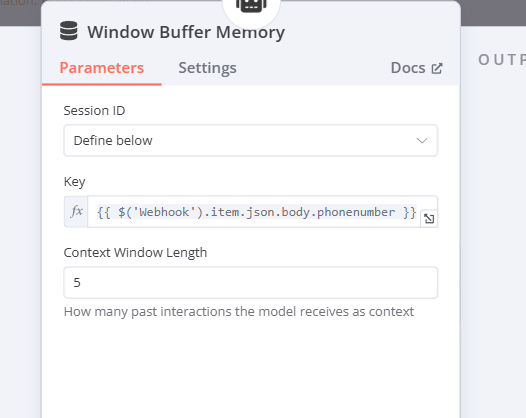
Connect the OpenAI model to the agent. To enable the agent to maintain a conversation, we’ll use the window buffer memory. In this example, we’ll use the phone number as the session ID and set a context window of five. This determines the amount of chat history the agent will retain for subsequent questions.
Step 7: Add a Tool for the Agent
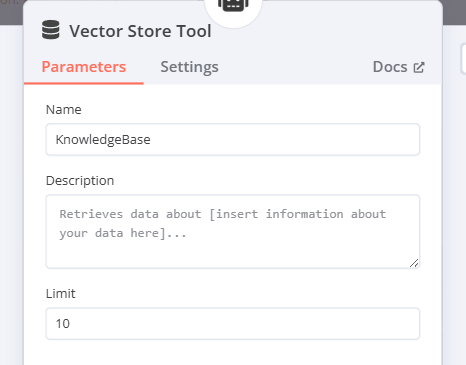
Next, we’ll add a tool for the agent. In this case, it will be the vector store. The limit in our vector store ensures that only the relevant chunks of the knowledge base are returned, aiding the AI in answering user questions.
Connect the in-memory vector store and utilize the knowledge base loaded at the beginning. Ensure that the memory key is identical to the one used to load the text. Configure the AI embeddings using the same model employed to load the data, and configure the LLM.
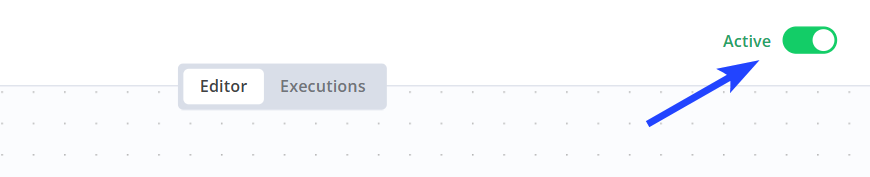
Step 8: Activate your n8n flow
Activate the n8n flow before the following steps
Step 8: Configure the Webhook and Test the Chatbot
The “Respond to Webhook” node has the JSON structure that will be used in 2Chat. After saving and enabling the workflow, you’re ready to test your chatbot.
Open the webhook component and copy the production URL. In 2Chat, create a flow with the following configuration:
Configure the flow trigger by selecting the phone number and using “Message Received” as the event.
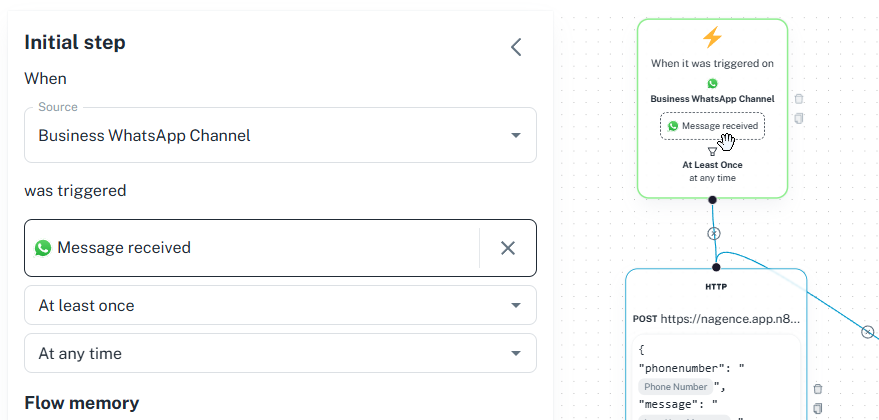
Add an HTTP component and paste the production URL copied from n8n.
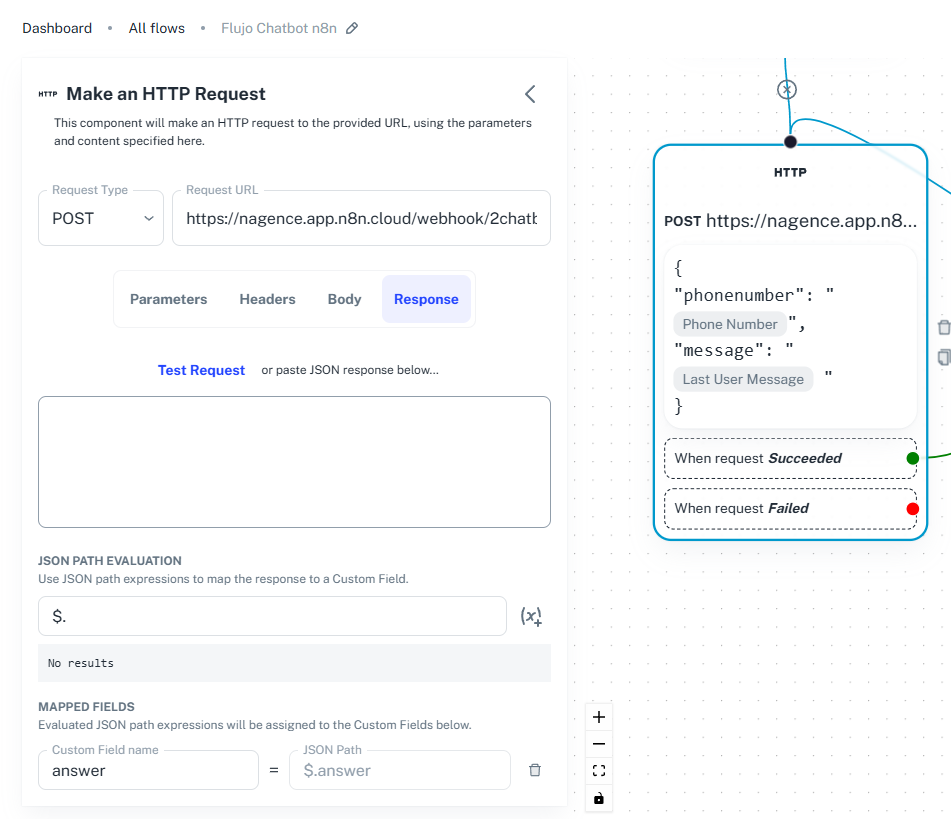
For the body, send the following structure and add the last user message and the phone number.
{
    "phonenumber": "{{wa.phoneNumber}}",
    "message": "{{message}}"
}
As a response, try the created webhook in n8n. This will return the AI-generated text in a variable called “answer.”
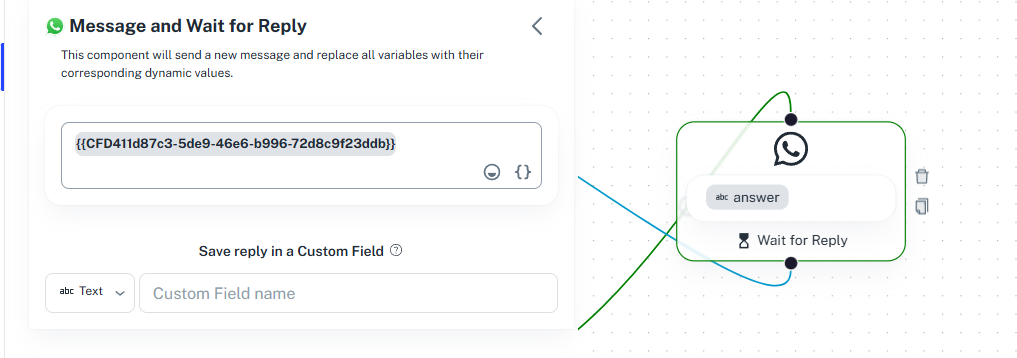
In the final component, “Message and Wait for Reply,” incorporate the answer variable. Ensure that this component is connected to the green port on the HTTP component and link the flow component back to the HTTP to establish the conversation loop.