Boost Business Efficiency: How to Forward WhatsApp Messages to Email Seamlessly
Learn to forward WhatsApp messages to email for better productivity and customer service. Monitor product questions, trigger emails for critical complaints, and send order updates easily.
You can forward WhatsApp conversations to your email in various strategic scenarios, such as monitoring product-specific questions or triggering emails when critical complaint keywords are detected. This approach allows you to centralize important communications, ensuring no vital information slips through the cracks. Additionally, you can automate sending specific information to a customer's email, such as order status updates or responses to help requests, enhancing both efficiency and customer satisfaction. By integrating these practices, you can streamline your communication workflow and provide a more responsive and organized customer service experience.
How to forward a Whatsapp message to your inbox
You will need this:
- 2Chat Account with a phone number connected
- A Sendgrid account with access to the API and a verified email
Getting your SendGrid API key
Login to your SendGrid account and follow these steps:
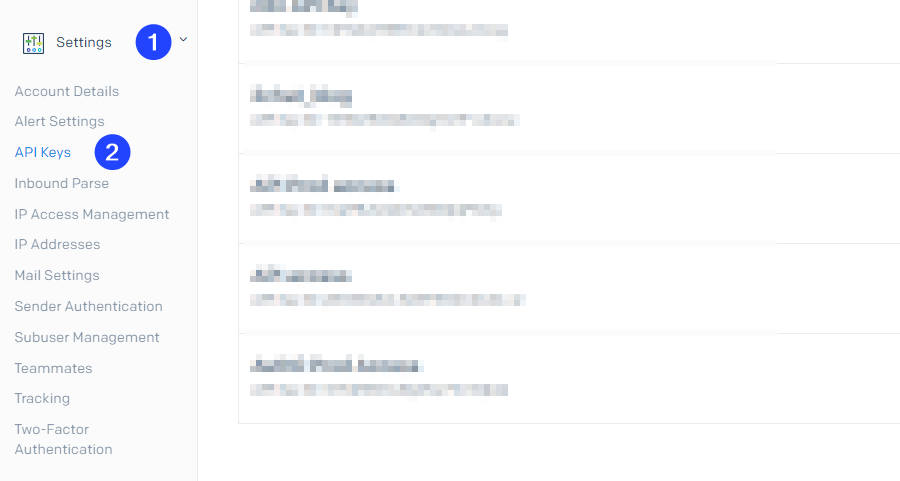
- Go to the Settings section on the left navigation bar and choose API Keys.
- Click on Create API Key.
- Assign a name to your API key.
- Choose between Full Access, or Restricted Access with Mail Send permissions.
- Click Create & View.
- Save your API key securely, we will use it later from 2Chat.
Configure the WhatsApp flow automation in 2Chat
In this case, we will send the email to our account if a specific word is mentioned, feel free to adapt the same process for your own use case.
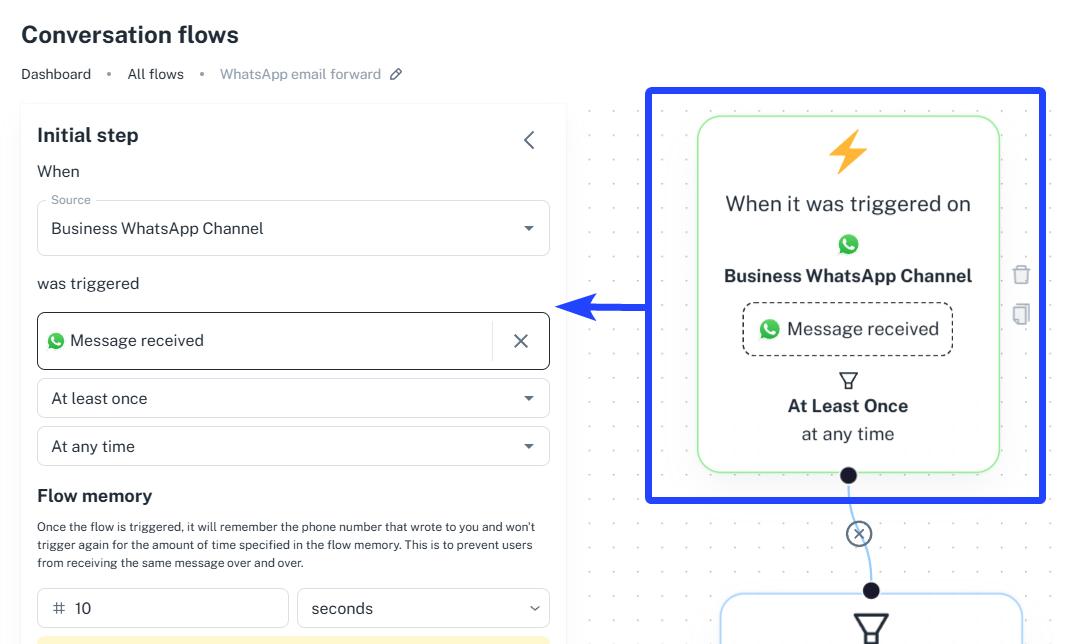
Login to your 2Chat Account and create a new flow. Configure the initial step as Message Received and select the phone number as source
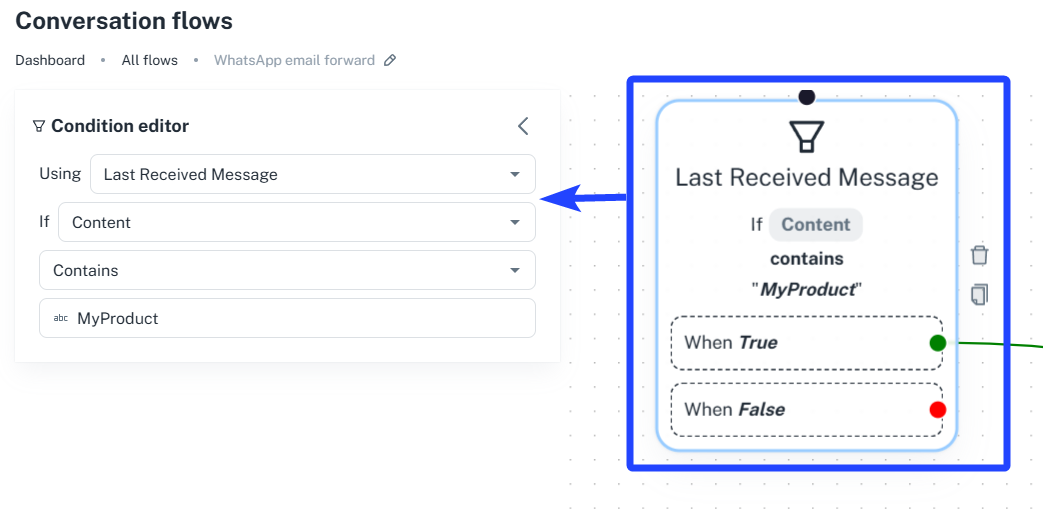
Add a Condition flow component and link it to the initial step. Configure the condition using Last Received Message and if the Content contains your keyword, in this case "MyProduct".
Now the critical step, add an HTTP Request component, here we will make several configurations. Let's see this sample CURL request to the SendGrid API taken from the SendGrid documentation.
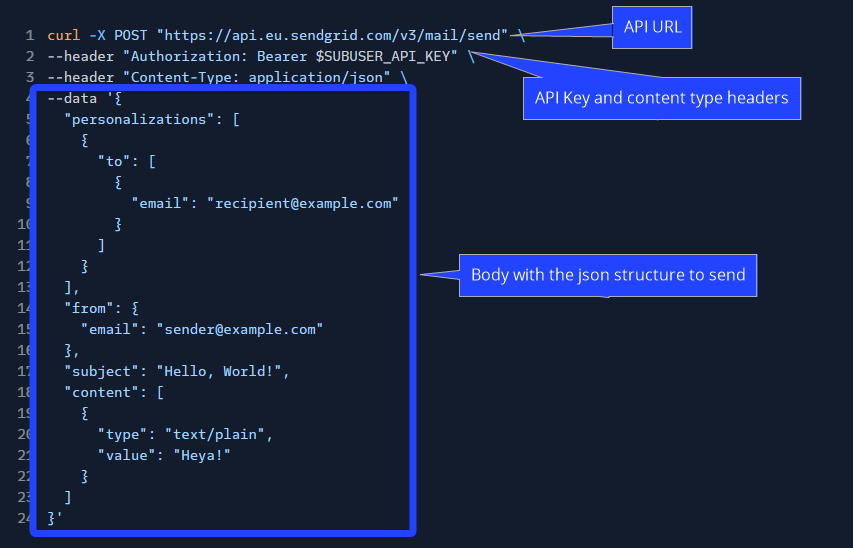
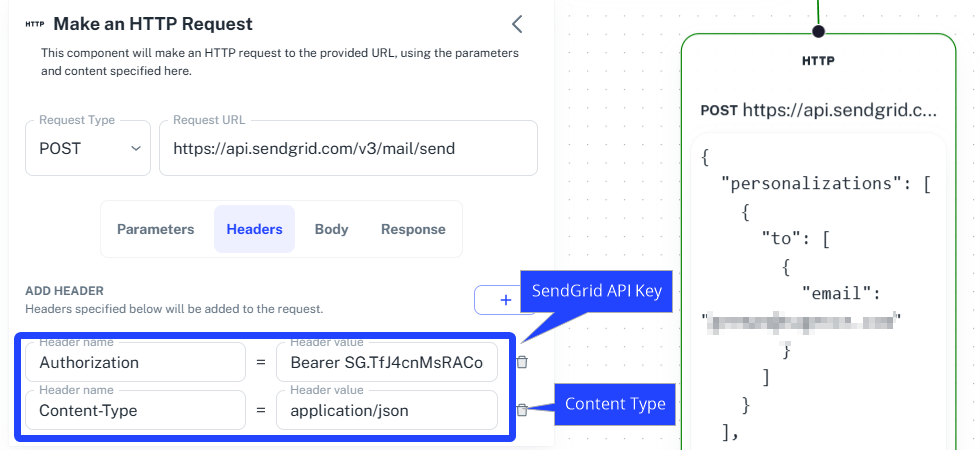
Select POST as request type and https://api.sendgrid.com/v3/mail/send as the Request URL.

Create two headers:
- Authorization = Bearer <<REPLACE SENDGRID API KEY>>
- Content-Type = application/json
Now for the body you can use this template code:
{
  "personalizations": [
    {
      "to": [
        {
          "email": "<<DESTINATION EMAIL>>"
        }
      ]
    }
  ],
  "from": {
    "email": "<<SOURCE EMAIL ENABLED IN SENDGRID>>"
  },
  "subject": "2Chat email verification code",
  "content": [
    {
      "type": "text/plain",
      "value": "Mesagge received from
{{wa.phoneNumber}}
:
{{message}}
"
    }
  ]
}
This will send a plain text message similar to this, because of this line "type": "text/plain",

You can send an HTML email to improve formatting:
{
  "personalizations": [
    {
      "to": [
        {
          "email": "<<DESTINATION EMAIL>>"
        }
      ]
    }
  ],
  "from": {
    "email": "<<SOURCE EMAIL ENABLED IN SENDGRID>>"
  },
  "subject": "2Chat email verification code",
  "content": [
    {
      "type": "text/html",
      "<b>Mesagge received from {{wa.phoneNumber}}:</b><br/> <br/>
      {{message}}"
    }
  ]
}
Here we changed these lines and we can now send email
  "type": "text/html",
  "<b>Mesagge received from {{wa.phoneNumber}}:</b><br/> <br/>
  {{message}}"

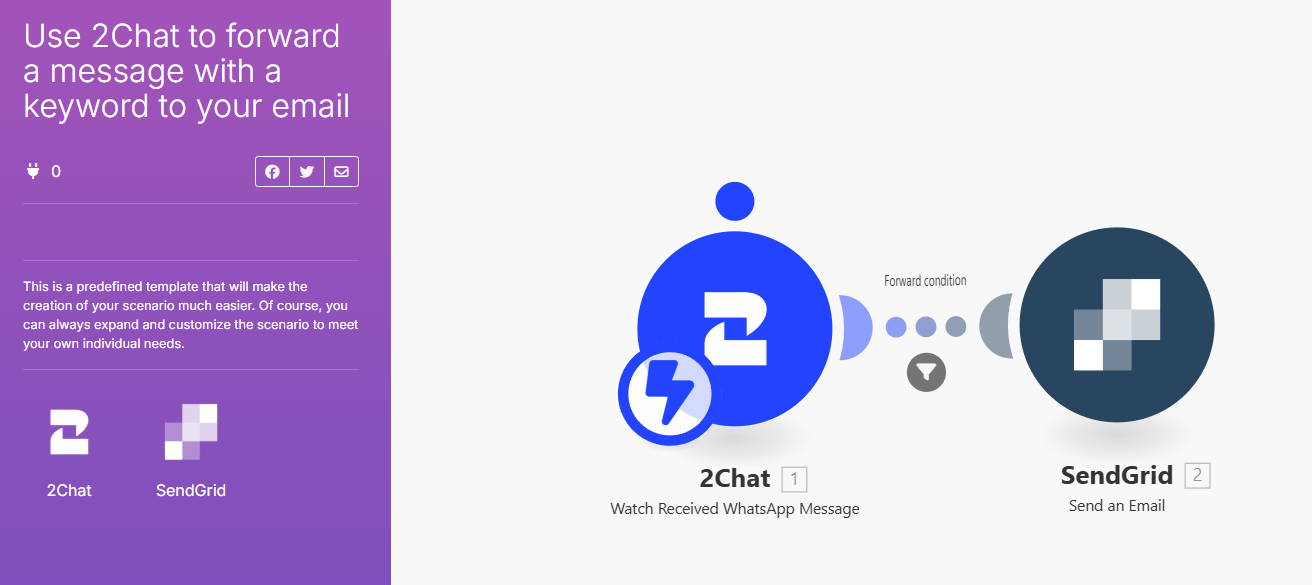
This method will allow you to integrate sending emails in any step of your flow but if you want to enable this same email forward case without any coding, you can us this Make template: