E-commerce Automation: Transfer WhatsApp Catalog to Shopify with Ease
Discover how to seamlessly export your WhatsApp catalog to Shopify using Make and 2Chat. This step-by-step guide helps you automate product transfers, saving time and ensuring accuracy. Ideal for small businesses, e-commerce managers, and drop shippers.
For any business, efficiency is key, which is why some e-commerce companies integrate WhatsApp into their sales and customer service channels. If you have WhatsApp Business, you can create a product or service catalog to share with your customers easily. However, if you want to boost your business with a Shopify store, manually transferring product data from one platform to another can be time-consuming and error-prone. Fortunately, with the help of automation tools like Make (formerly Integromat), you can seamlessly export your WhatsApp catalog to Shopify in just a few steps. Here's a step-by-step guide to help you get started using 2Chat API.
What You Will Need
- 2Chat account with the phone number where the catalog is enabled
- Make account
- Shopify Account
- 2Chat export WhatsApp Catalog to Shopify API Template
Before you carry out these steps, ensure that you are logged into your 2Chat, Make, and Shopify accounts.
Learn how to export WhatsApp Catalog to Shopify
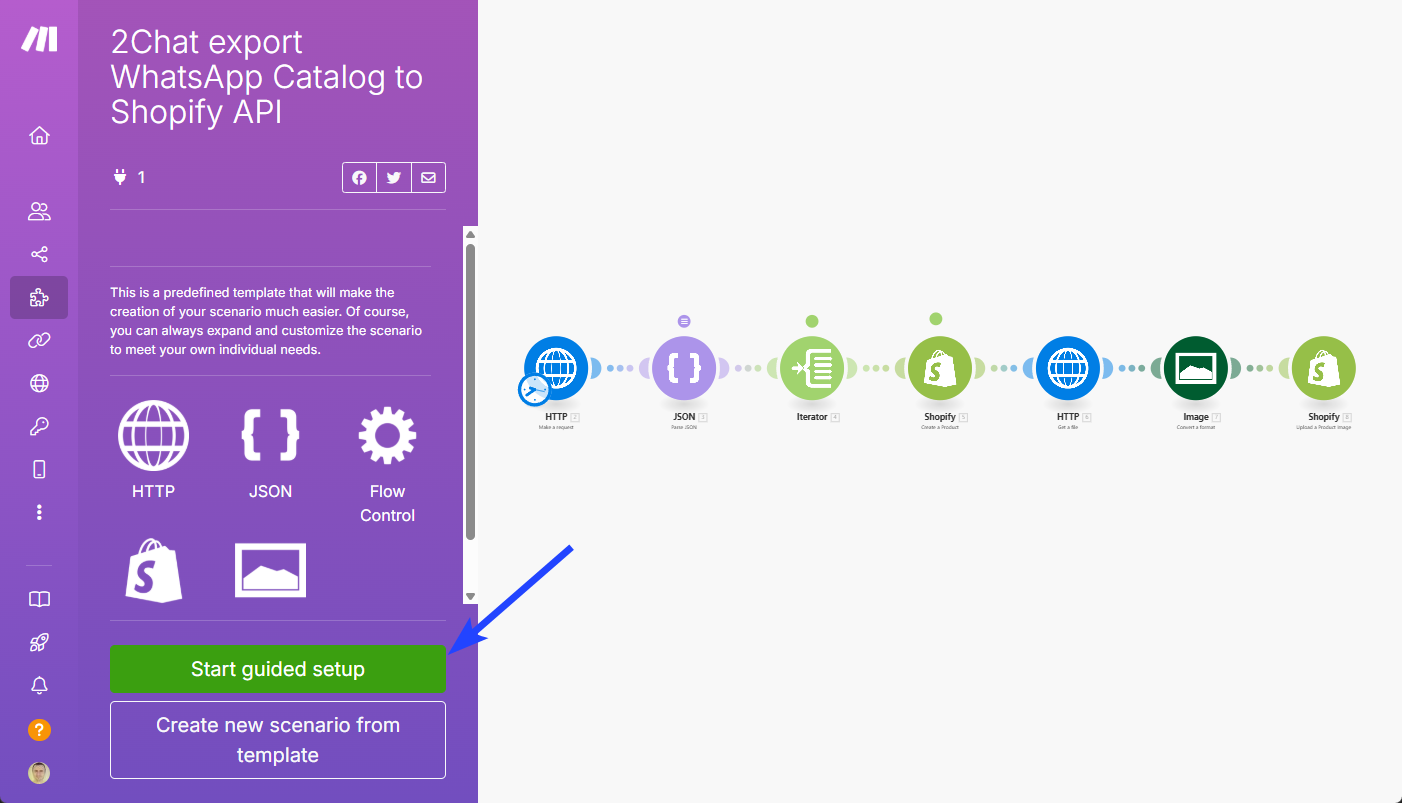
Step 1: Start the Guided Setup
Begin by using the Make template designed to export your WhatsApp catalog to Shopify. Click on "Start guided setup" to initiate the process.
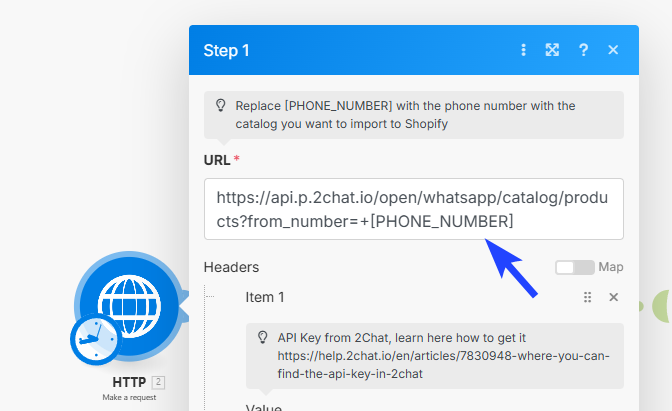
Step 2: Add Your Phone Number
Enter the phone number associated with your WhatsApp catalog. This number should be the one where your catalog is created and managed, and it must be enabled as a channel inside 2Chat.
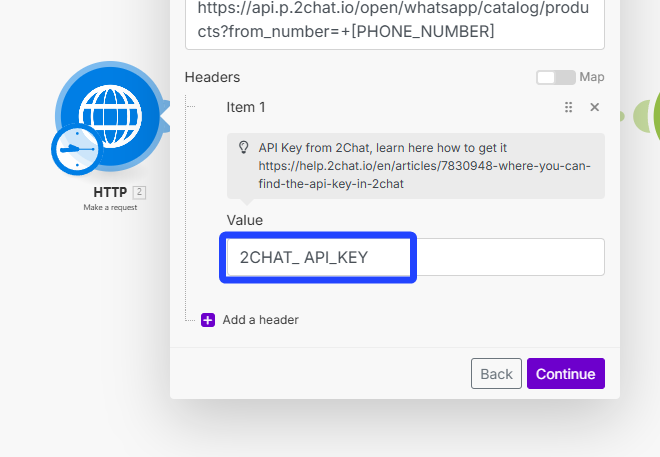
Step 3: Enter the 2Chat API Key
Next, you'll need to add your 2Chat API key. You can find this key in the 2Chat dashboard. This key is essential for authenticating your requests to the 2Chat API.

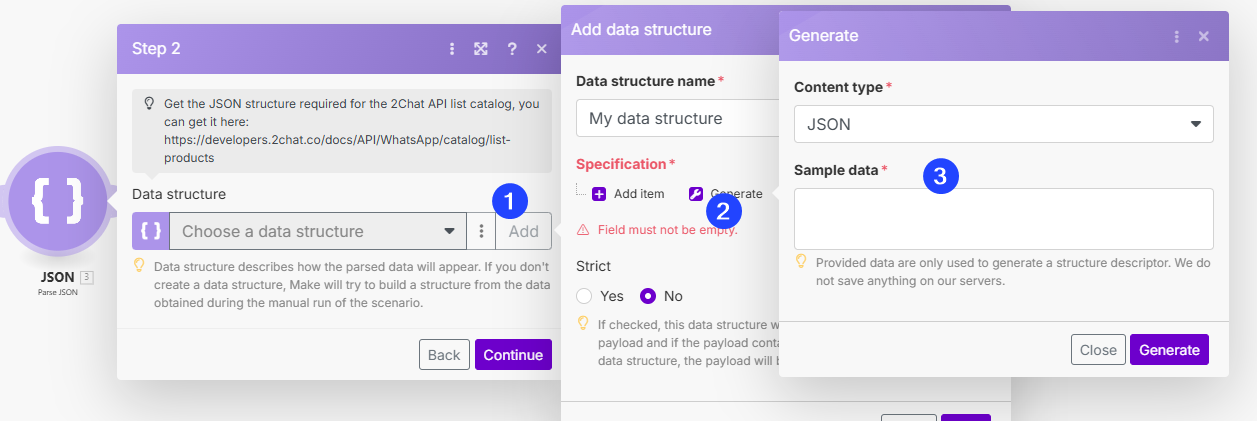
Step 4: Define the JSON Structure
In this step, you'll add the JSON structure that the 2Chat API will return. Visit the URL provided in the help text to get the JSON from the 2Chat developer site. Copy the entire response sample text.

- Create a New Structure: Enter a name for the structure to differentiate it.
- Generate the Structure: Paste the sample response you copied and click on "Generate." Make will create the necessary structure to process the following steps.
Step 5: Create a Shopify Connection
To connect your Shopify account, it's easier if you're already logged into Shopify in another window. Enter the starting characters of your Shopify subdomain and click on "Save." Allow Make to be installed in your Shopify account by clicking "Continue."
Step 6: Select the Shopify Connection
For the final step, select the Shopify connection you created earlier. This will link your WhatsApp catalog to your Shopify store.
Step 7: Execute the Scenario
Click on the "Run once" button to execute the scenario. The first step will use 2Chat to retrieve all the catalog items from the phone number you added. Make will loop through all the products and add them to your Shopify account, including product images.
Step 8: Verify and edit (if needed)
You can monitor the process in your Shopify account as each product is added. If you need any specific configurations, you can edit the Make scenario accordingly.
Conclusion
With these simple steps, you can effortlessly import your entire WhatsApp catalog to your Shopify account, avoiding the hassle of manual data entry. This automation not only saves time but also ensures accuracy, allowing you to focus on growing your business.
Ready to try 2Chat? Create your trial account Now