Connecting ChatGPT to your WhatsApp in 8 simple steps
The #noCode way of having a ChatGPT assistant right inside your WhatsApp

Imagine having your very own assistant right in your WhatsApp that you can contact at any time with questions, ask it to translate stuff for you, or simply have someone to talk to?
Well, that's exactly what we managed to do with 2Chat, Zapier, and ChatGPT, and after testing it for several weeks, I can honestly say it can be incredibly useful for quick stuff that you don't want to forget or can afford to get an answer to in a few minutes.
TLDR; check out a ready-to-use template here.
WhatsApp as a ChatGPT interface
ChatGPT proved to be quite versatile when it came to providing value using a text-based interface. The native application OpenAI provides is a good example of this, but the main issue in my opinion is that it requires opening a browser tab, navigating to the app, and having to do everything inside to use it.
This may be fine for most hobbyists wanting to try the power of ChatGPT, but when it comes to using it more regularly, it can add unnecessary friction to the entire experience.
This is exactly the reason we decided to use WhatsApp instead. It's likely the most used app you have on your phone, it's text-based, and it feels natural to use it to chat.
Now let's get to work and create our assistant!
Create a 2Chat account
The first step is to create a 2Chat account and connect your WhatsApp number to it using a QR-code connection. You can create an account here.
Create an OpenAI account
You will also need a ChatGPT account which you can create at openai.com. You can do that here.
Create a Zapier account
Zapier is the glue between 2Chat and ChatGPT. They will connect to both ends and establish a bidirectional communication that will allow our assistant to exist inside our own WhatsApp. You can create an account with them here.
Build your own assistant
Now that you have all 3 accounts created, we need to create the Zaps that will give life to our assistant.
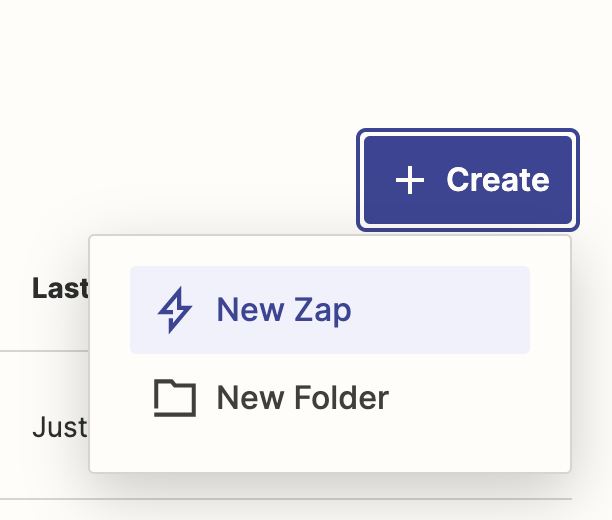
- Go to your list of zaps, and create a new one.
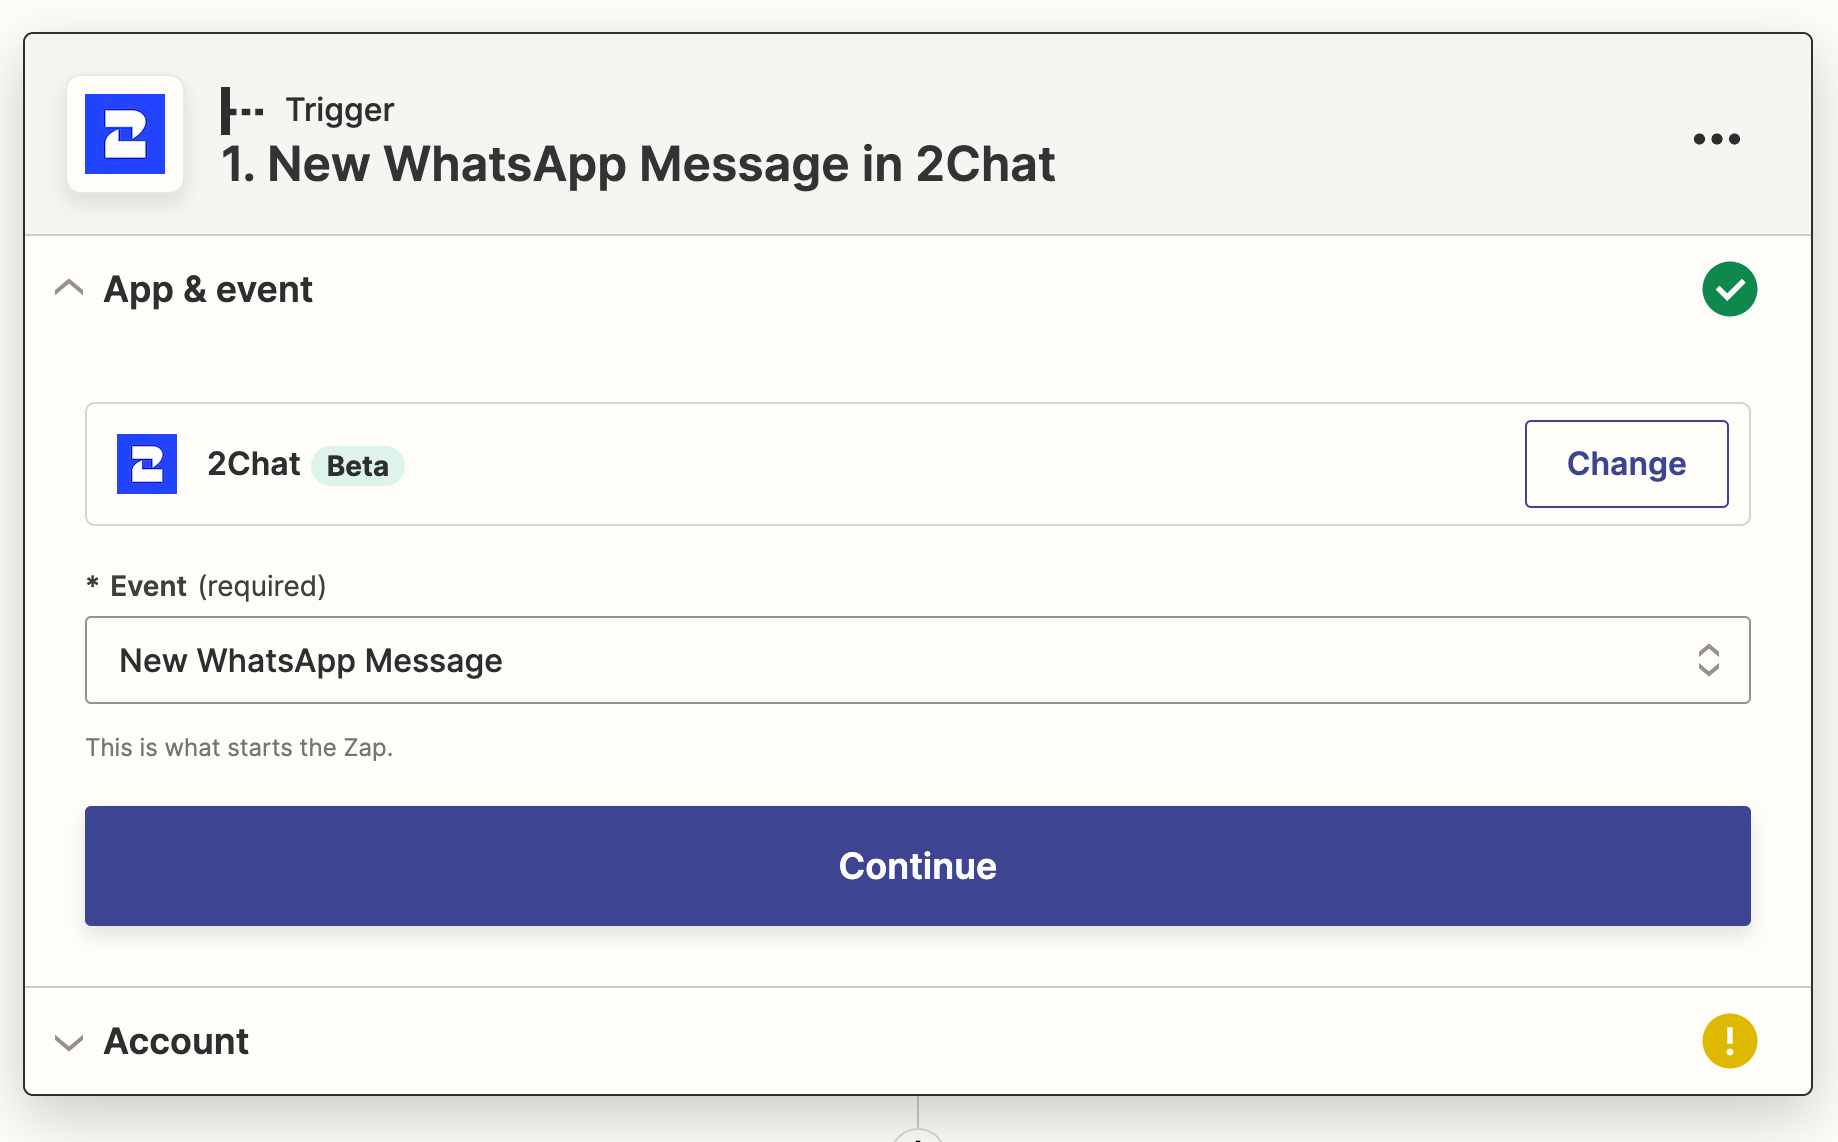
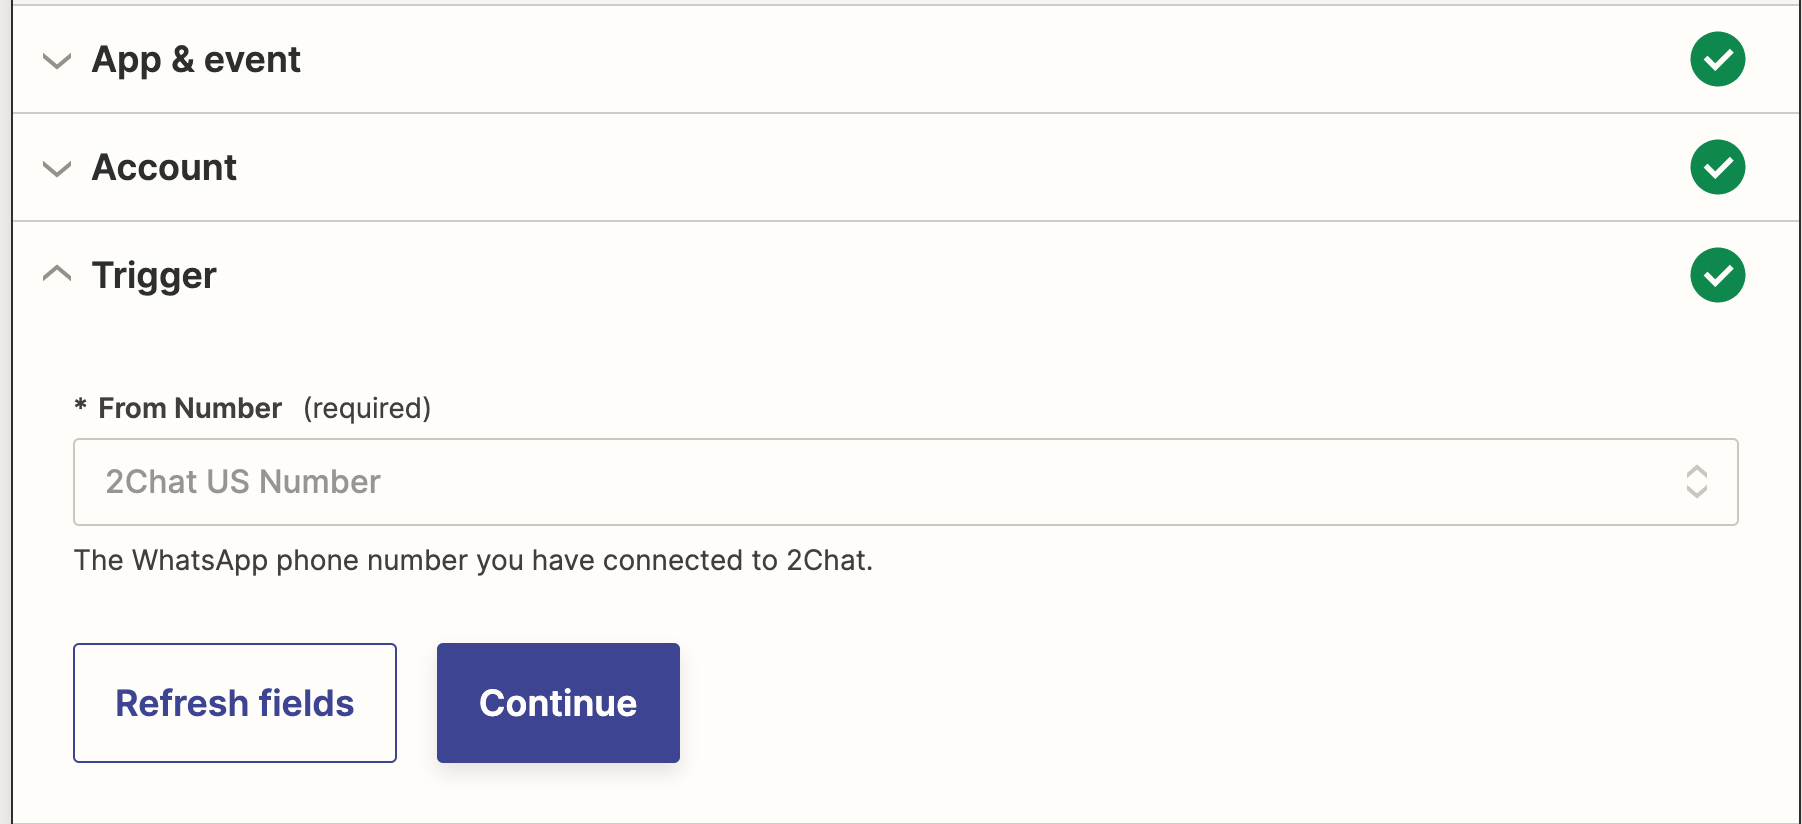
2. As the first action, select 2Chat and the WhatsApp Message Received event. You will also need to select your connected WhatsApp number here.
If you don't know what exactly is being asked here, you can visit our Help Center where we have articles that may come in handy for this first step.
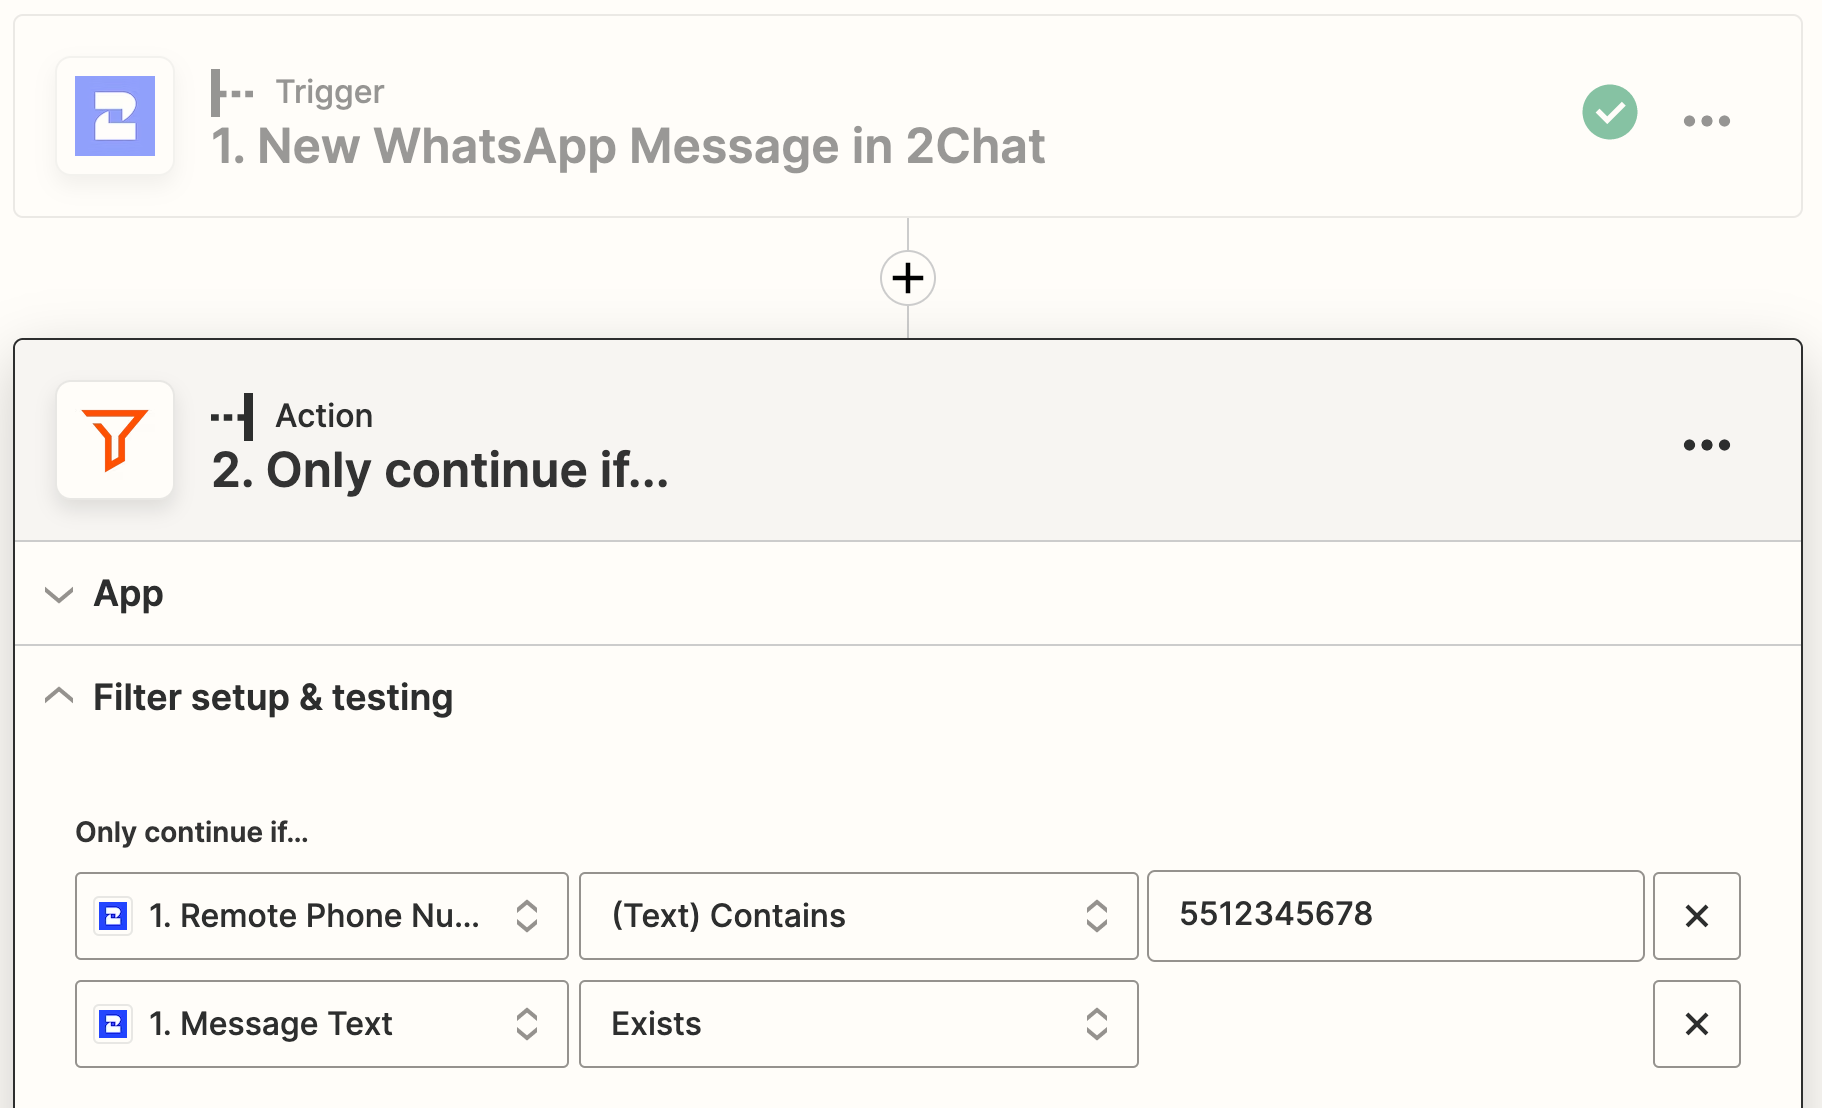
3. Now we need to filter the messages in order to trigger ChatGPT only when we want it to. To do this, find the Filter action and configure it accordingly to the image below:
- Say the number you connected to 2Chat is
+1 713 715 7533. This is the number that you will need to text to get ChatGPT to act as your assistant. - Say your personal number is
+52 55 1234 5678. This is the number that you will use to chat with+1 713 715 7533which in turn is where your assistant will live. - What we want is for all messages coming from
+52 55 1234 5678(ours), to be sent to ChatGPT (+1 713 715 7533) as prompt. - Likewise, for everything coming from ChatGPT, we want to use
+1 713 715 7533to send it back to+52 55 1234 5678 - Finally, we only want to trigger ChatGPT when we have a text message. Images and stickers should be ignored. This is the filter
Message Textyou see in the screenshot below.
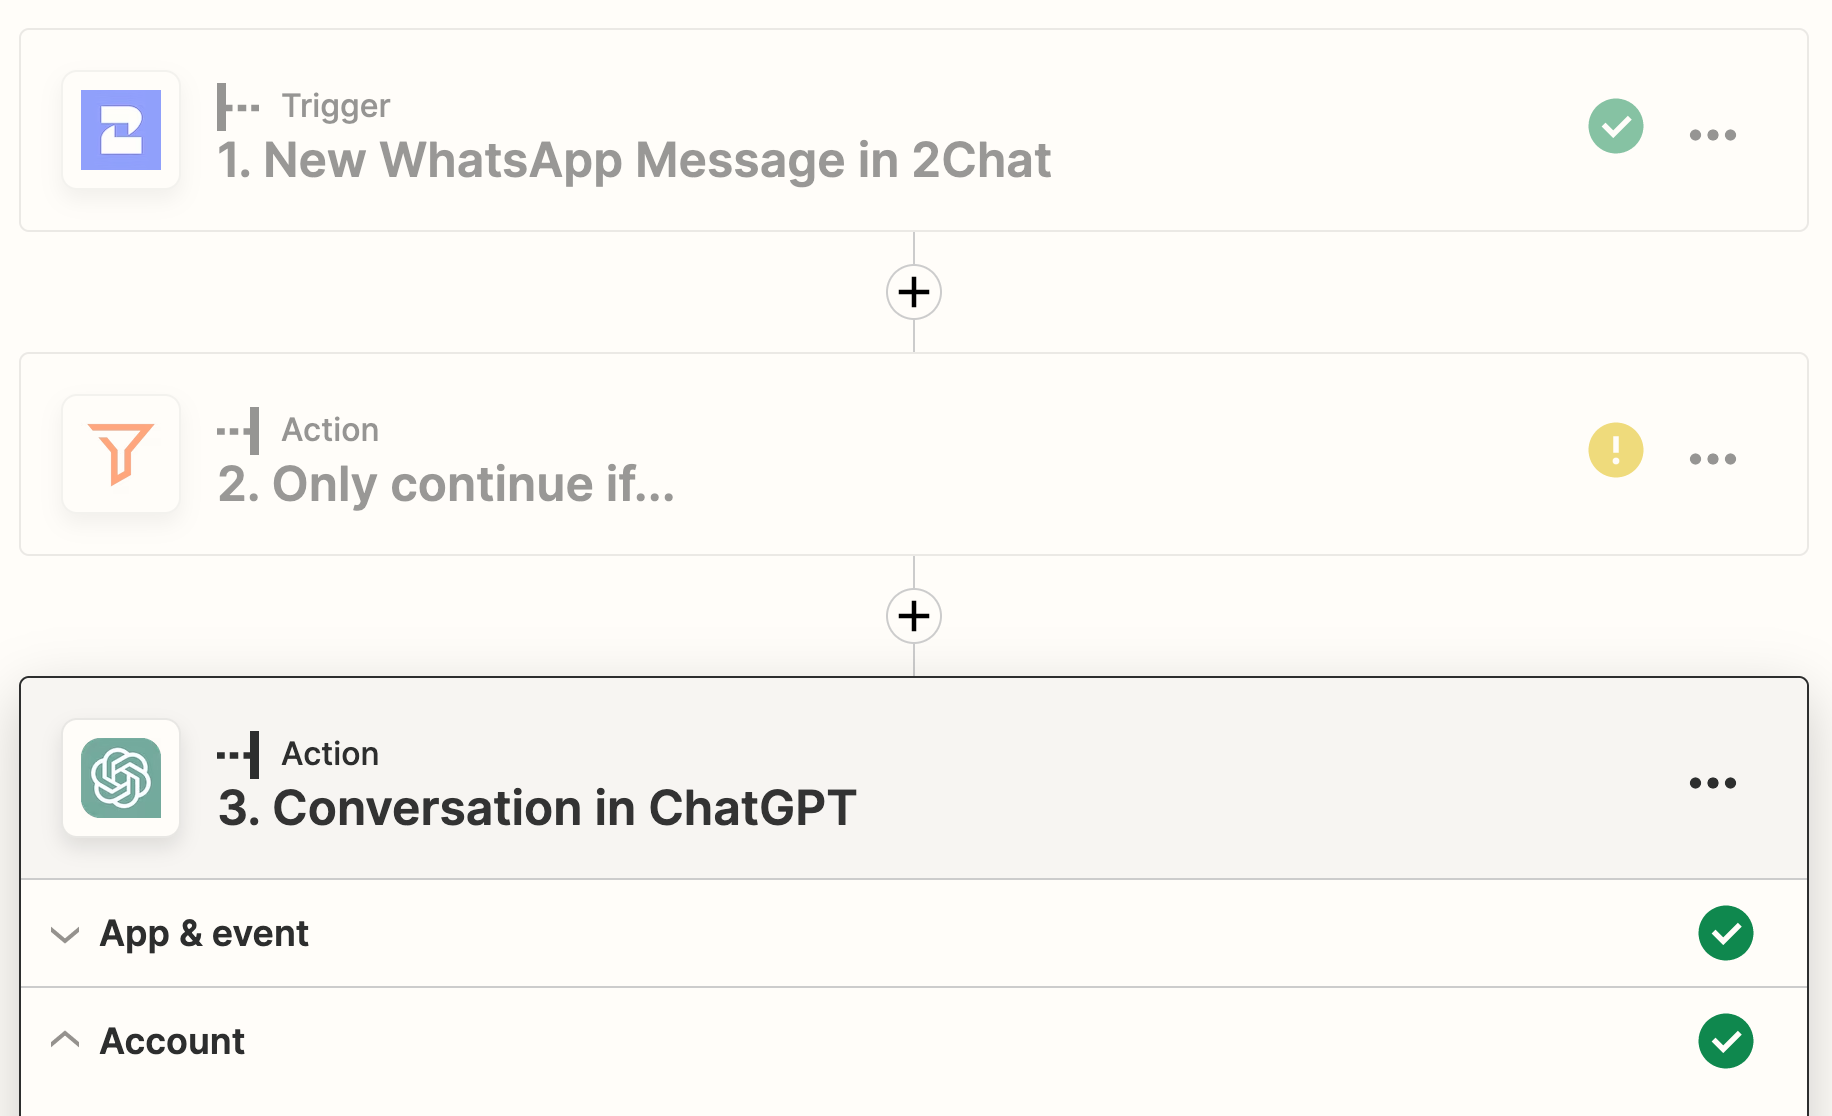
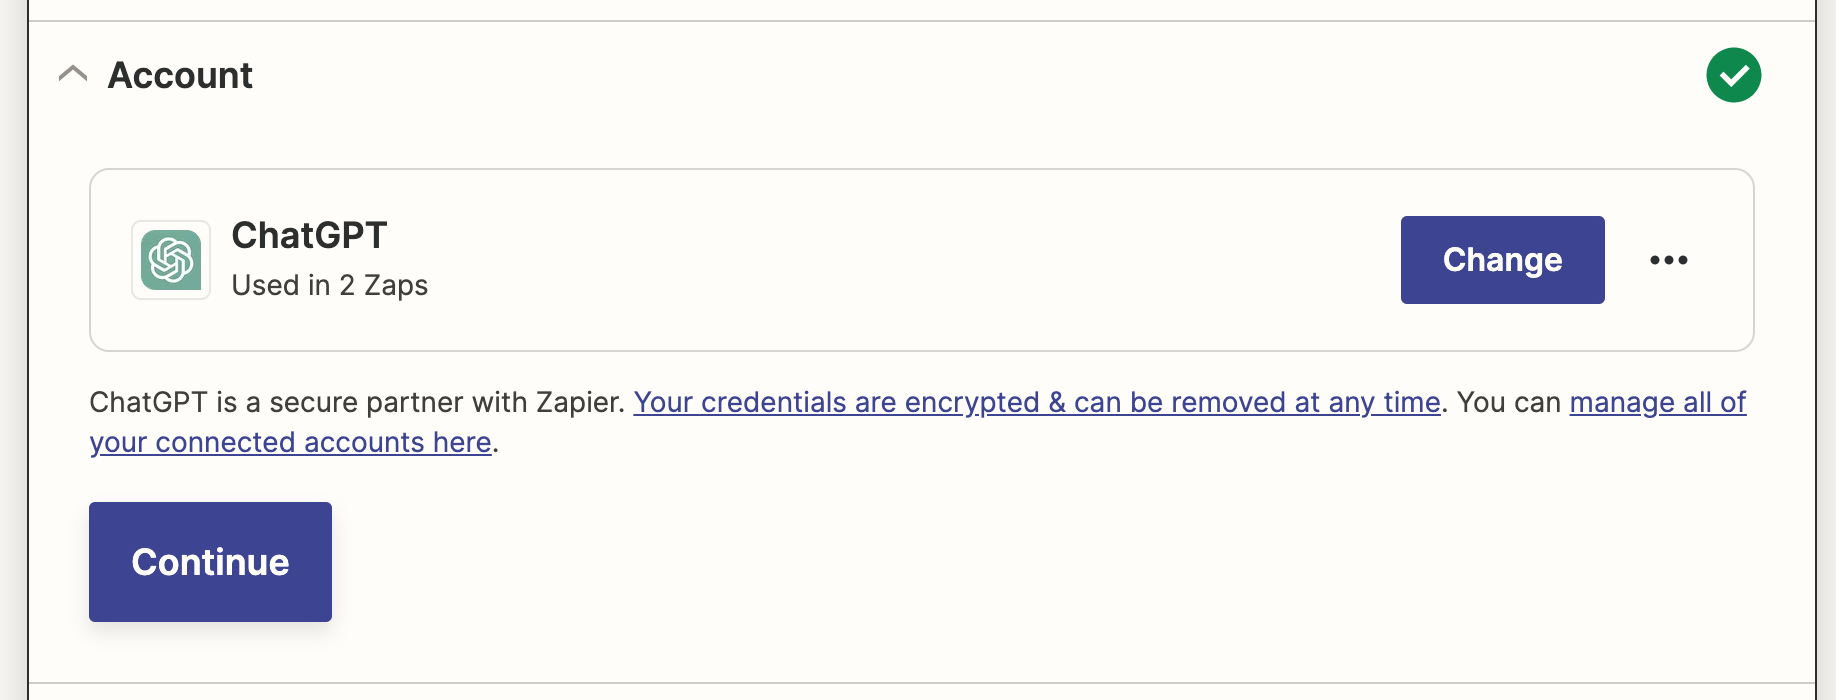
4. Now we need to connect to ChatGPT. To do that, we find and select ChatGPT as the next action.
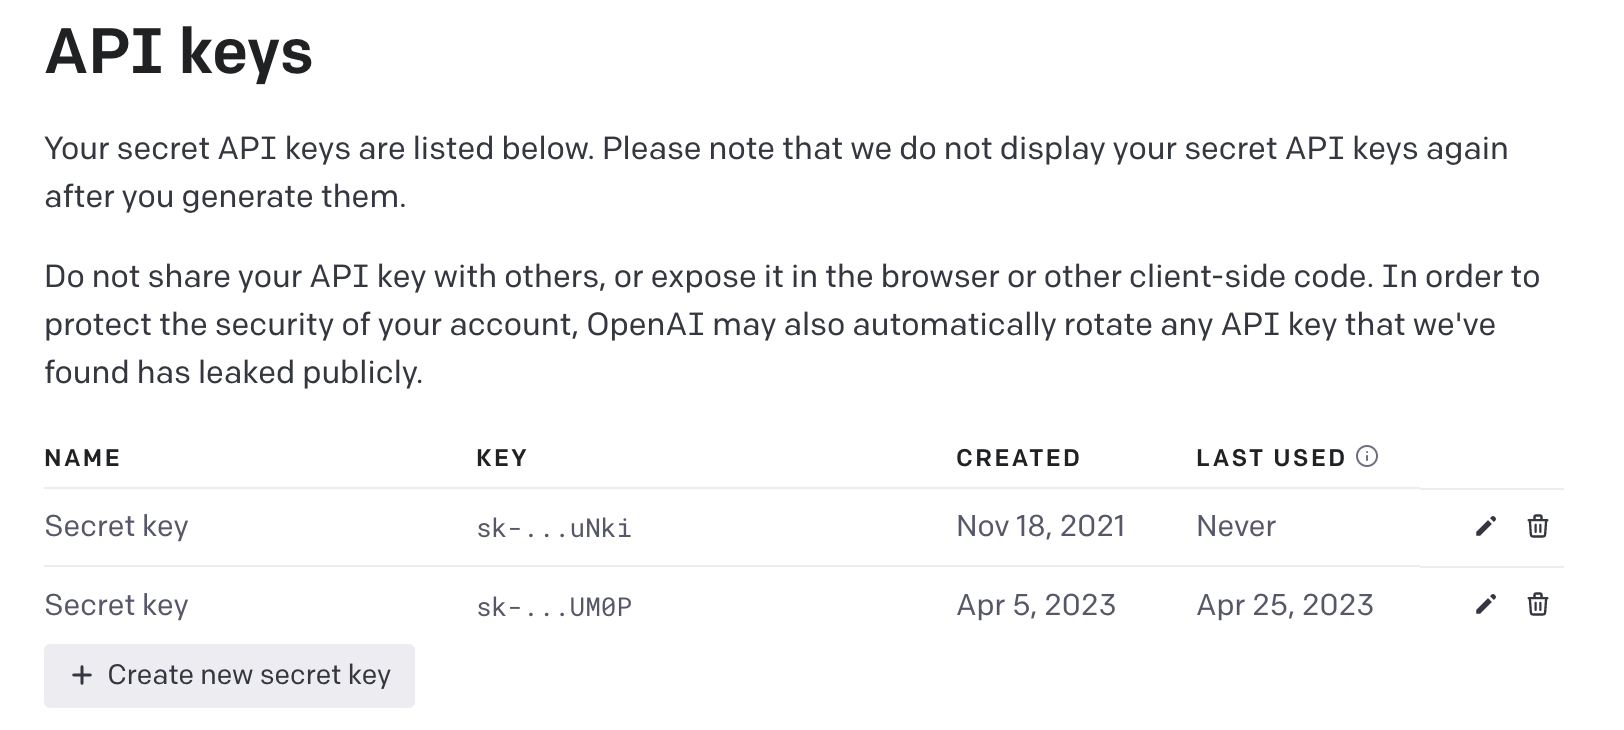
4. Follow the steps indicated by Zapier to get your OpenAI API key. You can generate a new key here.
5. Now we need to give ChatGPT the prompt that it will use to respond to our messages. For that, we can use the text content we send to it, along with a few other tweaks to make it more enticing.
- User Message: this should be the
Message Textfield that 2Chat populates. - Model: GPT 3.5 turbo, or potentially GPT4 if you can choose it as an option.
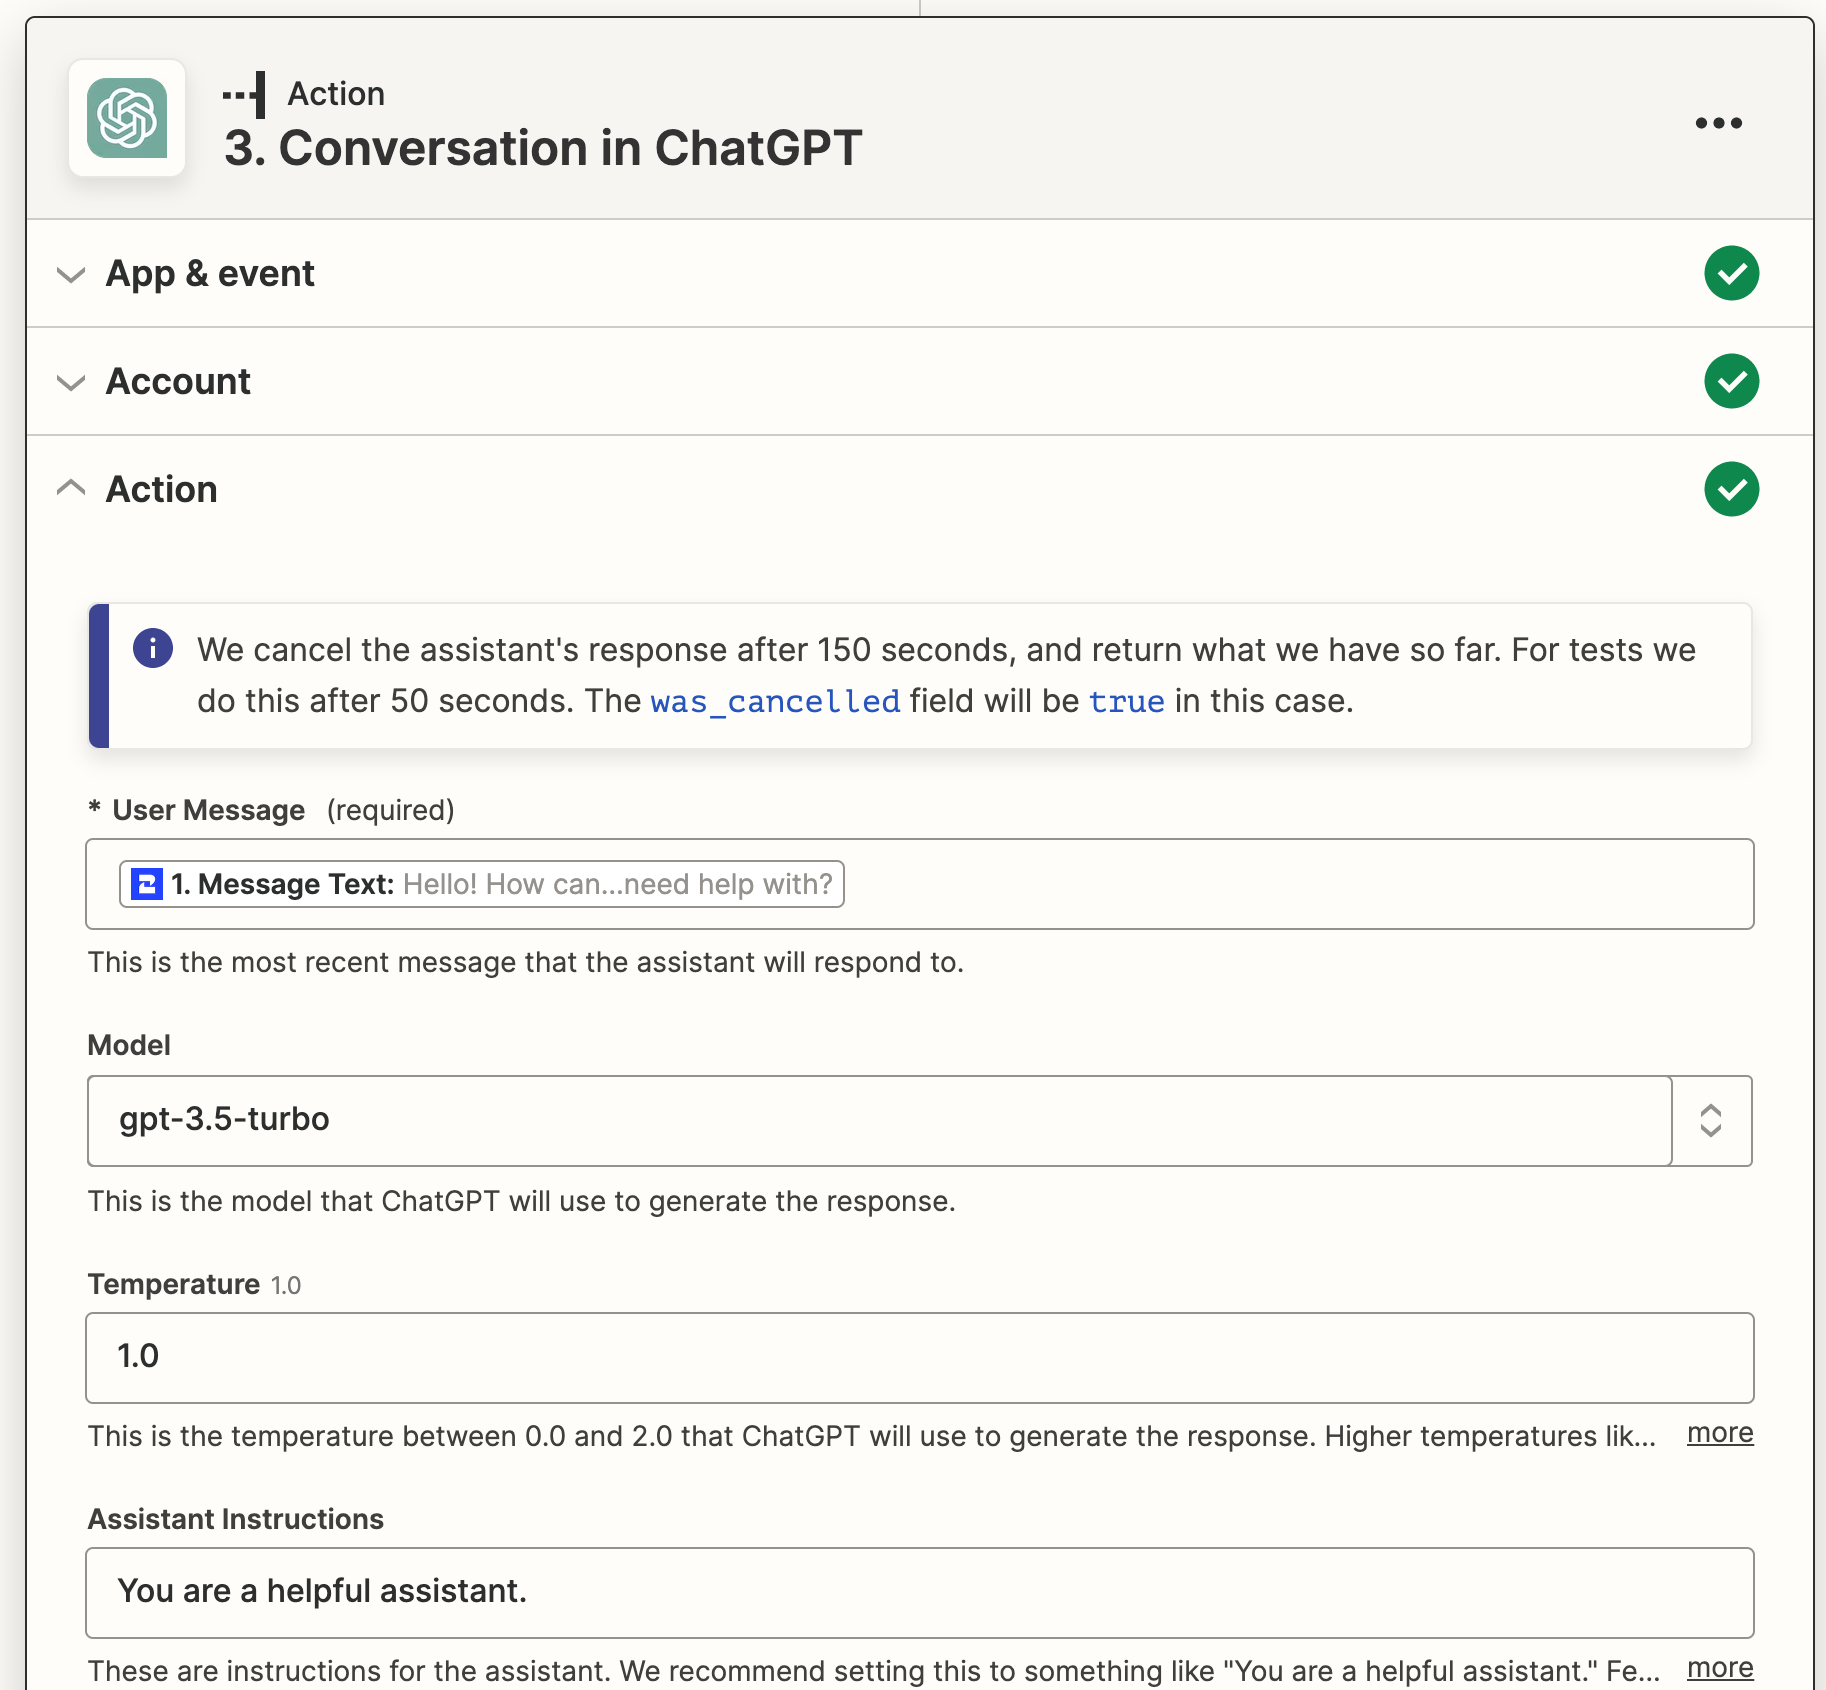
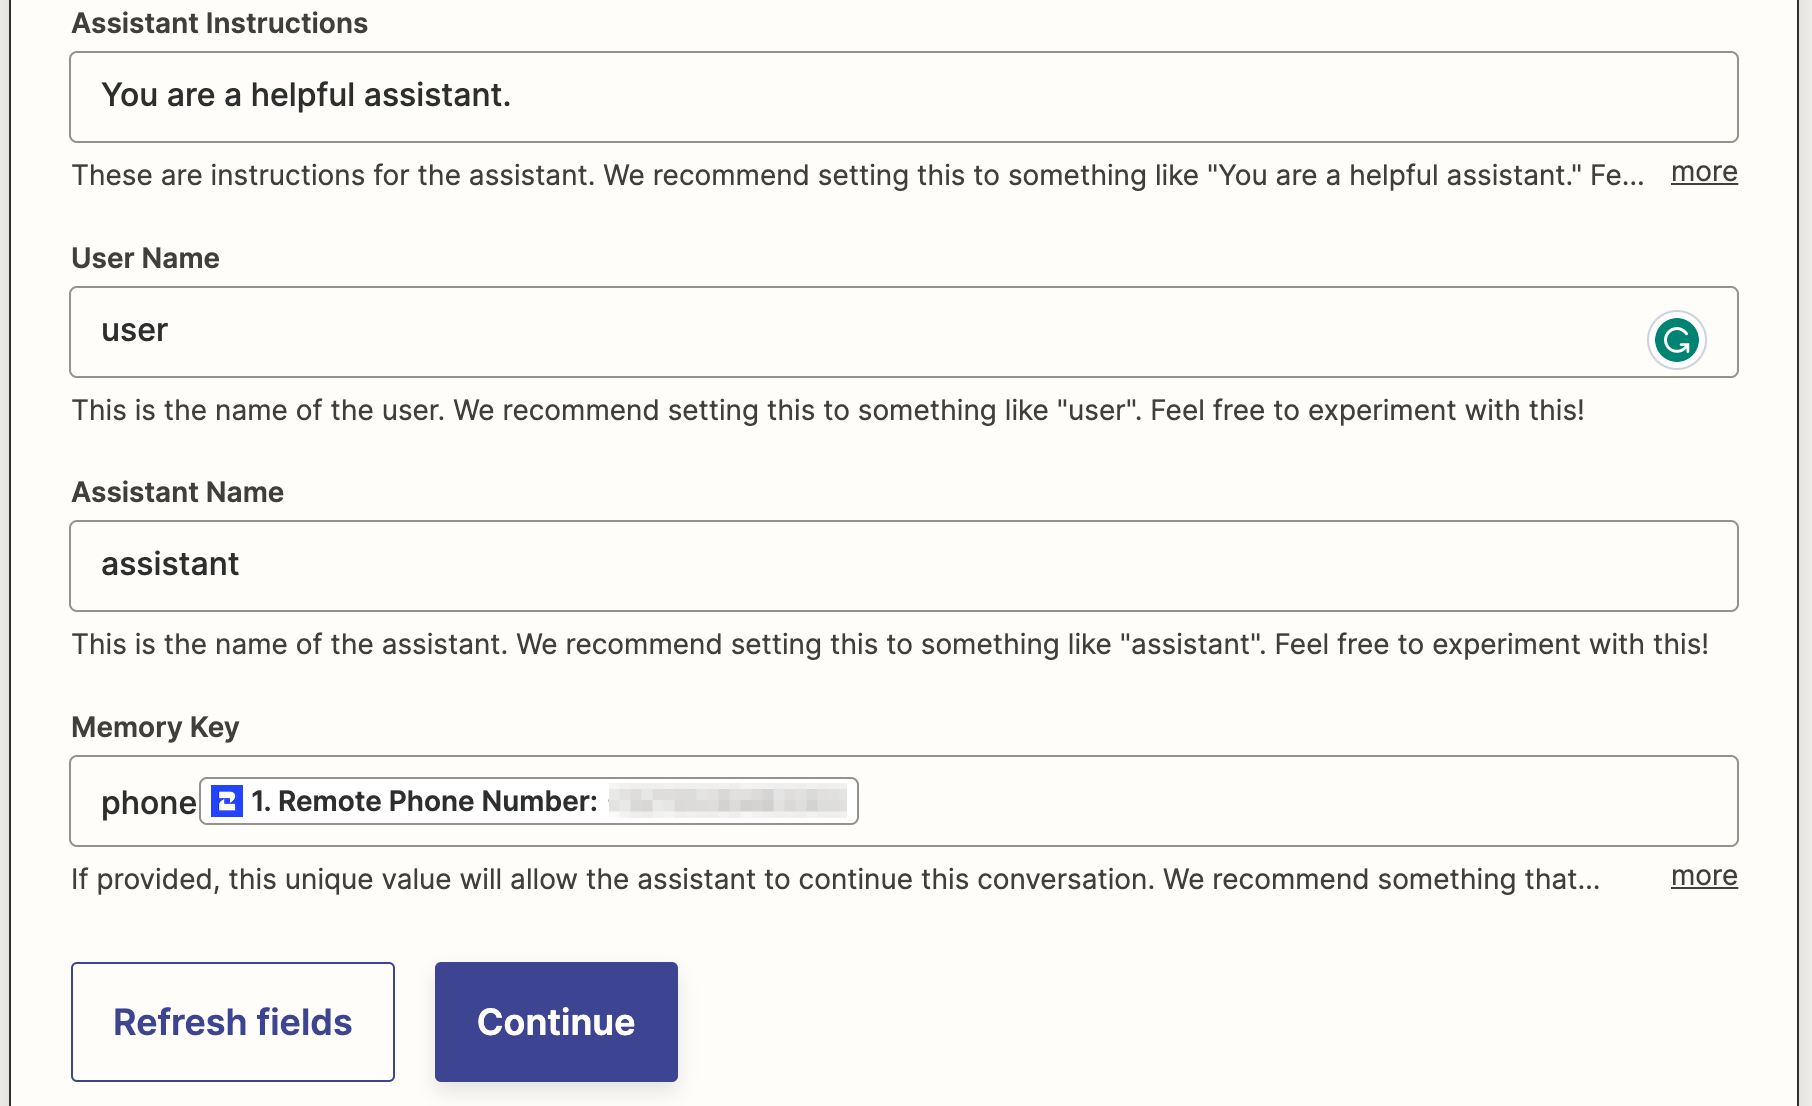
- Memory Key: it should be something that won't repeat across conversations with multiple people. The phone number of the user texting ChatGPT is a great choice for this part. It will repeat for the same person, but will never for different people.
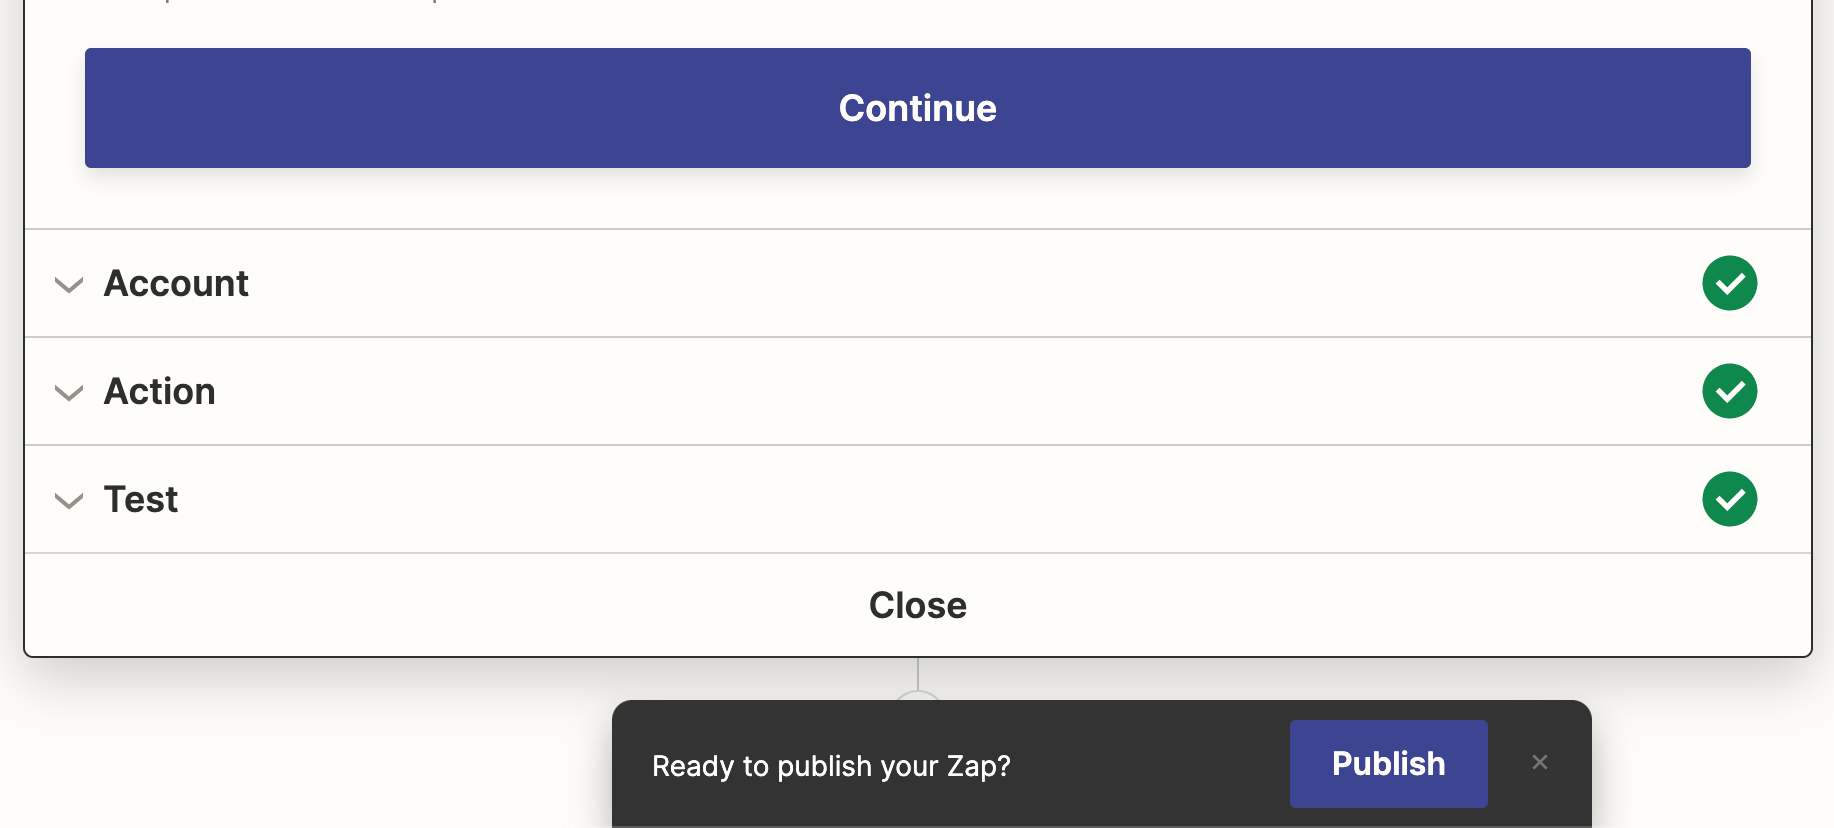
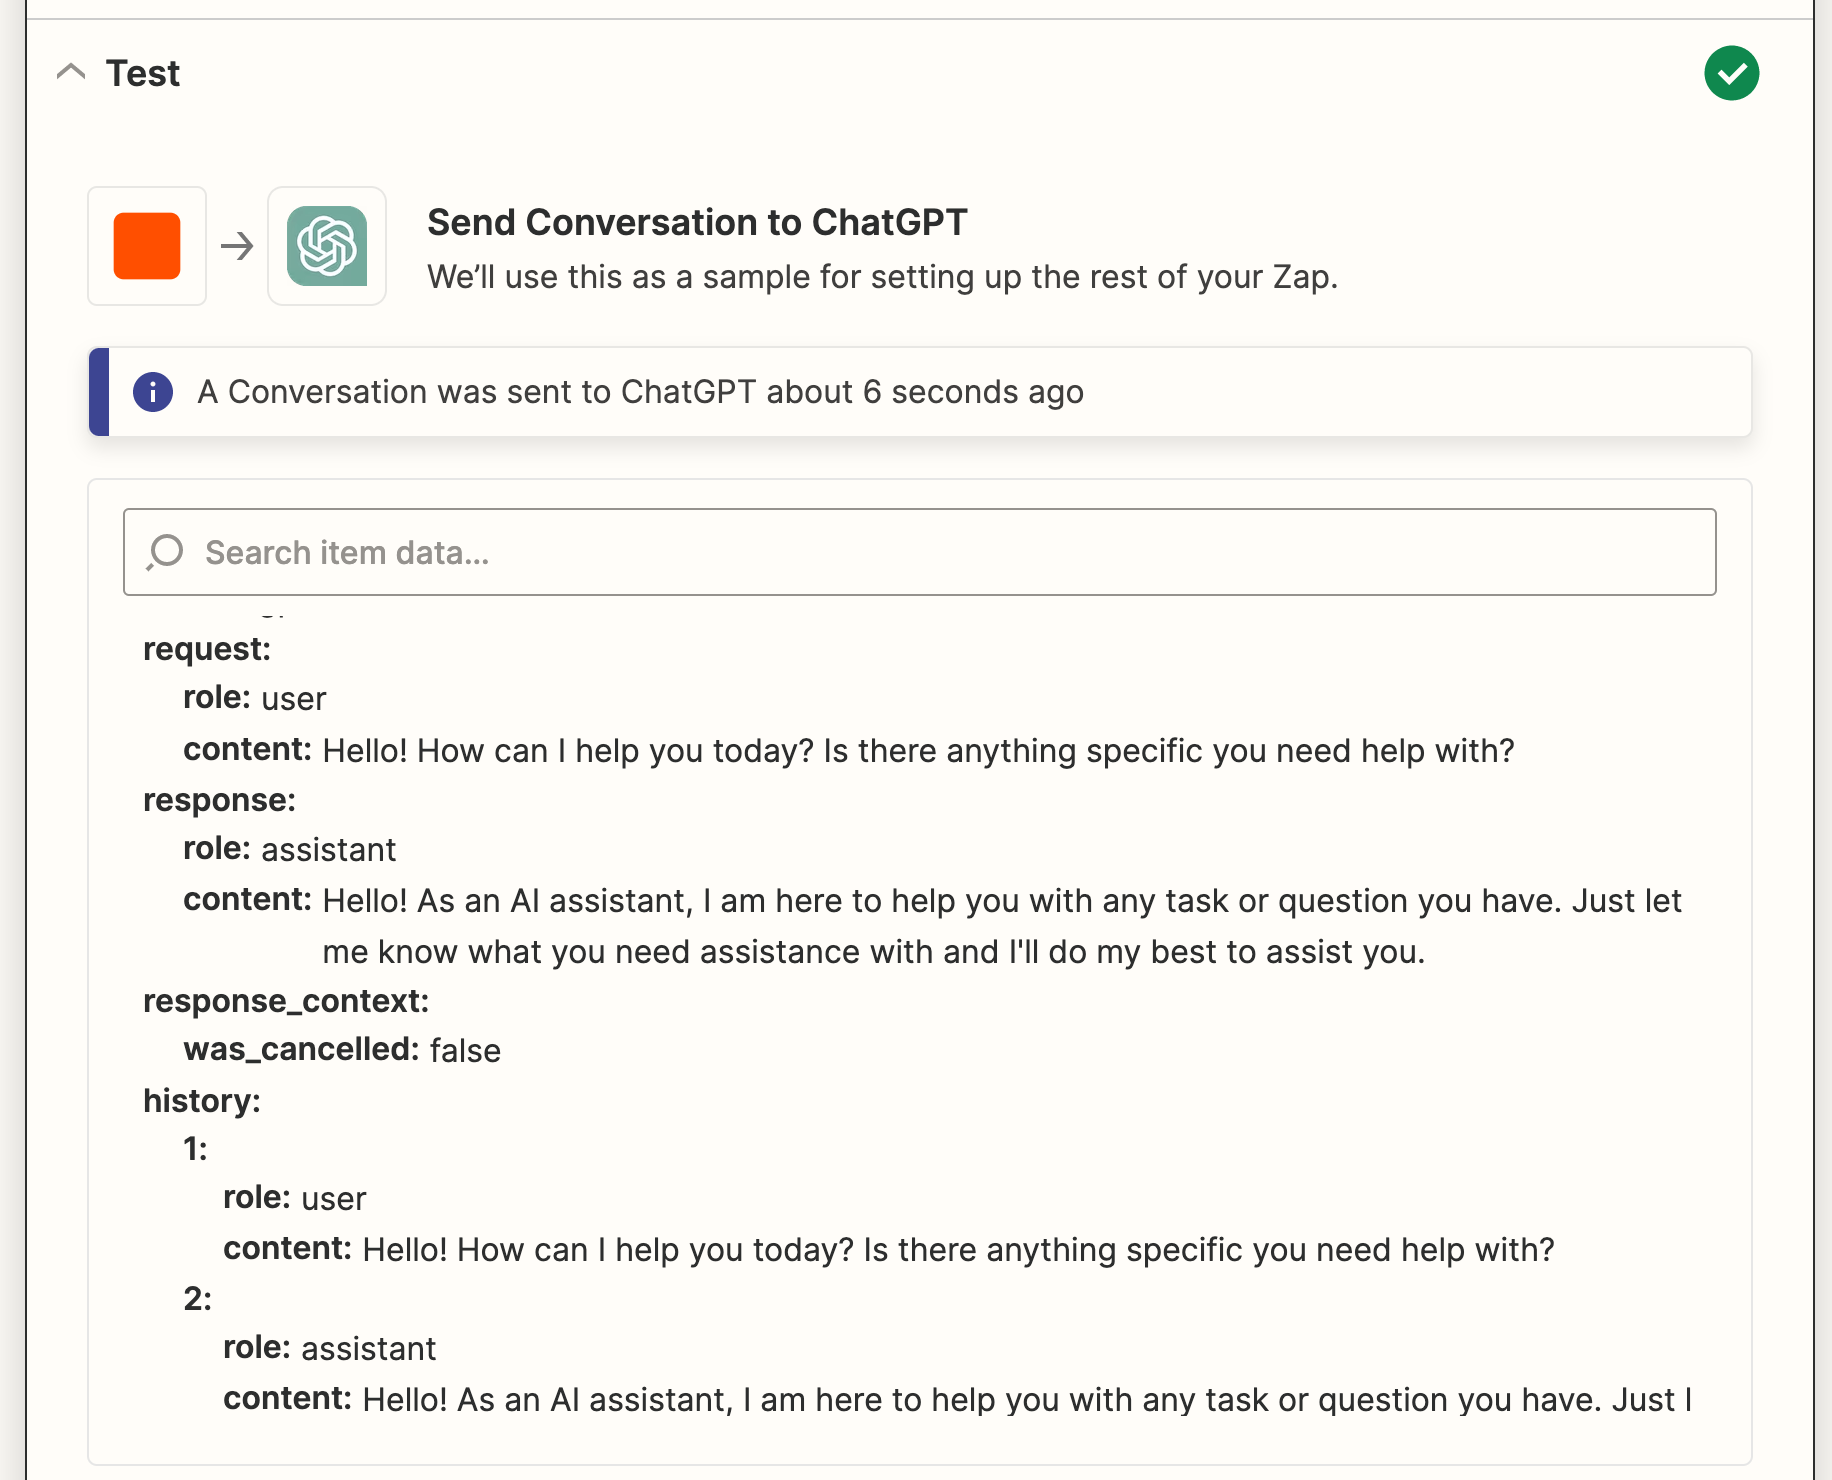
6. Test the connection and if everything went well, you should see something like this:
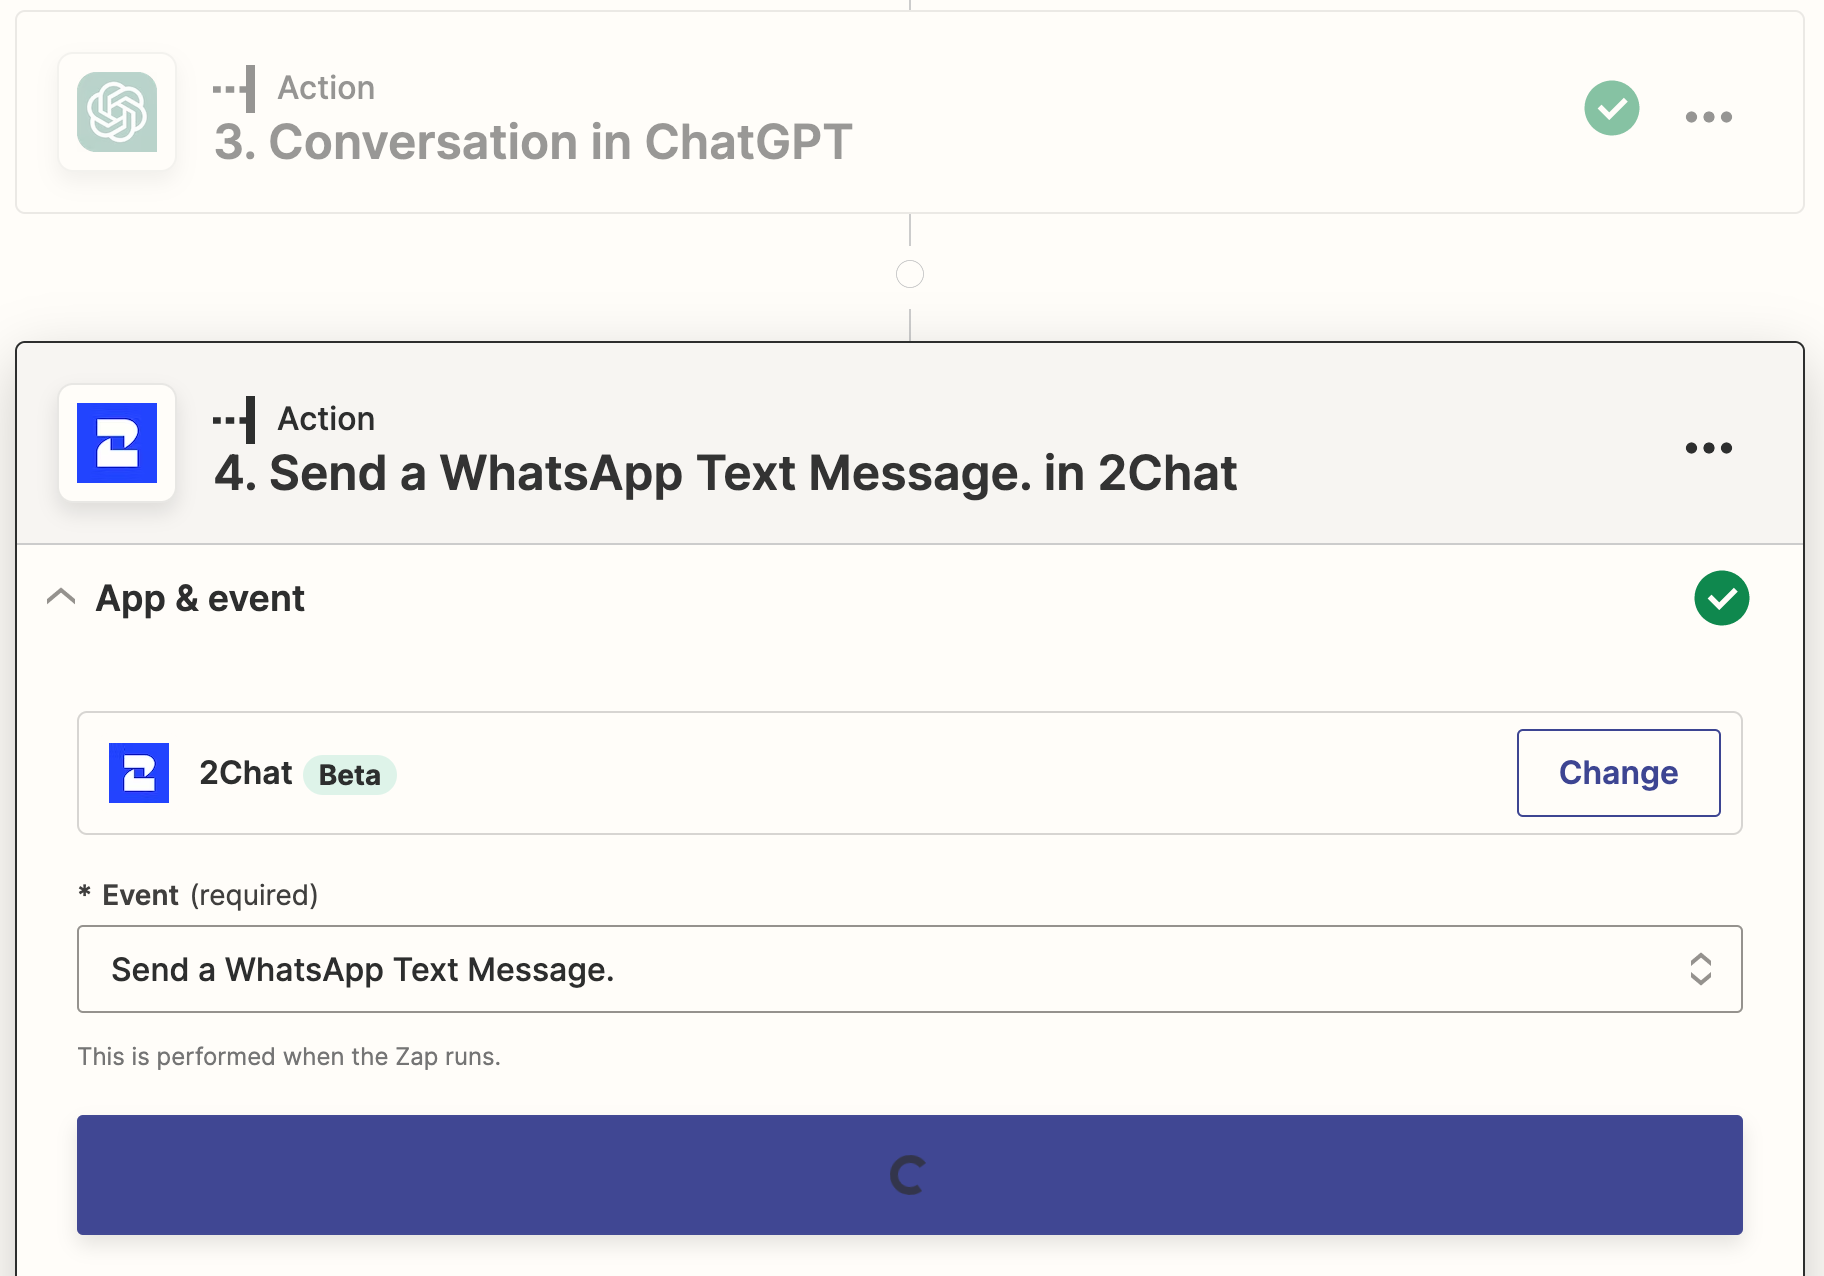
7. Our assistant can now reply to our messages which is excellent, but we need to send that reply back to WhatsApp. To do that, create a new action step and choose 2Chat again to Send a WhatsApp Text Message.
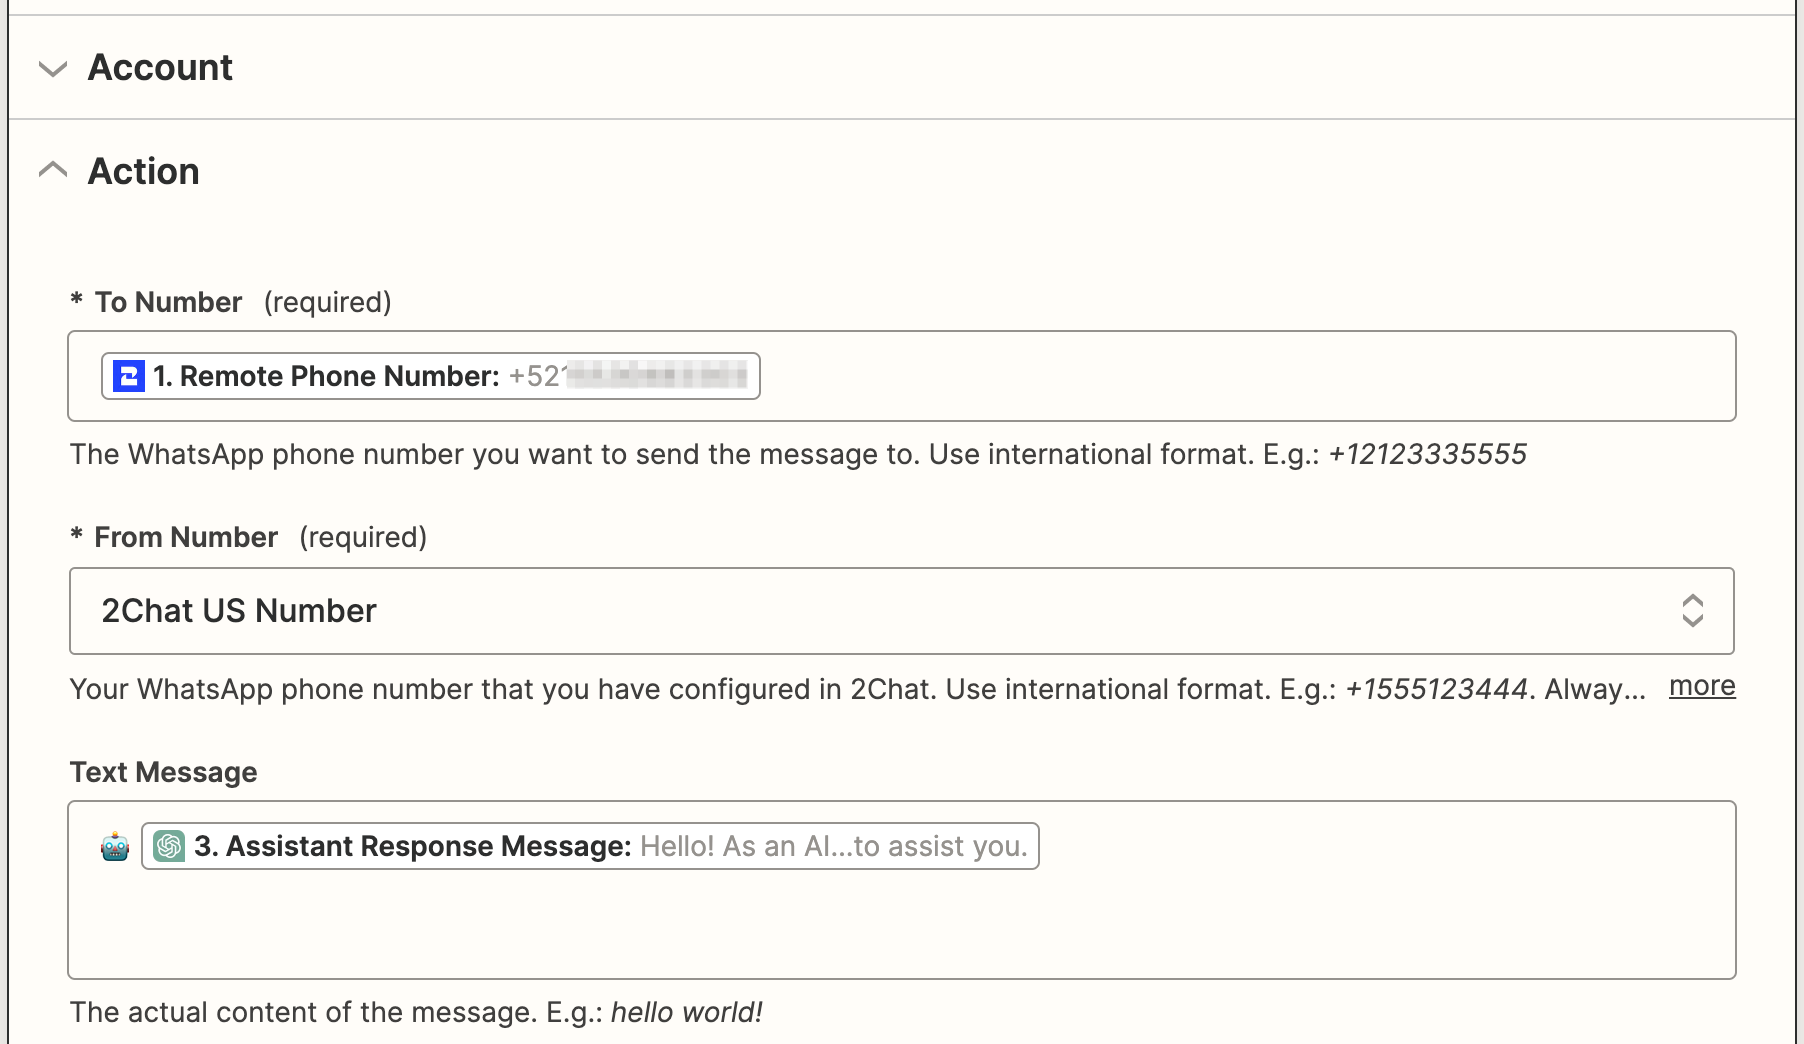
8. Finally, the generated ChatGPT response should be the message we send back to our number.
- To Number: choose the phone number of the user sending the message, which will be
+52 55 1234 5678in our example. - From Number: your WhatsApp number that is connected to 2Chat.
+1 713 715 7533in our example. - Text Message: the output generated by ChatGPT. We also put a robot emoji in front to clearly state the response is generated by an AI.
With the final test Zapier will prompt you to perform, you should now be able to publish your new Zap and have your own personal ChatGPT assistant right inside your WhatsApp!